

With GenPage’s Zapier integration, you can connect your campaigns to over 8,000 apps. That means you can:
Import leads automatically from your CRM, list building tools, spreadsheets, and more
Trigger GenPage page generation whenever a new lead is created in your stack
Send enriched data back to your CRM or outreach tool with GenPage links included
For this example, we'll connect a Google Spreadsheet to GenPage using Zapier to fetch leads and return a personalized landing page URL - you can use a similar setup to connect GenPage to HubSpot, Airtable, or any tool of your choice.
Step 1: Select your Spreadsheet
Select or create an appropriate spreadsheet for your Zapier / GenPage workflow. This can be any list of leads that contains either an email or LinkedIn profile URL column, with additional columns for each variable you'd like to sync with GenPage. You can also get started by using the template below:
GenPage x Zapier Demo Spreadsheet
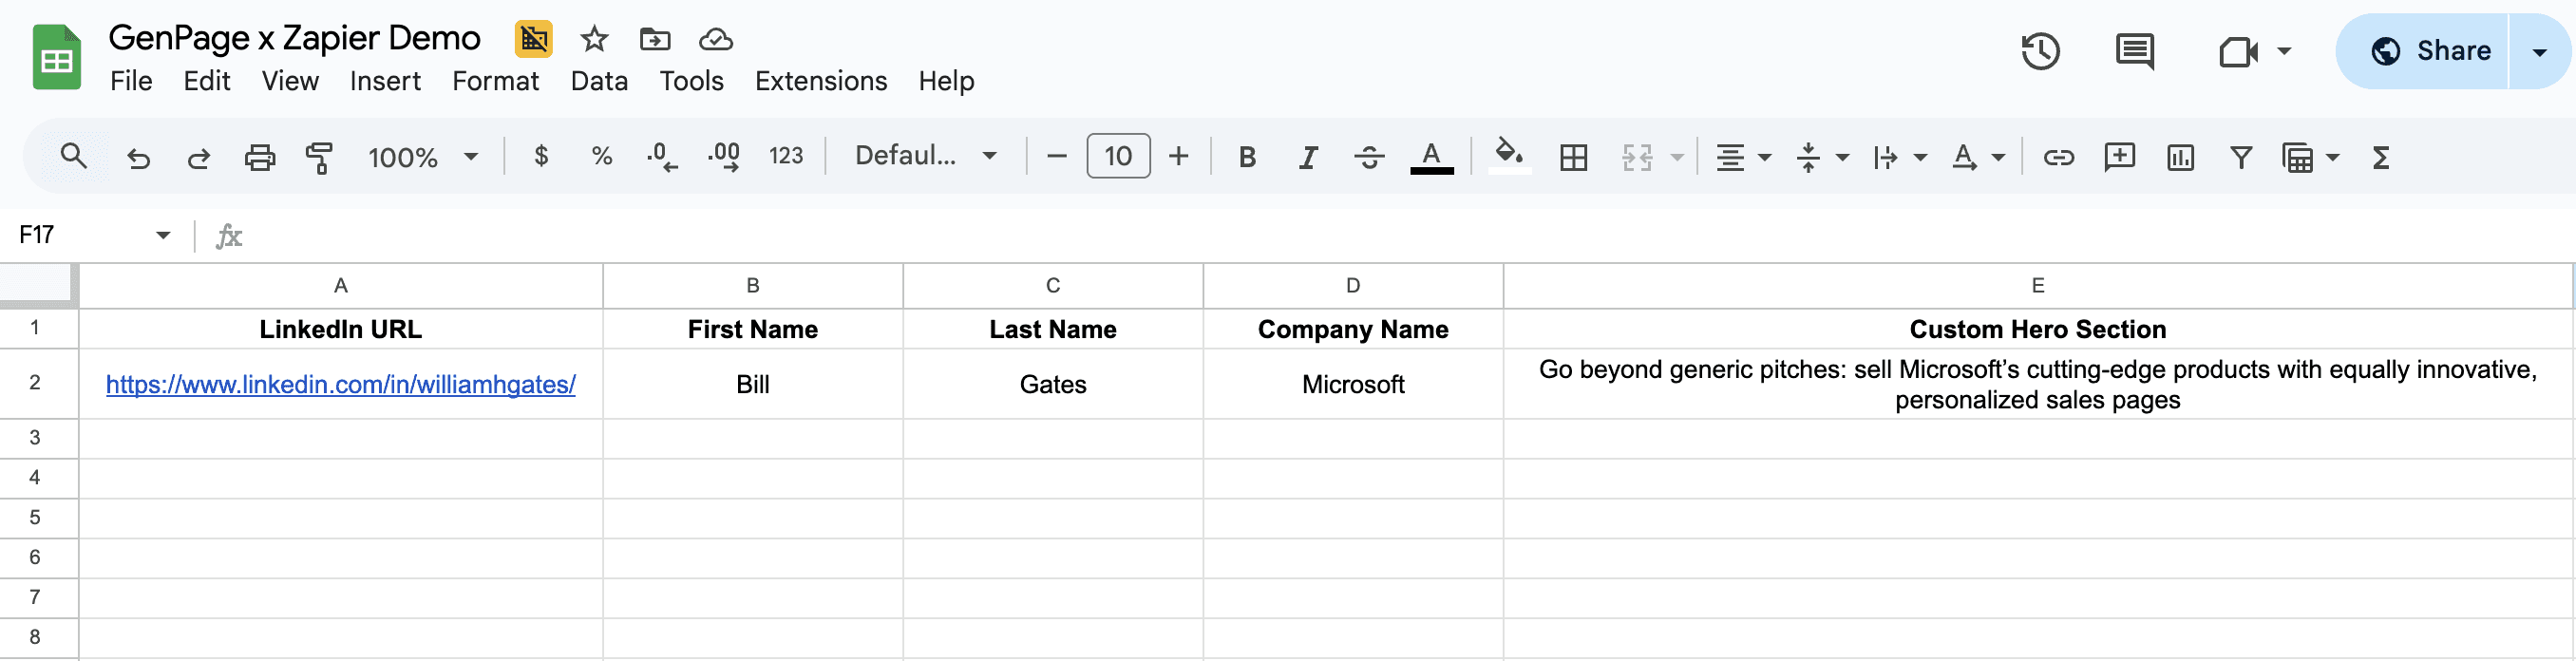
Sample spreadsheet to be synced with GenPage
Step 2: Create a new Zap with a Google Sheets trigger
Head to your Zapier dashboard and click “Create Zap”
Search for Google Sheets in the app list
Select the "New Spreadsheet Row" trigger event in the trigger list
Connect your Google account, select a spreadsheet file, and the worksheet you'd like to sync
Hit "Find new records"
Click "Continue with selected record" once you've confirmed the trigger is fetching records appropriately
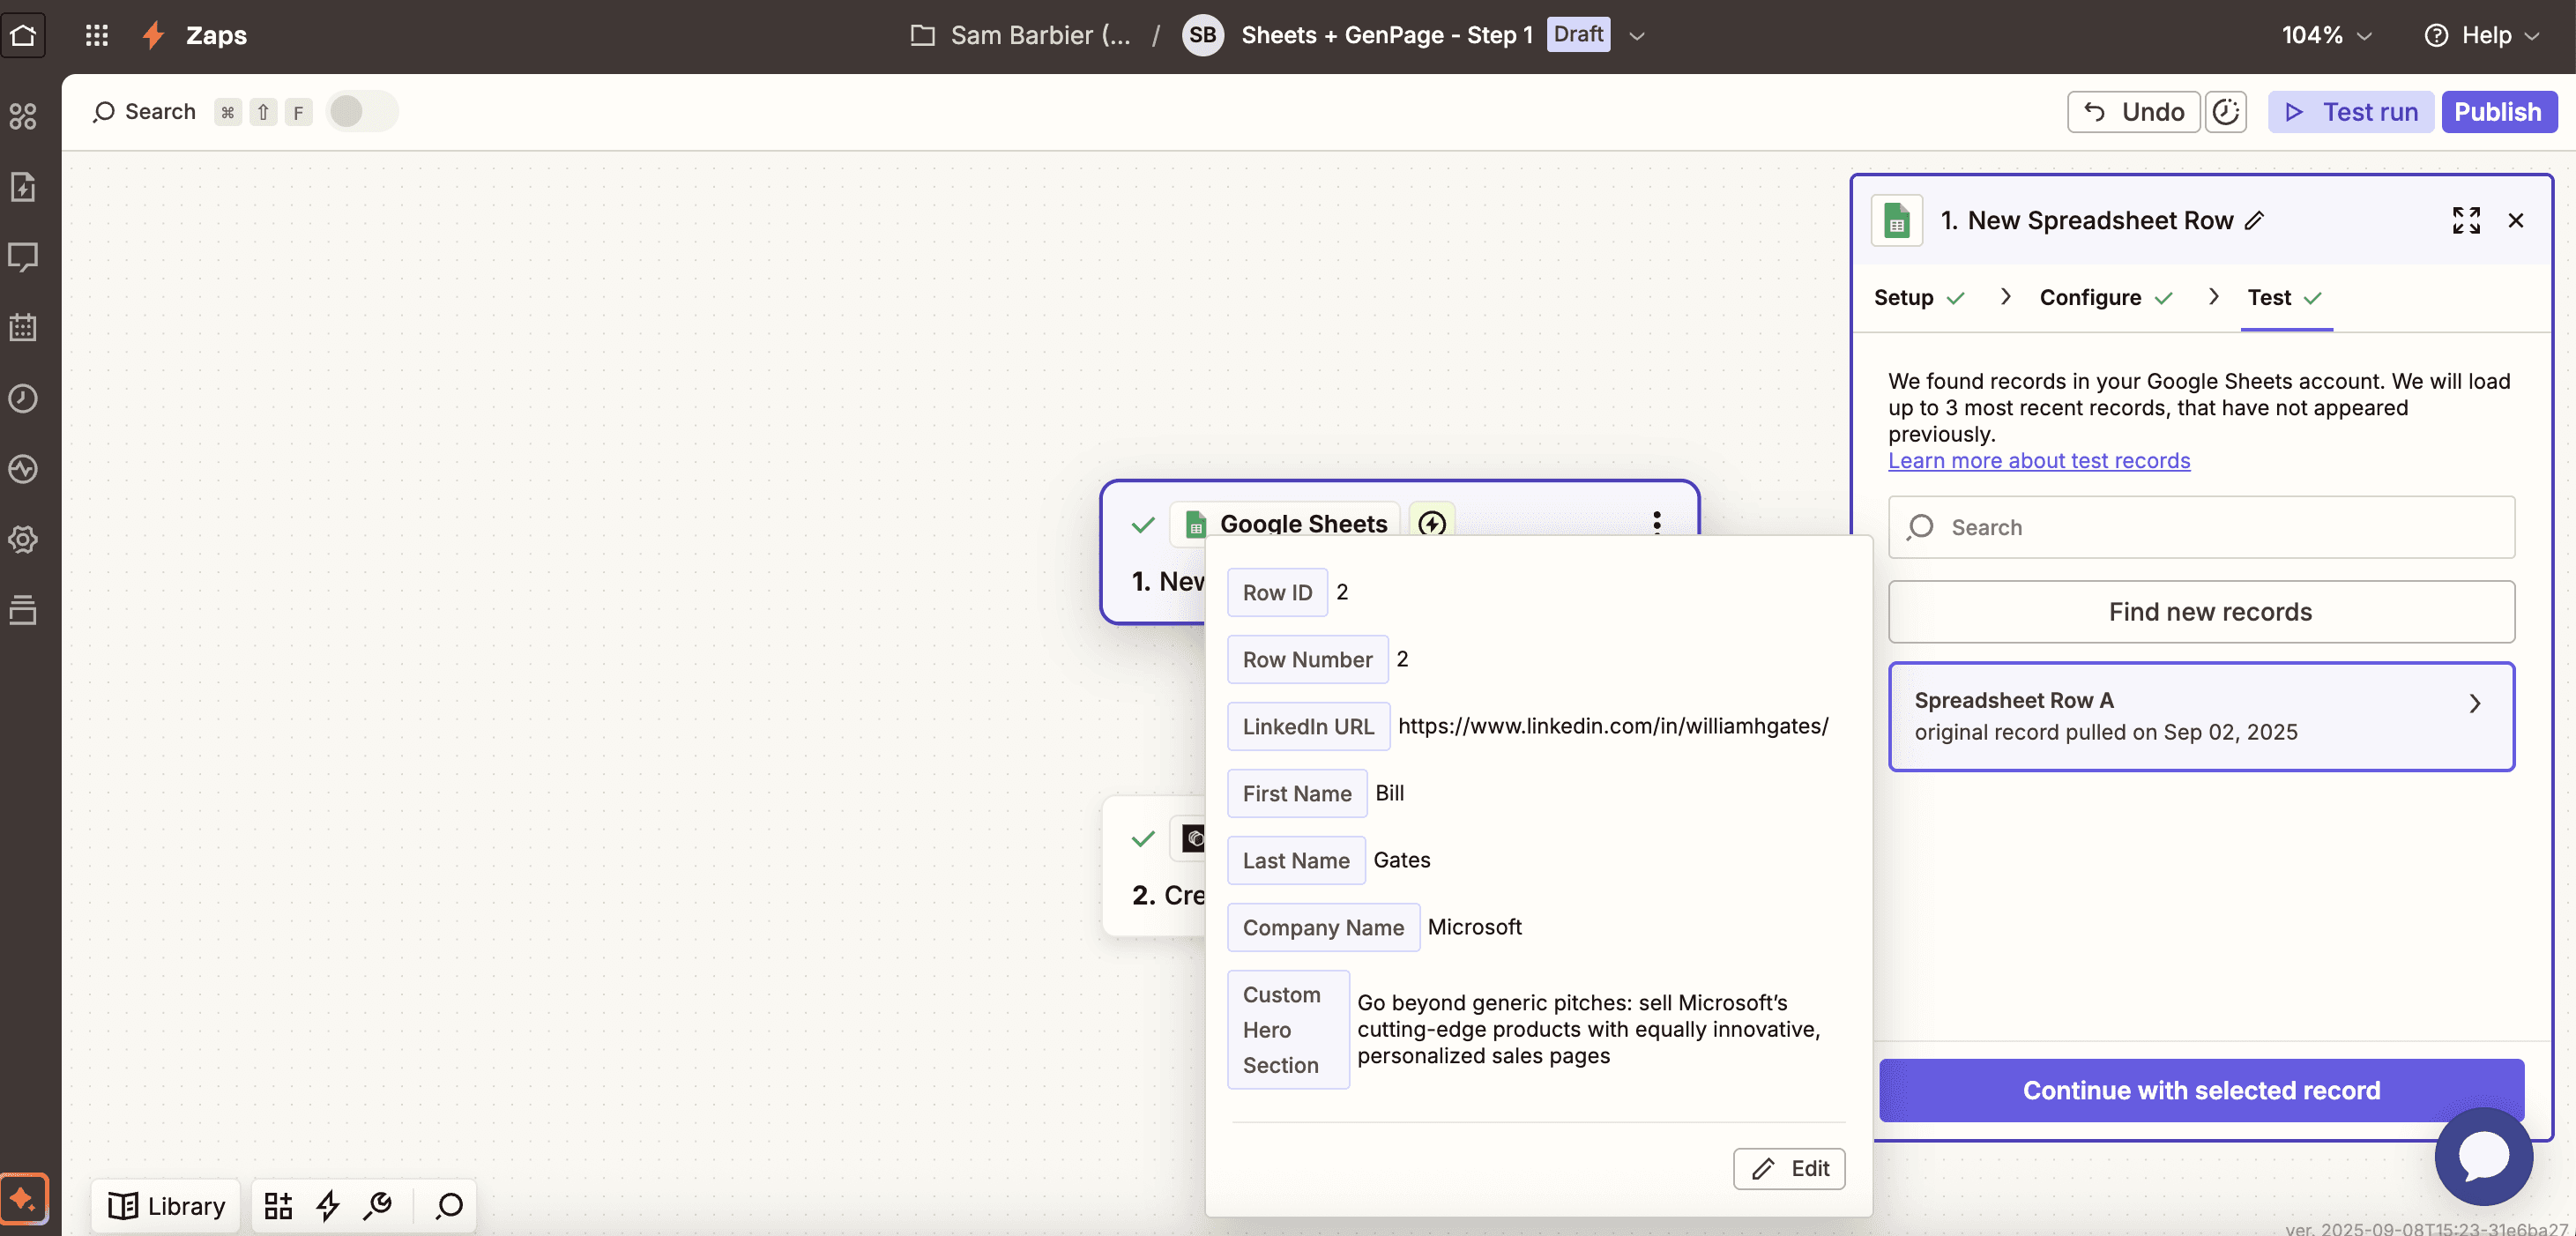
Connecting Google Spreadsheet to GenPage via Zapier to create lead pages for each new row entry
Step 3: Set up your GenPage action
Click "Add Step"
Search for "GenPage" in the app list
Select the "Create Lead" action event
Connect your GenPage account by adding your GenPage API key in Zapier under "Connect New Account"
You can find your GenPage API key by navigating to Settings > Integrations > GenPage API from your dashboard:

Finding your GenPage API Key
In the "Configure" step of your Zap, select the appropriate workspace and campaign you'd like to send leads to
Map each column of your spreadsheet to your GenPage fields and variables:
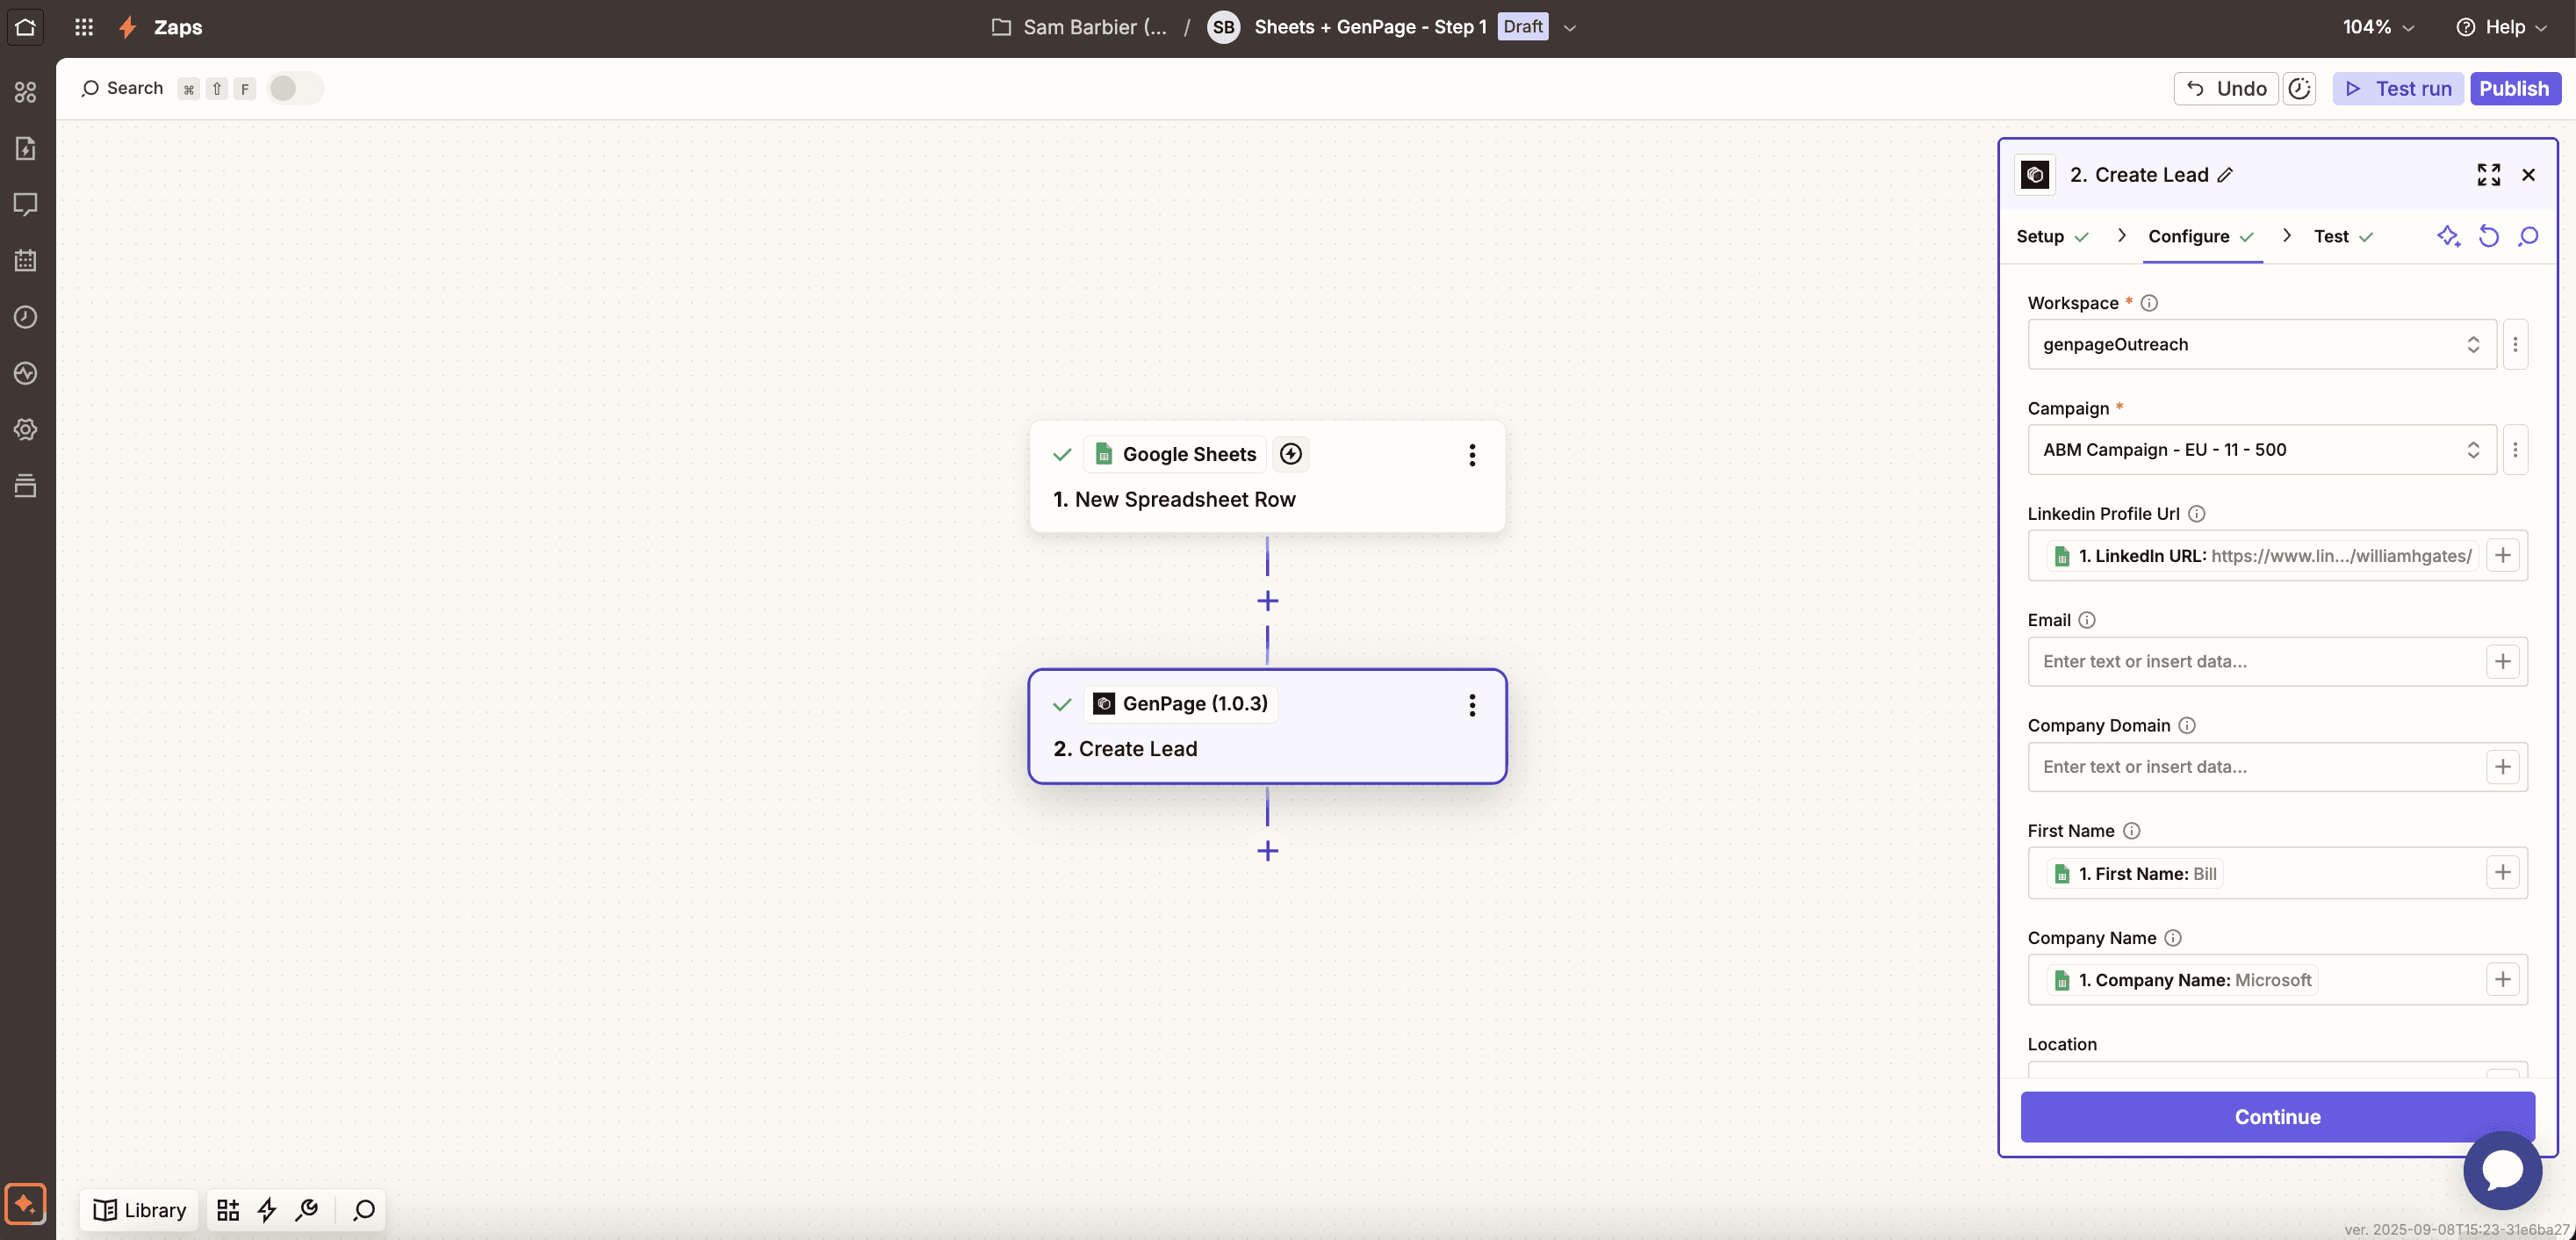
Mapping your spreadsheet columns to GenPage fields & variables
Once mapping is complete, click "Test Step"
Head into the GenPage campaign you used for this Zap, and confirm a new lead record and page were created:
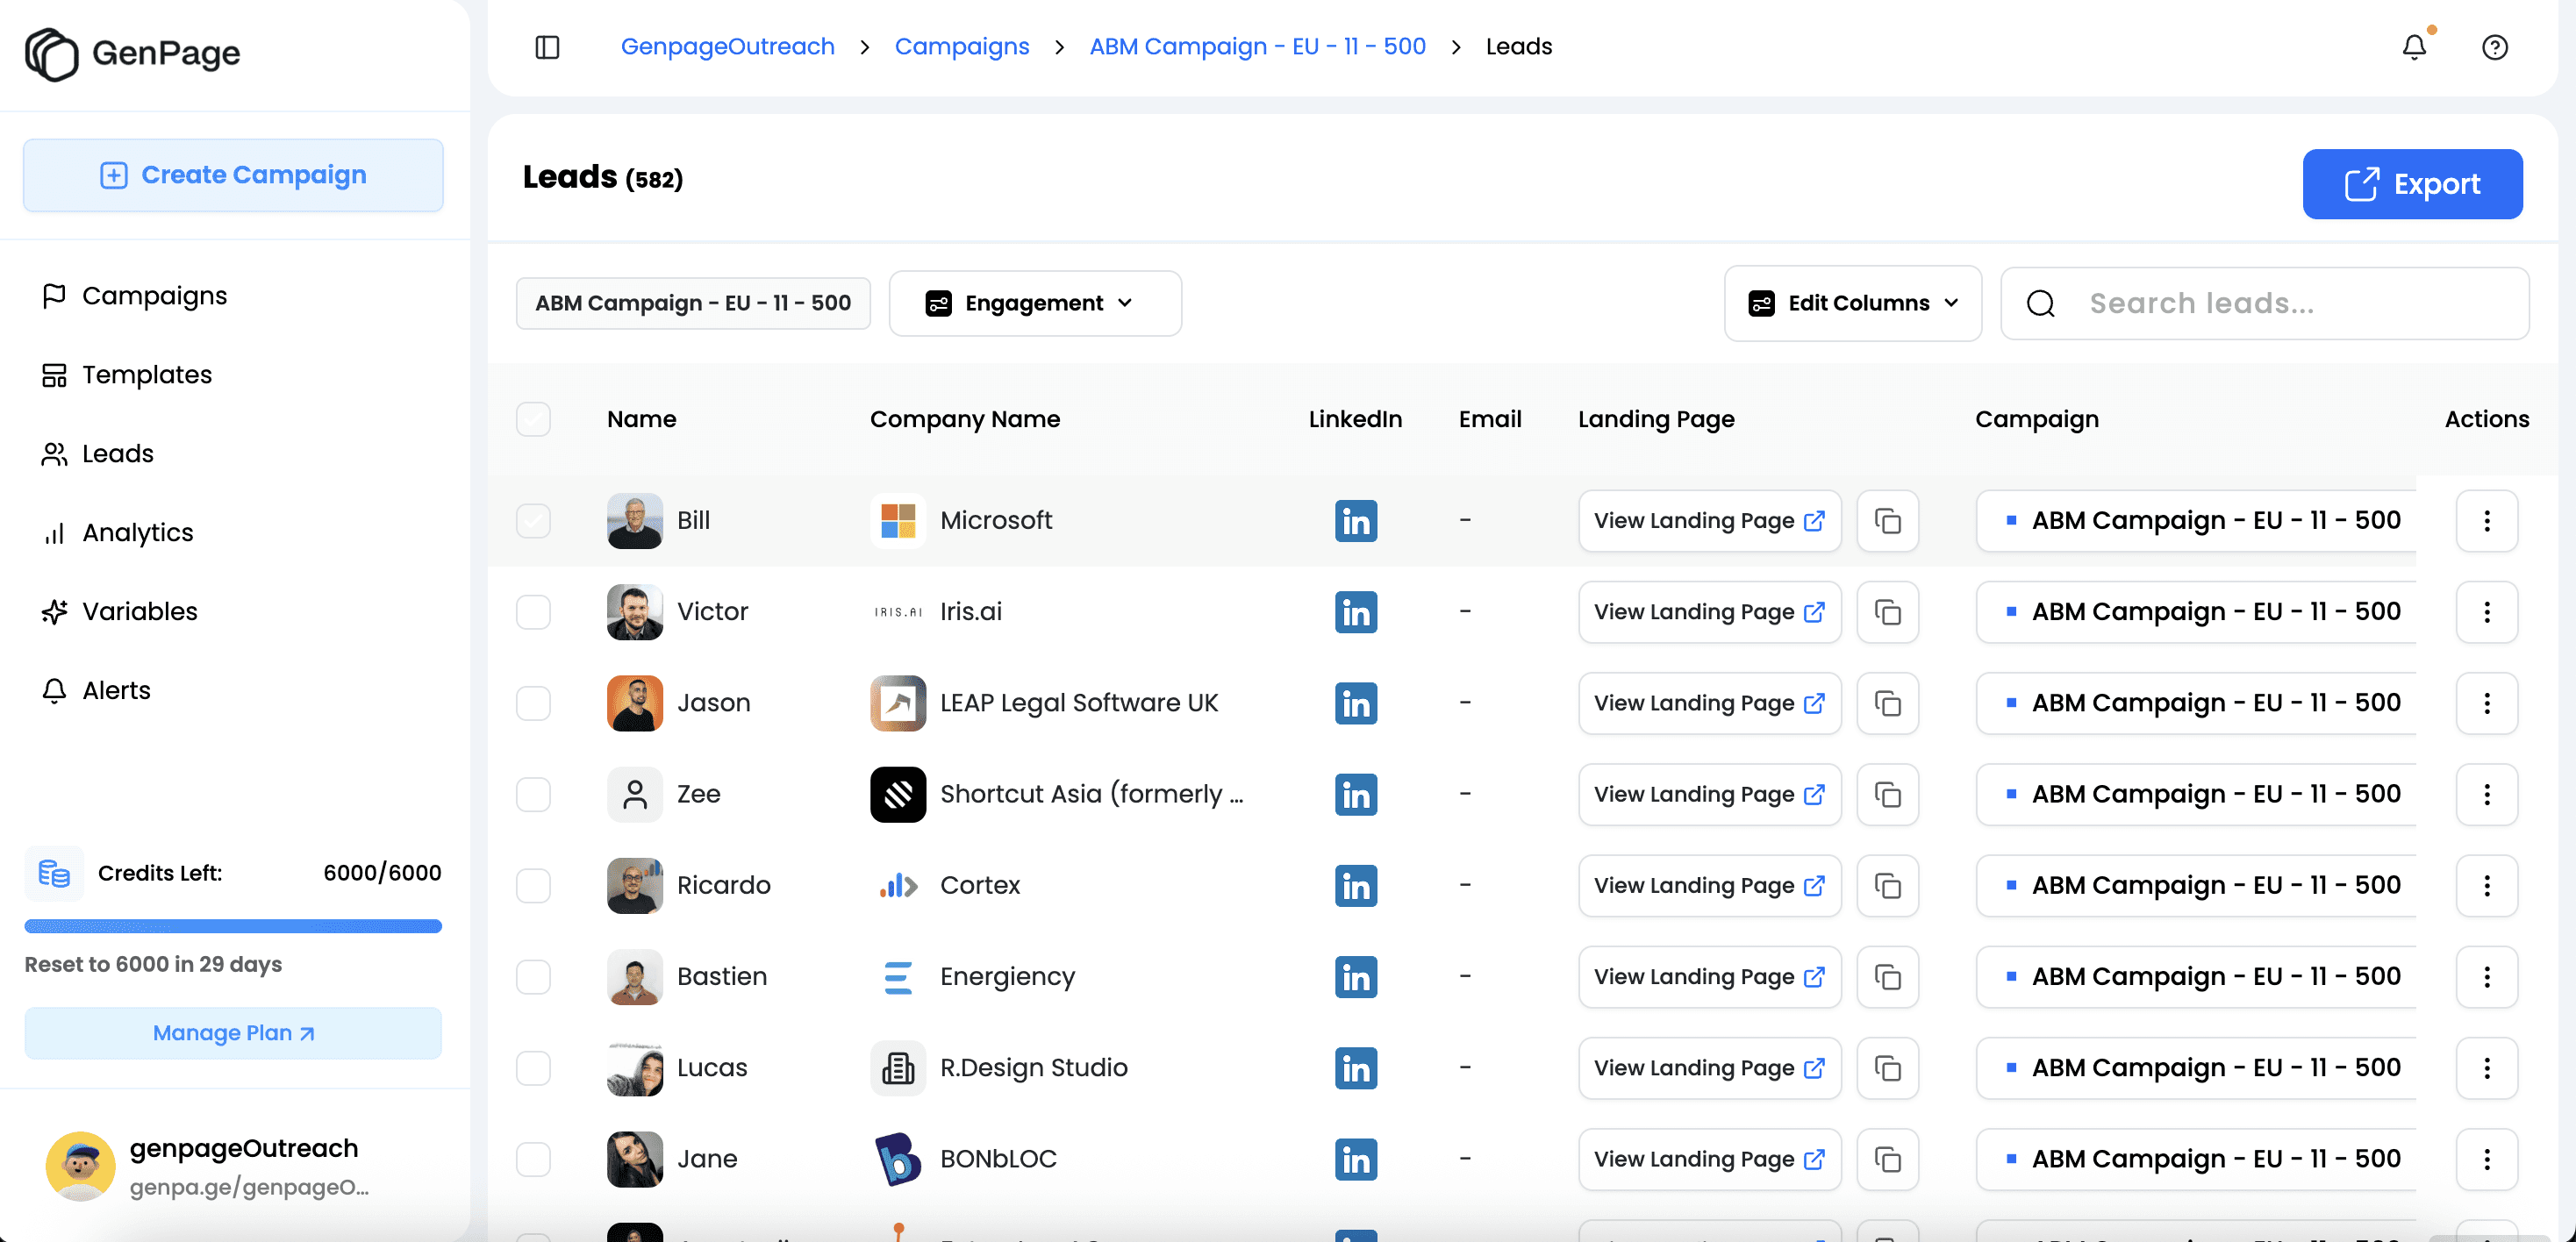
A new lead (Bill) was created in my GenPage campaign as a result of the Zap workflow
Once you've confirmed the lead record and page were created, you can publish your Zap. This concludes the first part of this workflow!
Step 4: Sync GenPage URLs back into your Spreadsheet
Head back to your Zapier dashboard and create a new Zap
Search for "GenPage" in the app list
Select the "Get New Leads" trigger in the trigger event list
Select the same GenPage account used in your first zap
Under "Configure", select the same workspace and campaign used in your first zap
Click "Find new records"
Click "Continue with selected record" once you've confirmed the trigger is fetching leads appropriately
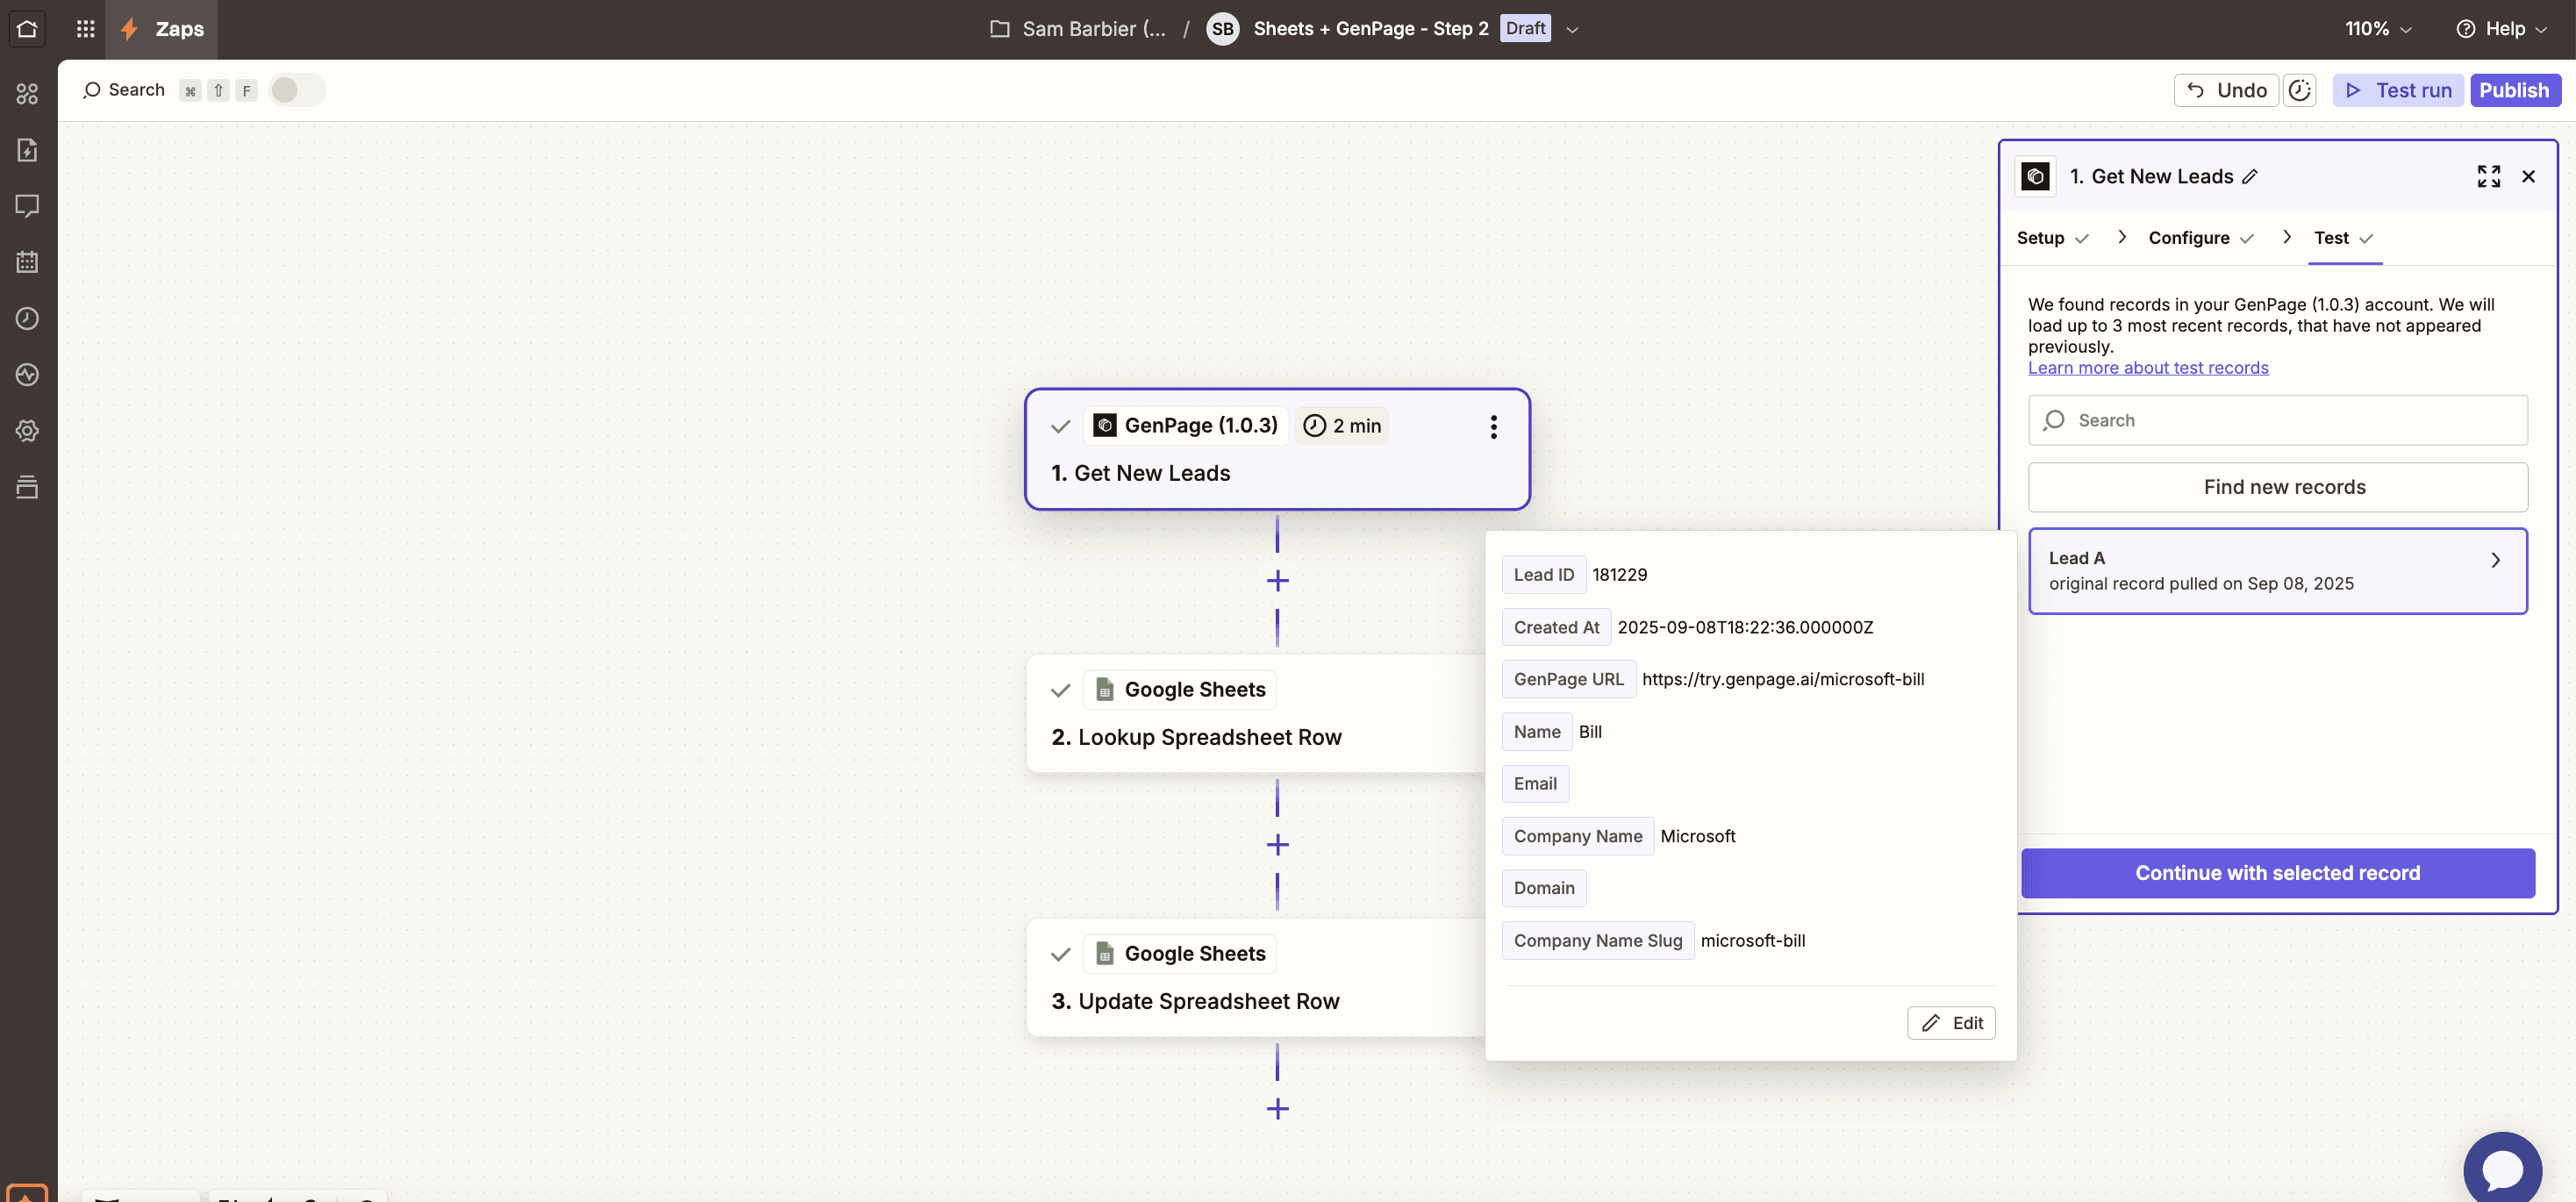
Syncing GenPage leads and page URLs back into Zapier
Step 5: Lookup Spreadsheet Row
To update the appropriate row in your spreadsheet with the GenPage URL, you'll need to use the "Lookup Spreadsheet Row" action event:
Click "Add Step"
Search for "Google Sheets" in the app list
Select the "Lookup Spreadsheet Row" action event
Connect the same Google Sheets account, Spreadsheet, and worksheet used in your first Zap
To match GenPage data with your spreadsheet, map a Lookup column and value that uniquely identifies each lead. In this case, we're using the company name as a lookup value and lead first name as a supporting lookup value to find a matching lead - but you can use any unique identifier:
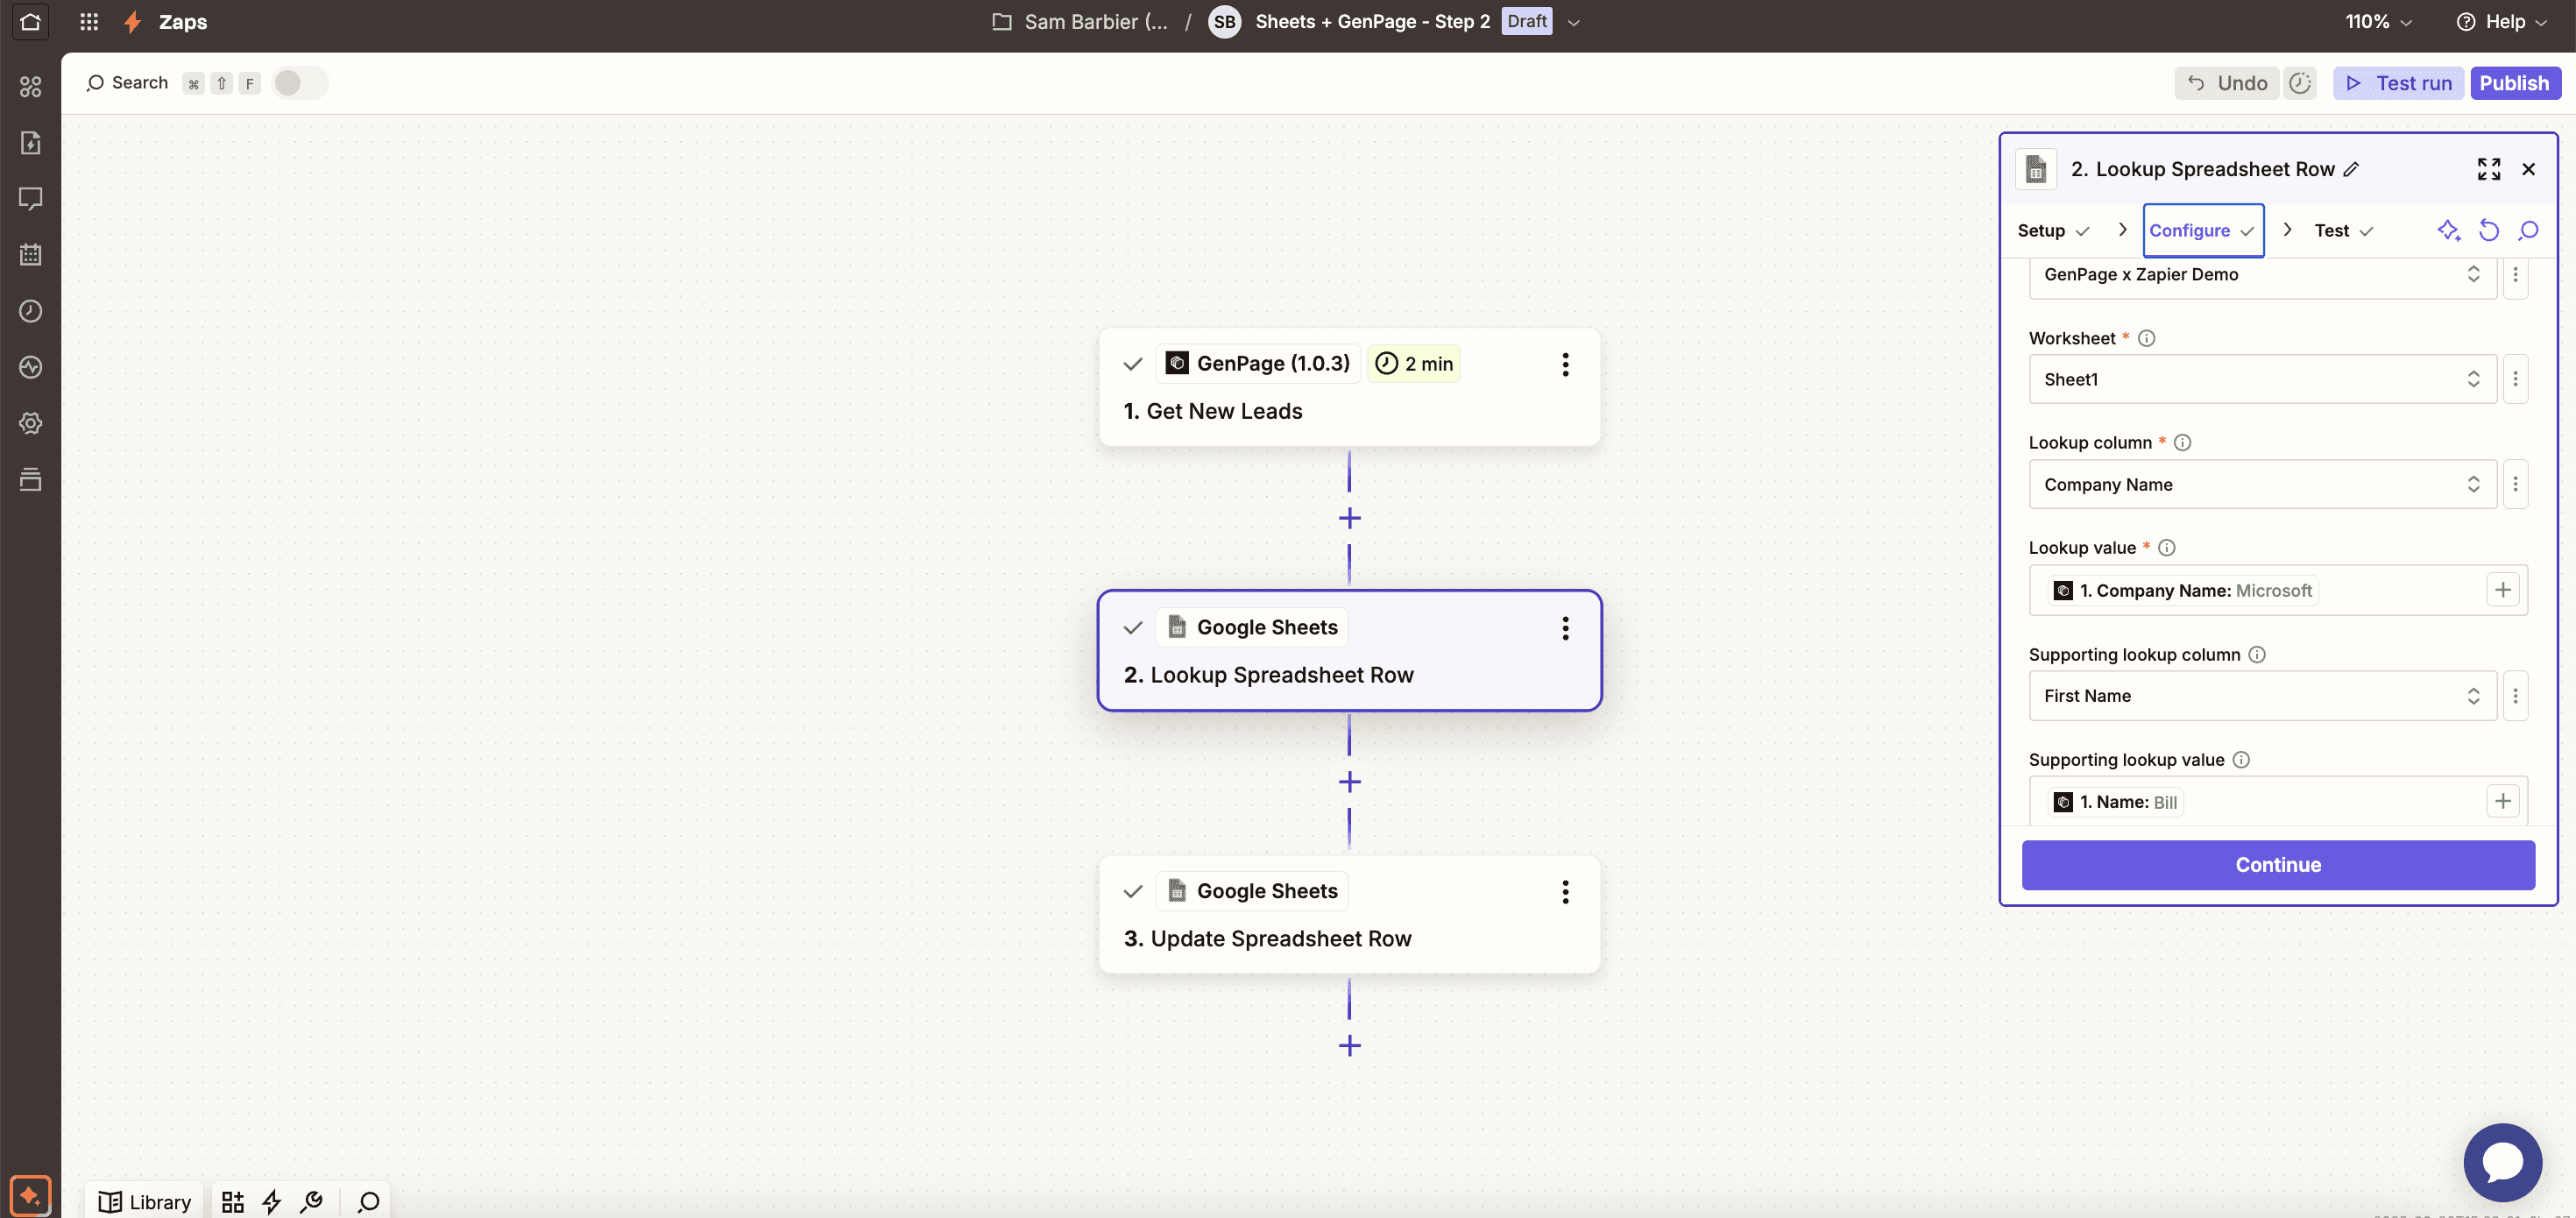
Looking up the appropriate spreadsheet row to update with your GenPage URL
Test your step and ensure the row matching your GenPage lead gets returned by Zapier.
Step 6: Update Spreadsheet Row
We're now ready to update lead records in your spreadsheet with their unique GenPage URL:
Click "Add Step"
Search for "Google Sheets" in the app list
Select the "Update Spreadsheet Row" action event
Connect the same Google Sheets account, Spreadsheet, and worksheet used in your first Zap
To ensure the correct row gets updated:
- Under the"Row" field, click the three dots on the right
- Select "Custom"
- Click the "Lookup Row" step on the modal that appears
- Select the "Row ID" in the list of variables:
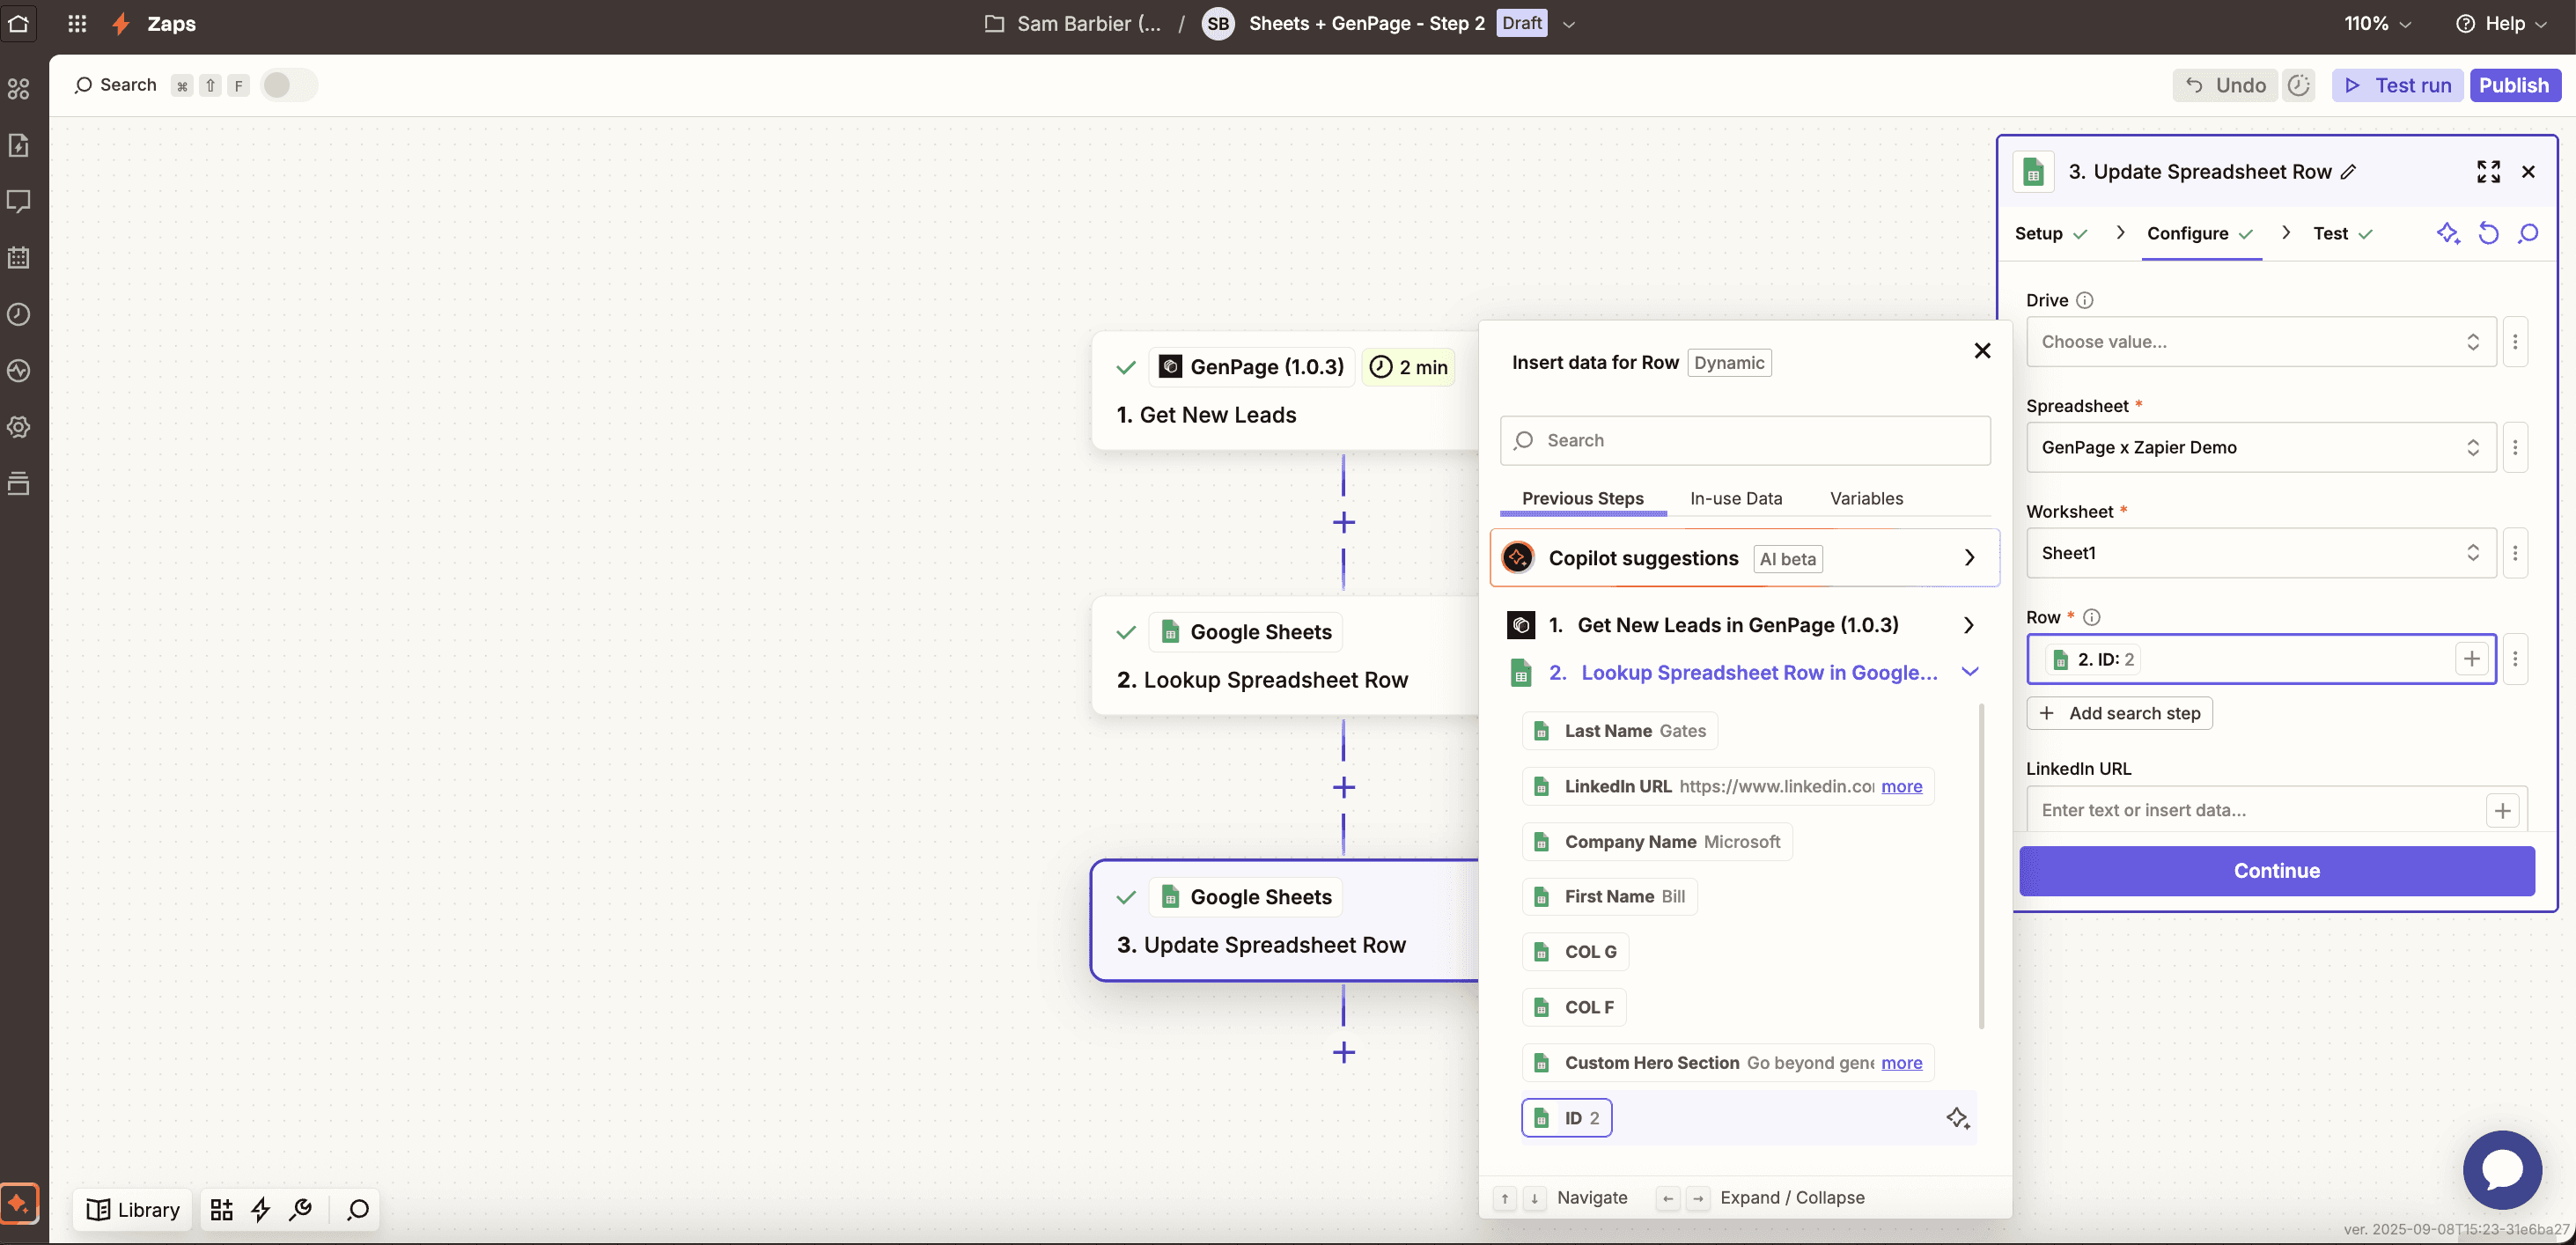
Mapping the appropriate row to be updated with a GenPage URL
Then, you can simply map the GenPage URL generated in step 1 in the appropriate column of your spreadsheet - In this case, the column we used is named "Landing Page URL":
Scroll down to the appropriate column field on the right-hand modal
Hit the"+" button, or simply type "/" within the field
Click the "Get New Leads" step on the modal that appears
Select the "GenPage URL" in the list of variables:
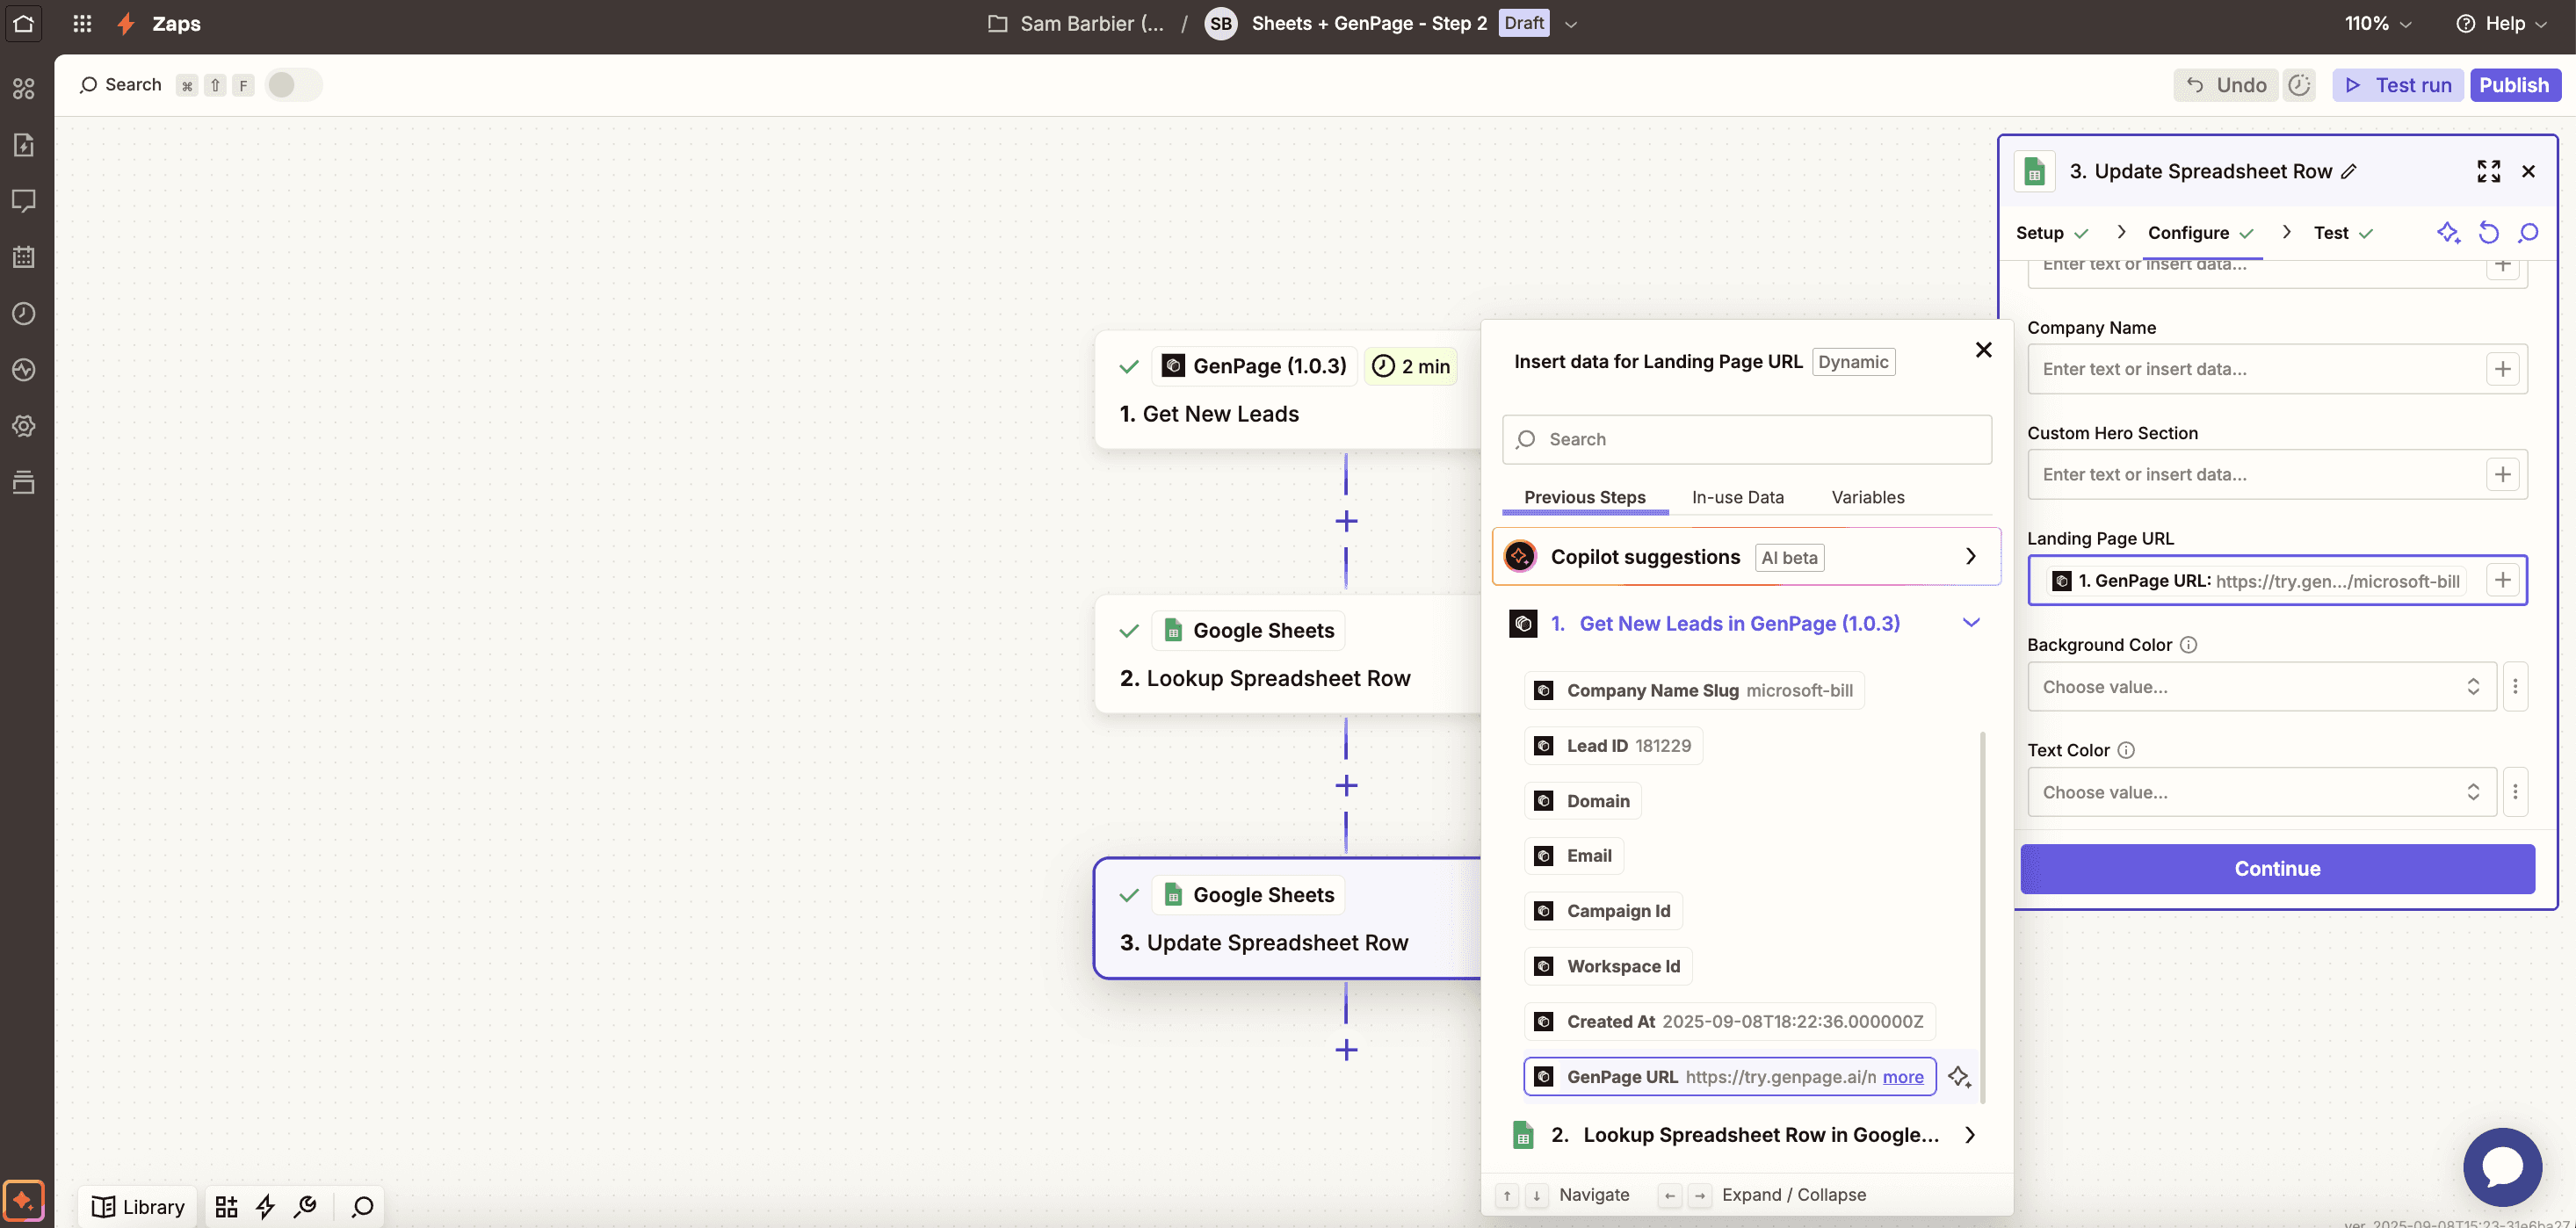
Syncing the GenPage URL on the appropriate spreadsheet row, and in the appropriate column
Once mapping is complete, click "Test Step"
Head into the spreadsheet you used for this Zap, and confirm your lead record was updated with its GenPage URL:

Confirming GenPage URL was sent back to Google Sheets on the correct row
Once you've confirmed the page URL was correctly sent back to your spreadsheet, you can publish your Zap. This concludes the second and final part of this workflow - but make sure to test it live to ensure it is working as intended!
You’re All Set!
Your GenPage campaigns now connect seamlessly with 8,000+ apps via Zapier. Automate lead imports, page generation, enrichments, or any workflow of your choice - so you can scale personalization without lifting a finger.
💡 Need help? Reach out to support or book a quick onboarding call with our team - we’re happy to walk you through setup.