

1. Set up your custom domain
Before connecting GA4, make sure your custom domain is configured in GenPage.
Follow our full domain setup guide here.
2. Create a new data stream in GA4
Log in to Google Analytics.
Go to Admin in the bottom-left corner.
Under Data collection and modification, click Data streams.
Select Add stream → Web.
Enter the domain you use for your GenPage campaigns.
Give the data stream a clear name.
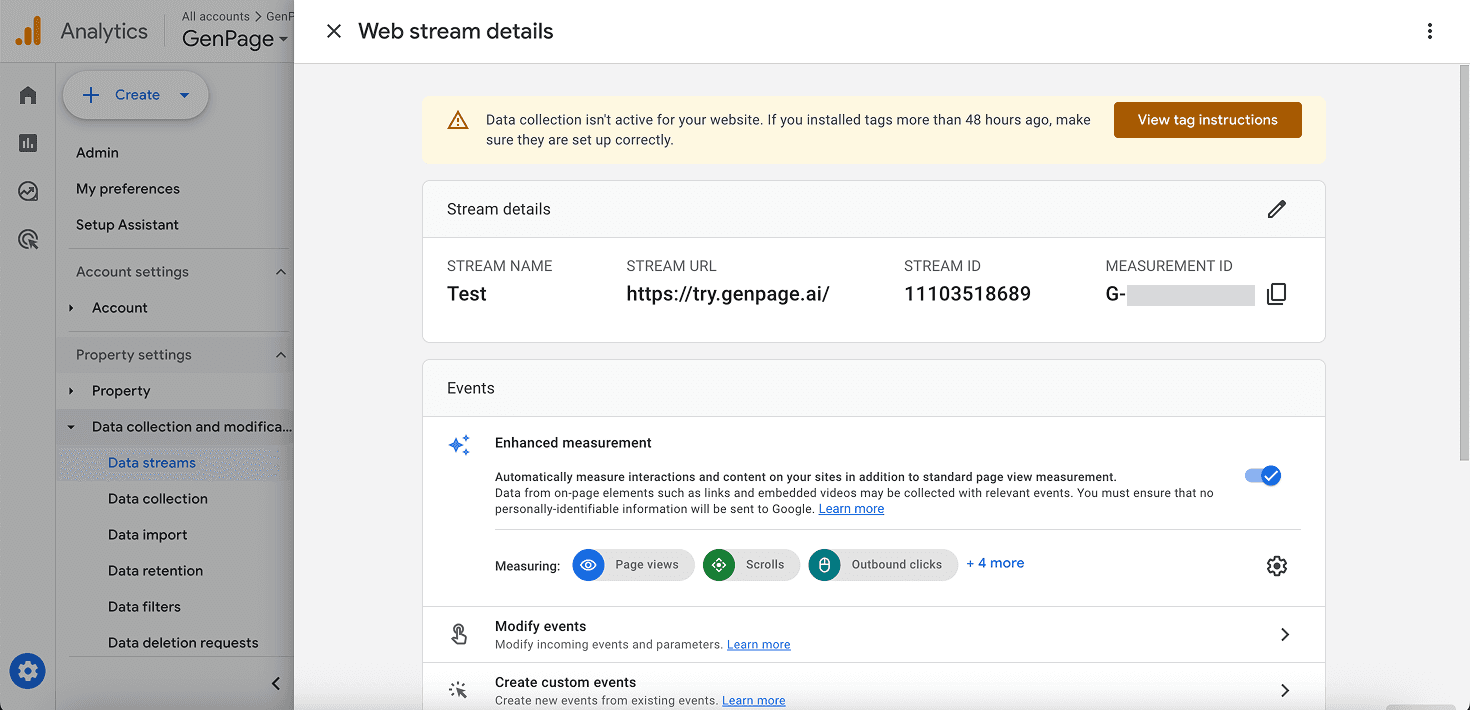
3. Enable enhanced measurement and copy your Measurement ID
Inside your new web data stream:
Click Enhanced measurement to turn on event tracking (recommended).
Look for your Measurement ID at the top right. It should look like:
G-XXXXXXXXXXCopy it.
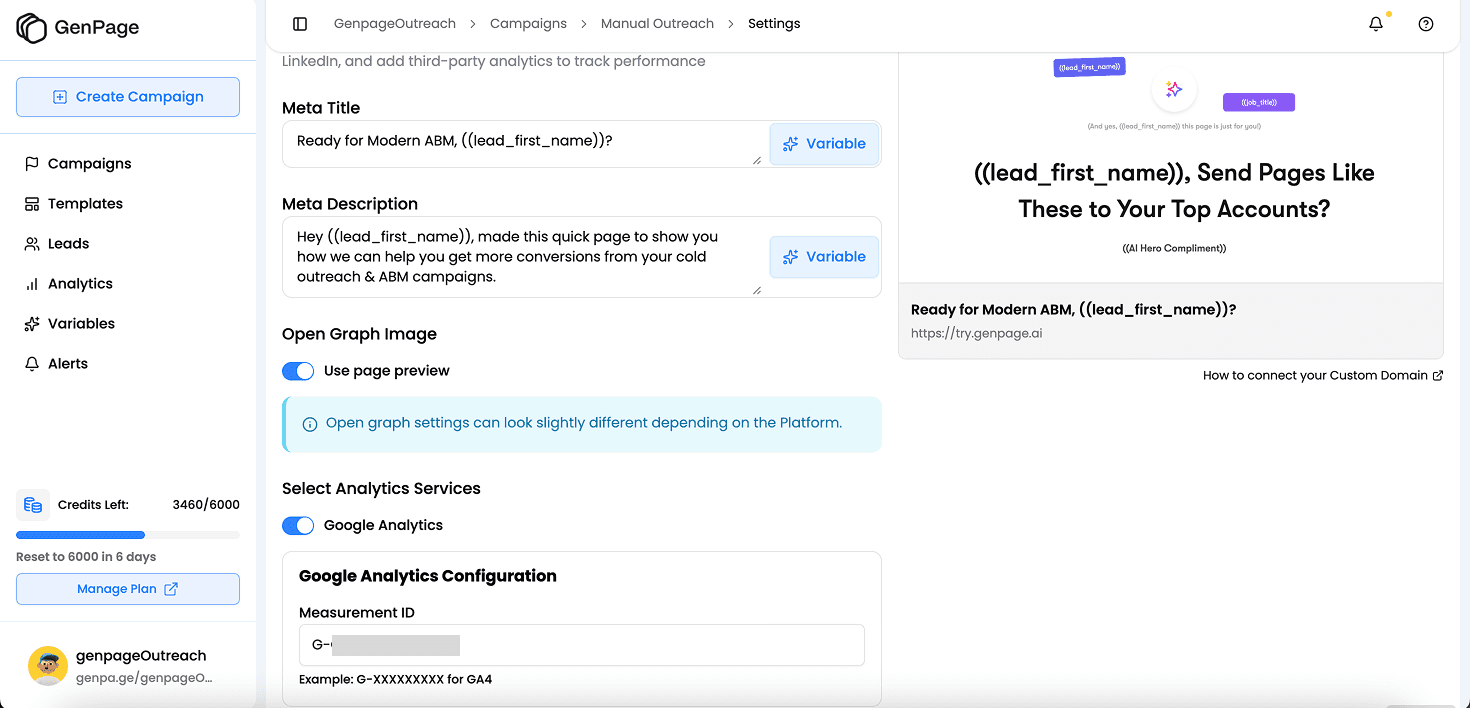
4. Add your GA4 Measurement ID inside GenPage
Go back to GenPage.
Open the campaign you want GA4 to track.
Go to Settings.
Toggle on Google Analytics.
Paste your Measurement ID.
Save your changes.
Important: Make sure the brand attached to this campaign is using the same custom domain you created in GA4.
5. Generate or open a GenPage to test tracking
If you haven’t created a page yet, generate one in your campaign.
Otherwise, open any exported or generated lead page to activate the tracking code.
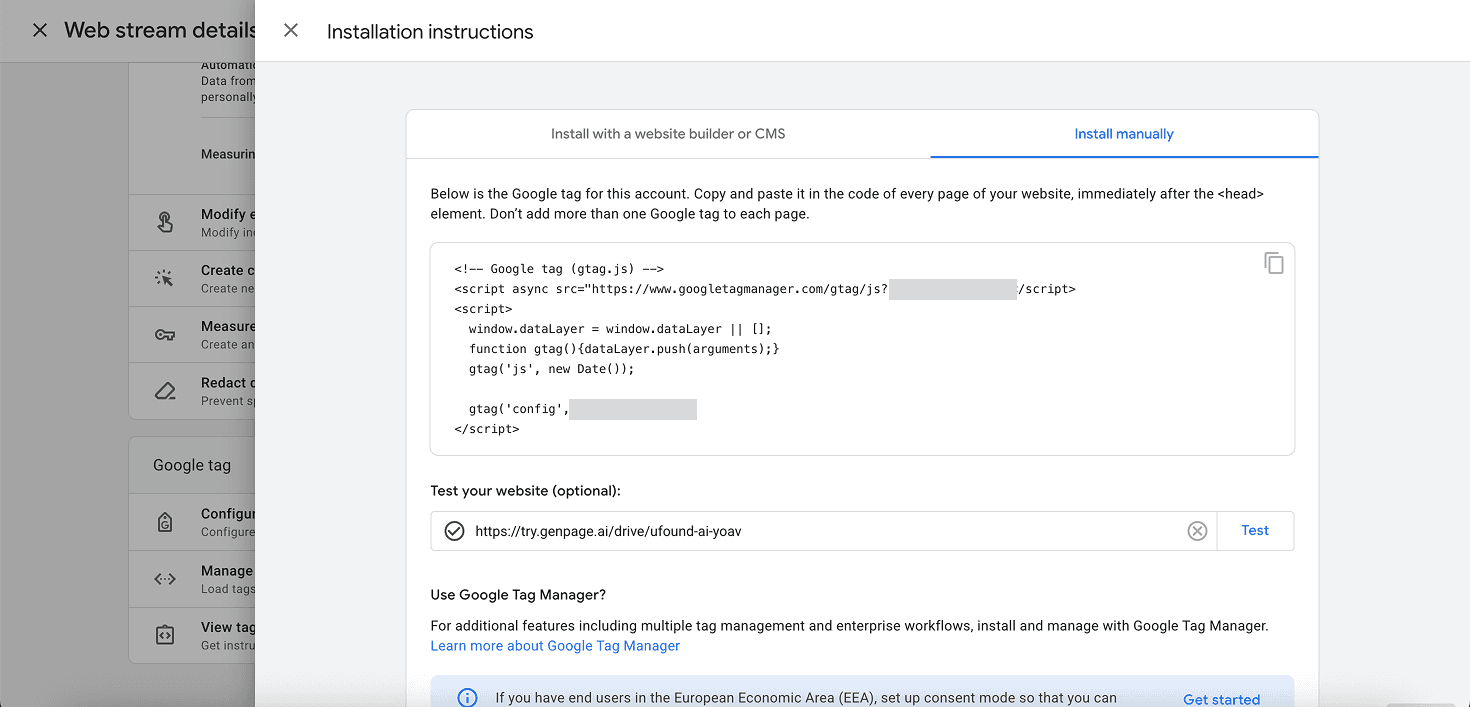
6. Verify the connection inside GA4
Inside your web data stream:
Scroll to the Google tag section.
Click View tag instructions.
Choose Install manually.
Paste the URL of the GenPage you just opened.
Click Test to confirm GA4 is receiving data.
Note: You do not need to add any script to your pages. This is handled automatically by GenPage.
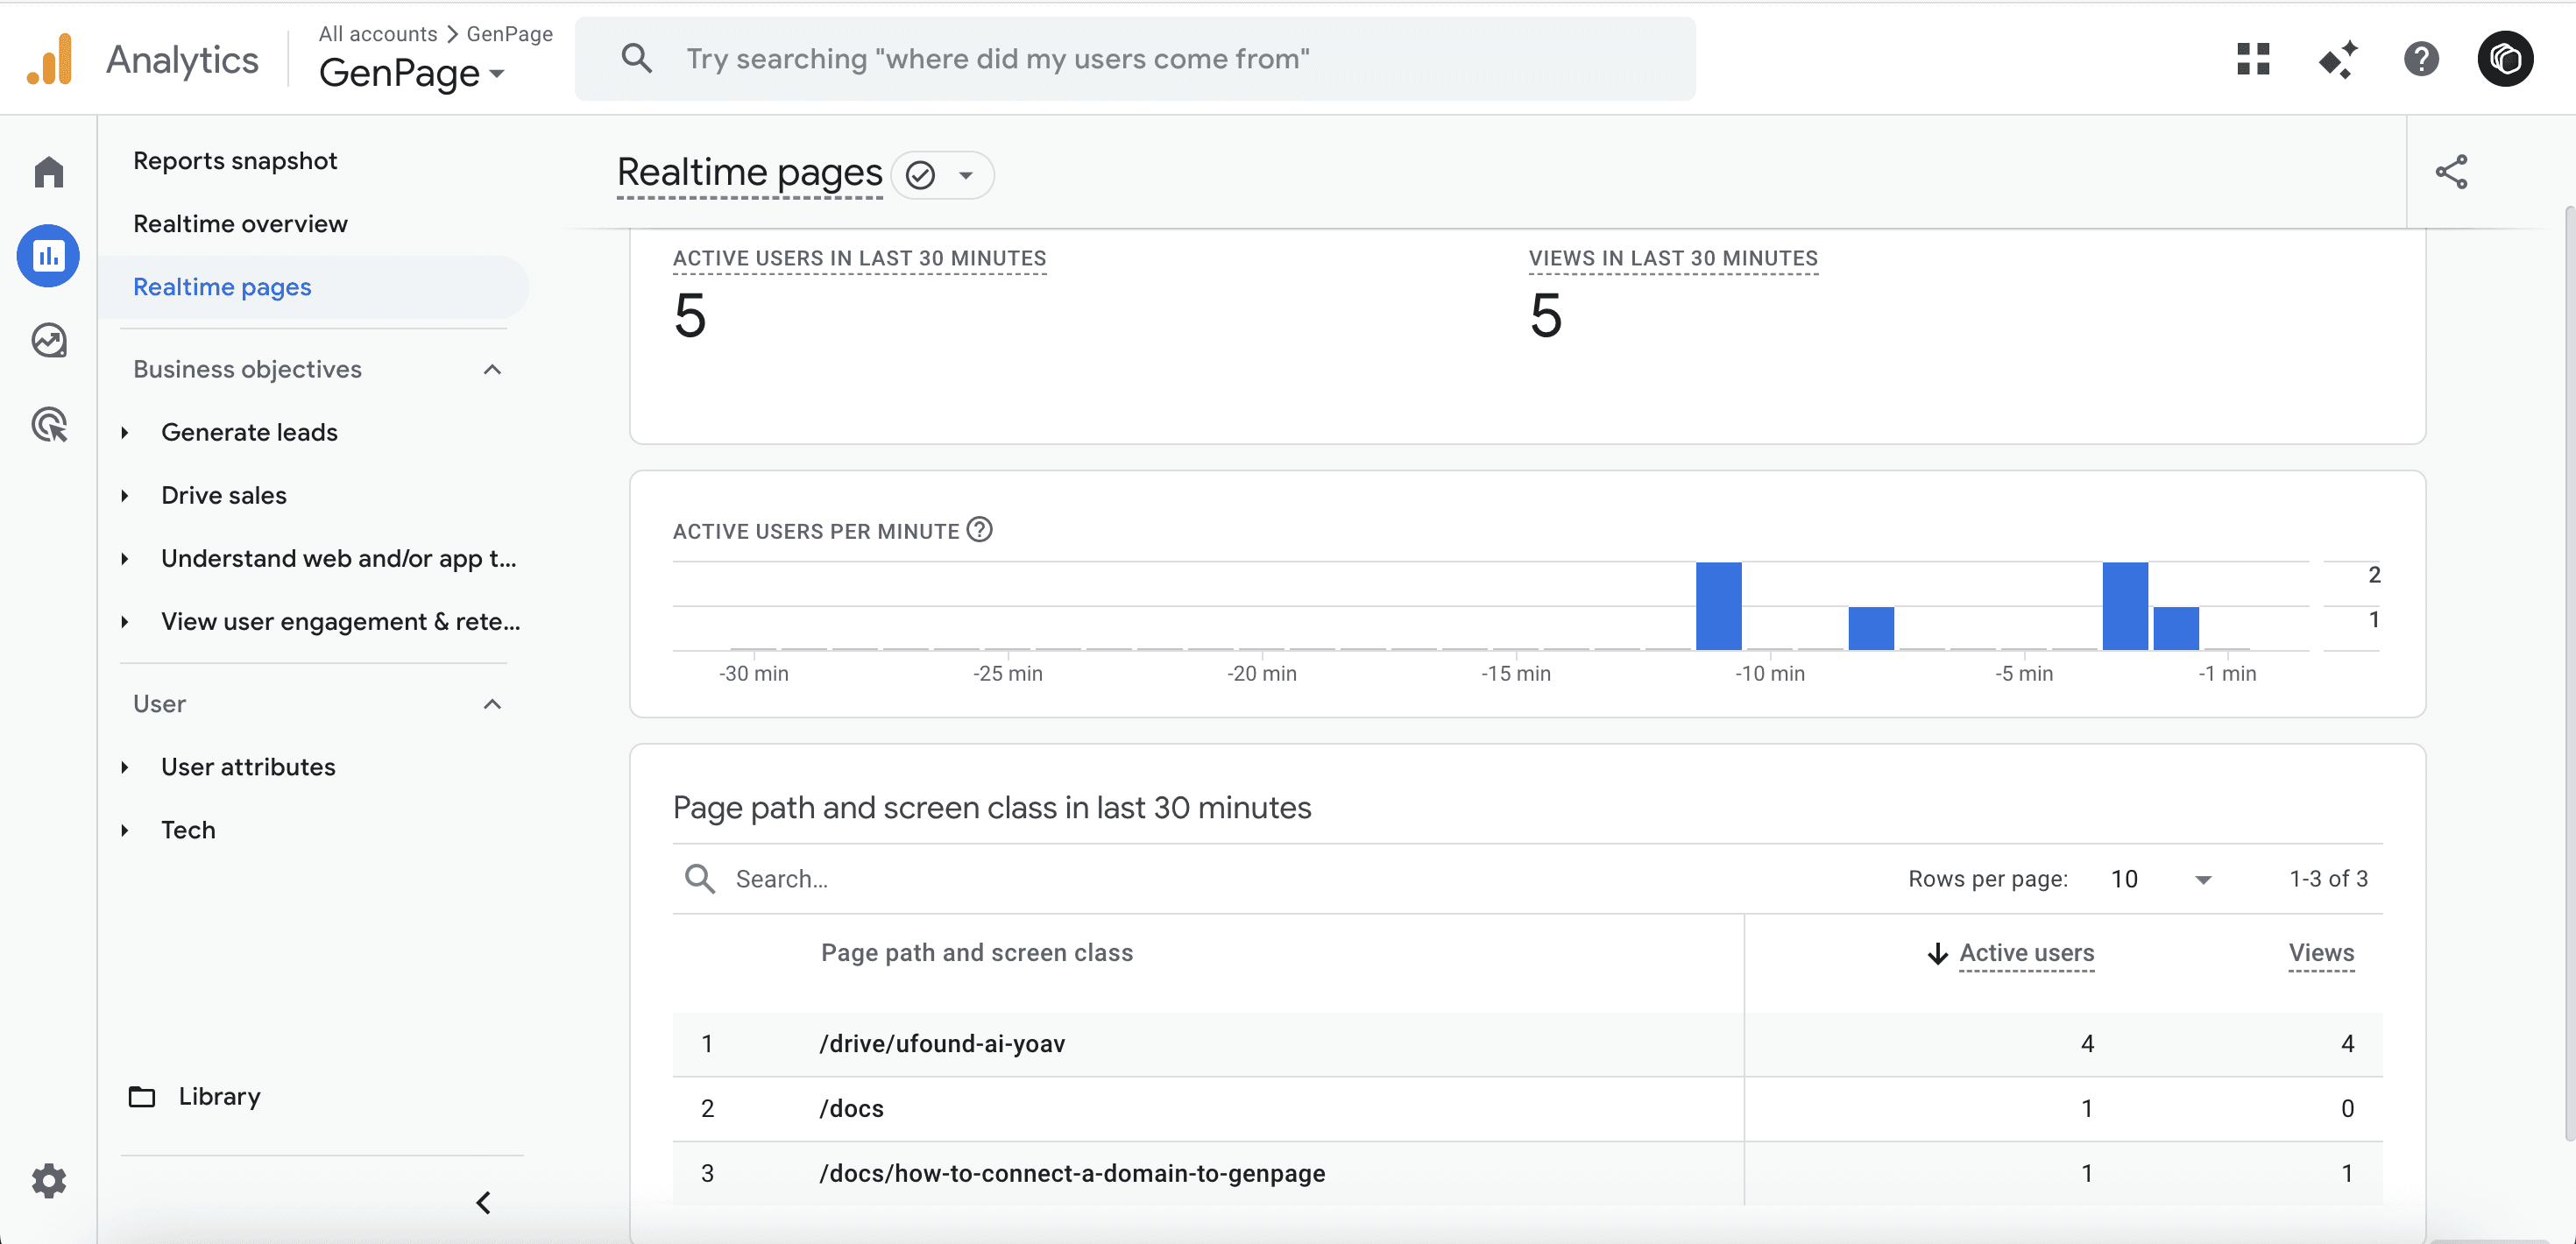
You can also verify in Reports → Real-time.
Check that the page URL appears under Page path and screen class in the last 30 minutes.
Need more help?
If you need support setting up GA4 with GenPage, contact us at: team@genpage.ai