

1. Set up your custom domain
Before integrating the Meta Pixel, make sure your custom domain is connected in GenPage.
Follow our full domain setup guide here.
2. Create your Meta Pixel inside Meta Business Manager
Go to Meta Business Manager.
Open Settings in the left sidebar.
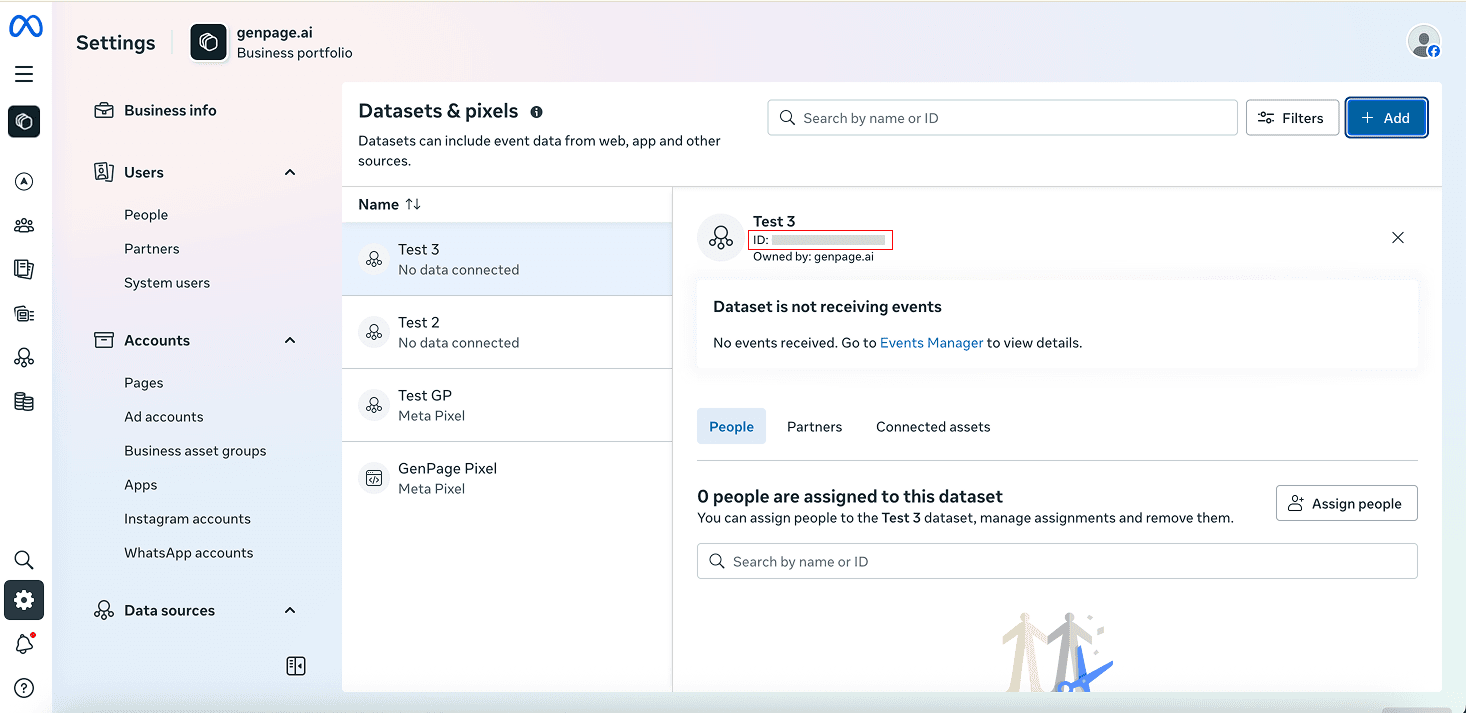
Under Data Sources, select Datasets & Pixels.
Click Add new dataset / pixel.
Give your pixel a name.
Copy the Dataset ID that appears in the new UI.
3. Add your Pixel ID to your GenPage campaign
Go back to GenPage.
Open the campaign where you want Meta tracking enabled.
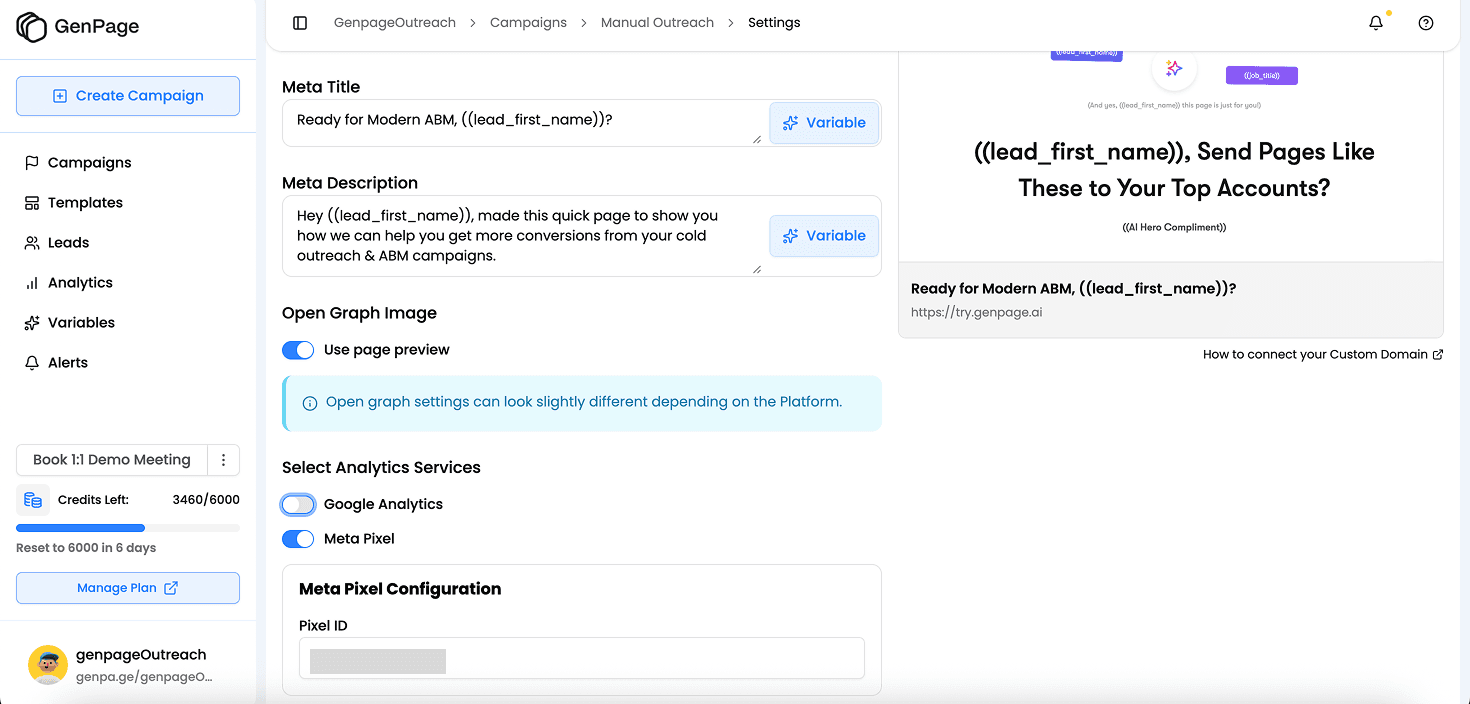
Go to Settings.
Toggle on Meta Pixel.
Paste your Dataset ID.
Save your changes.
4. Generate or open a GenPage to activate tracking
If you haven’t generated a landing page yet, create one inside your campaign.
Otherwise, open any of your existing exported lead pages and take some actions to trigger the pixel.
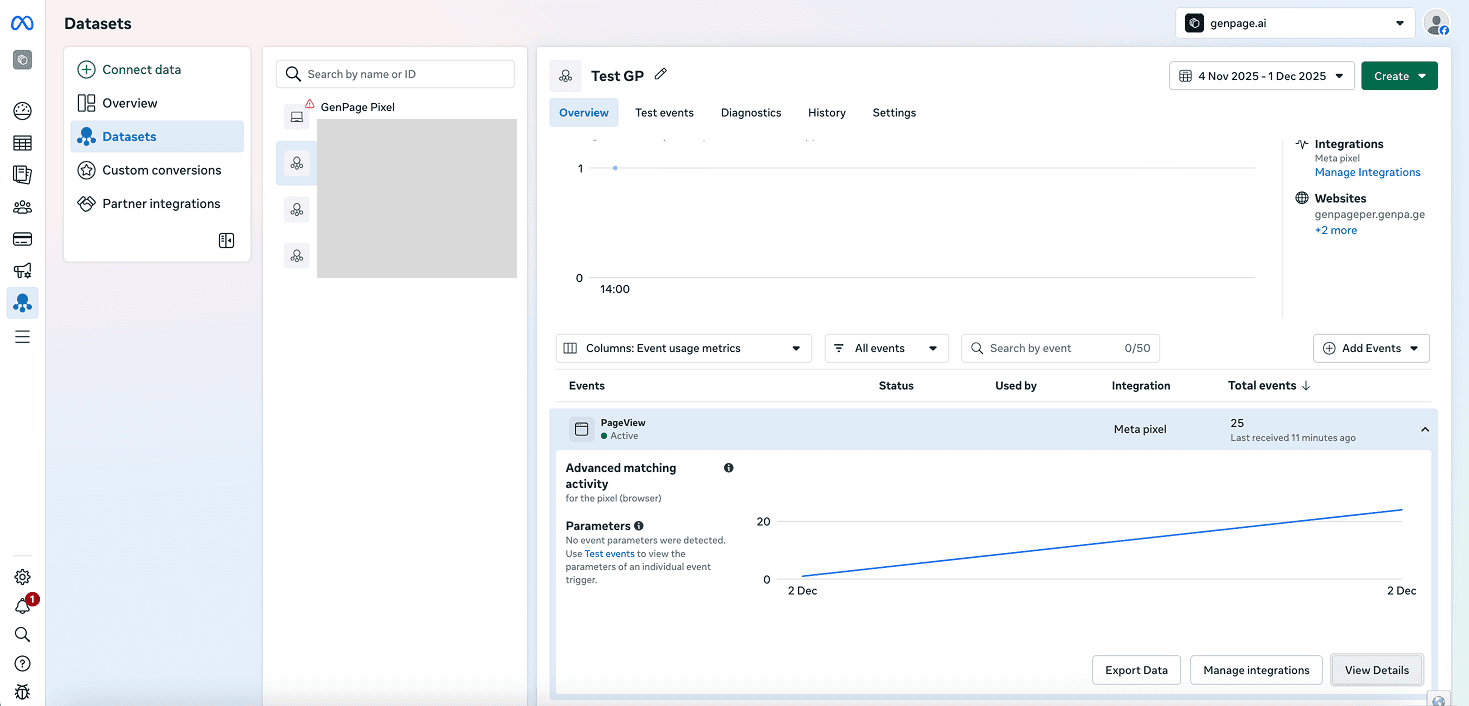
5. Confirm your Pixel is working inside Events Manager
Go back to Meta
Select your Pixel.
Click "Go to Events Manager"
In the Overview tab, scroll down to "Events"
Check that Meta is receiving activity from your page.
Note: Meta takes a bit of time to process events, so it may take up to 30 minutes for your events to be displayed here.
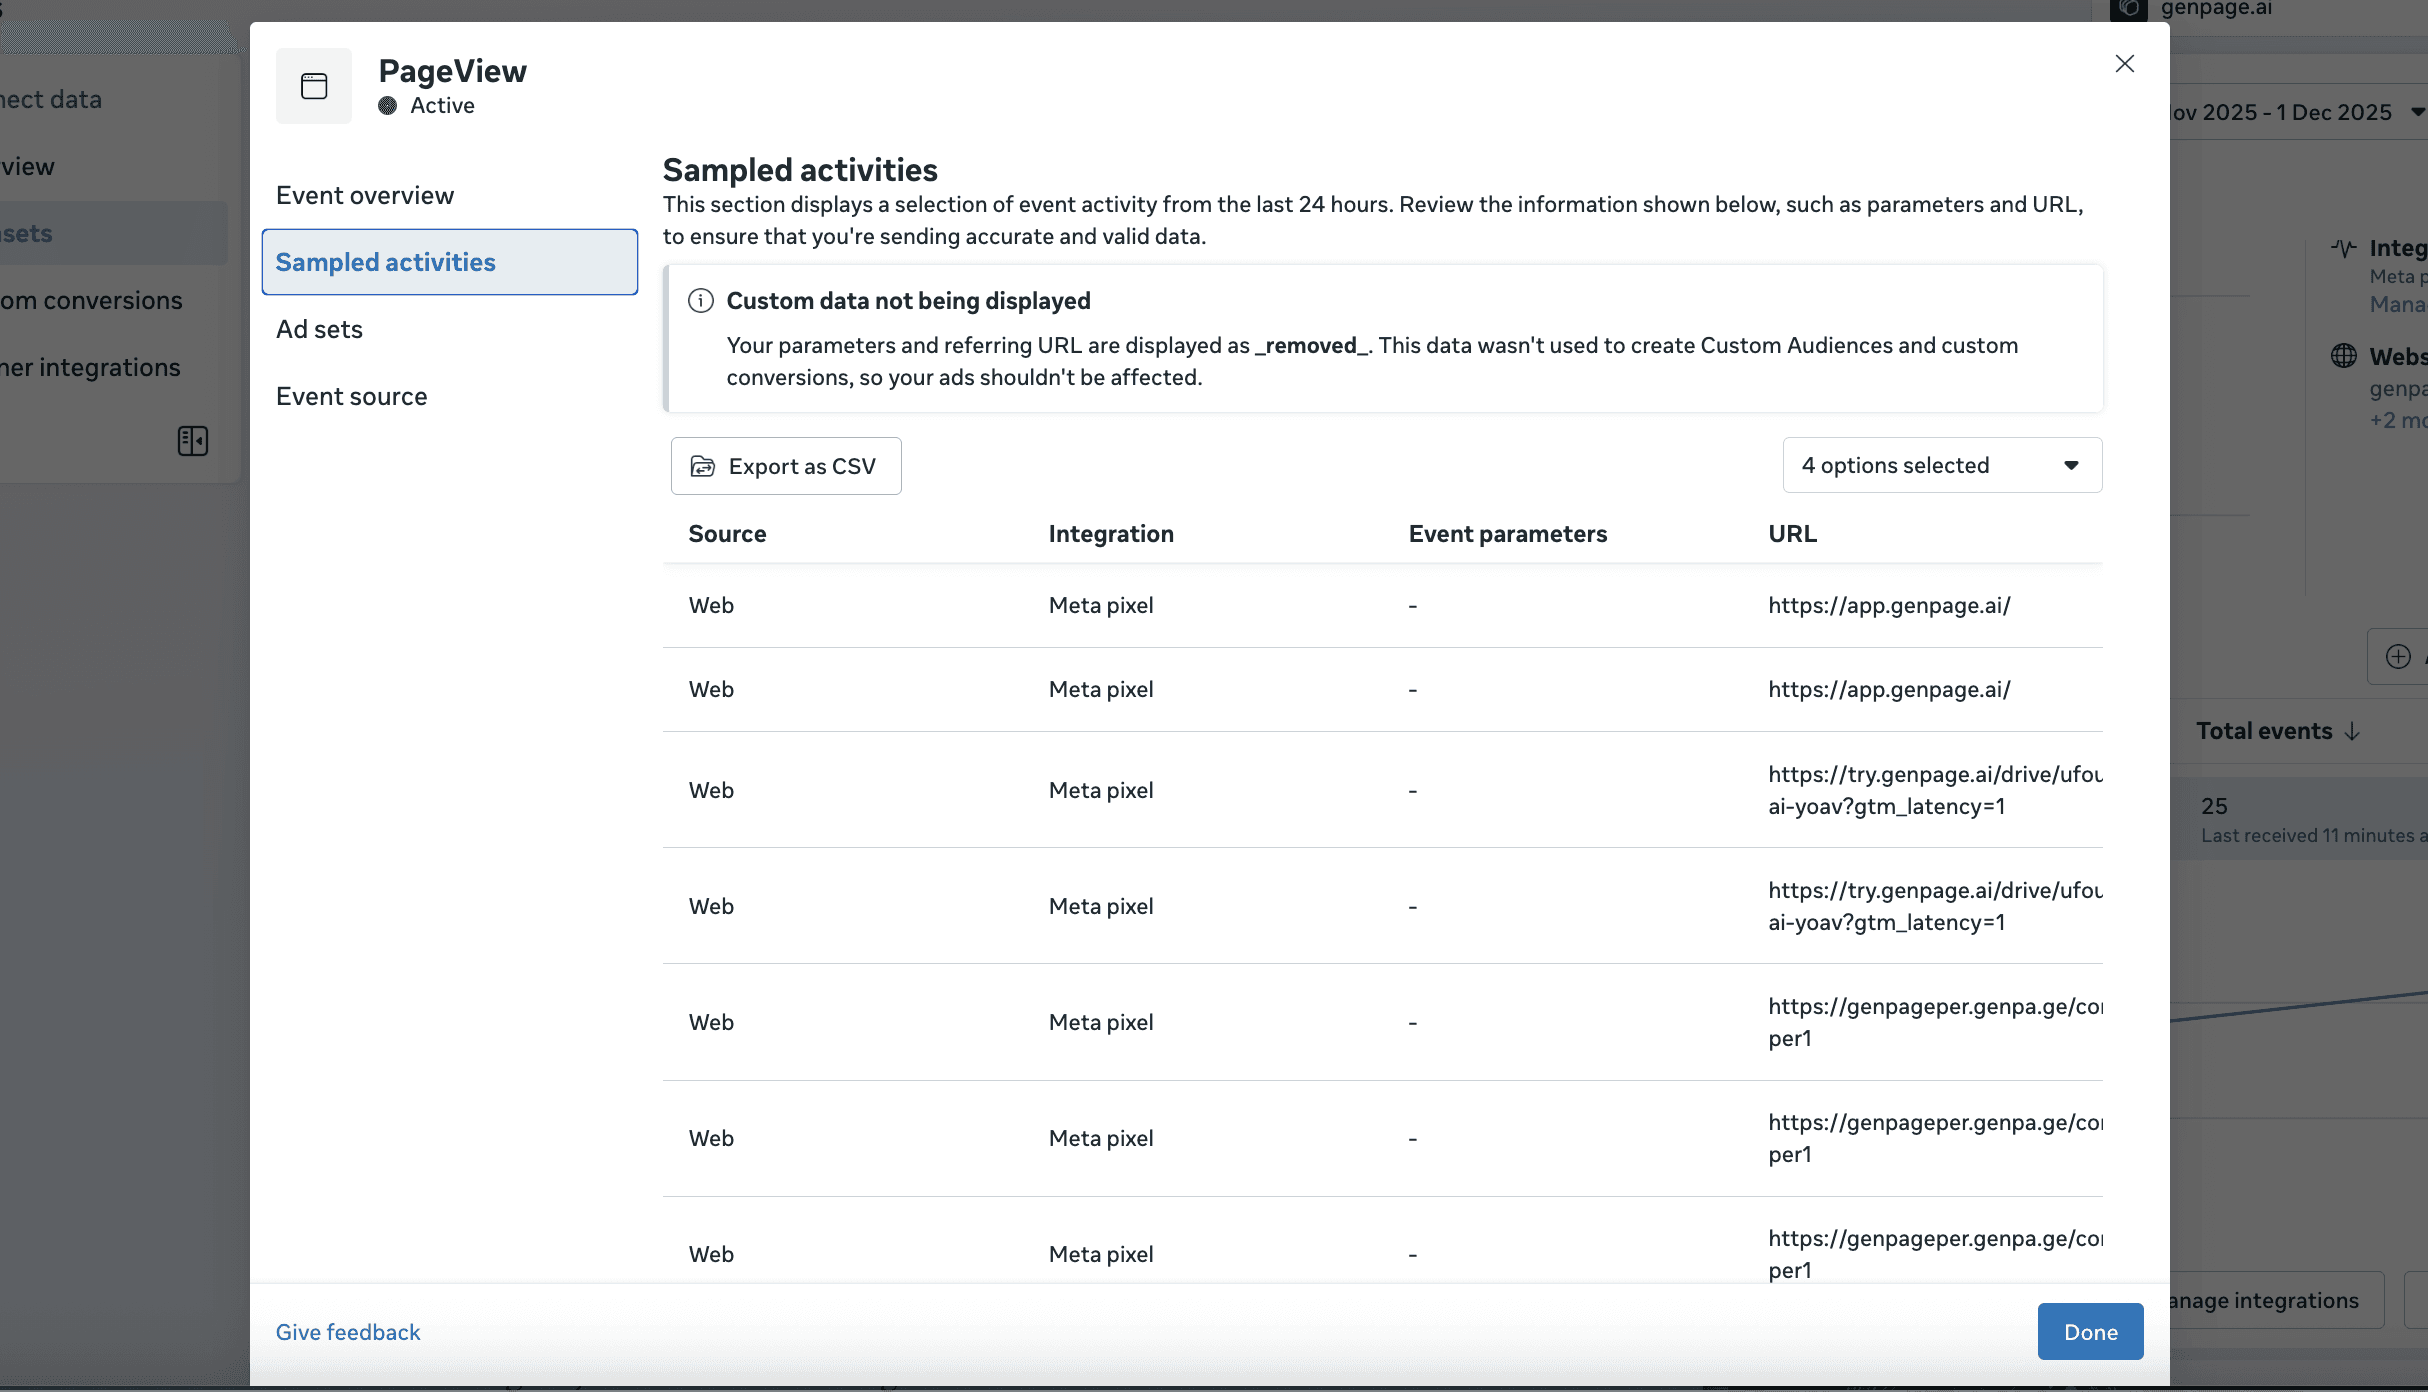
You can view additional information and ensure your pages are firing properly by clicking "View Details" in the bottom right of the events section, then selecting "View Sampled Activities". This will show you which page URLs have triggered your Pixel:
Need more help?
For support or troubleshooting, email us at: team@genpage.ai

