

Personalizing your GenPage links with your own domain is simple. Just follow the steps below:
Step 1 - Add a DNS Record
Go to your DNS provider (Cloudflare, GoDaddy, 101domain, etc.) and create a new A Record.
Record Settings:
Name: Choose a subdomain that will be used exclusively for GenPage. Example: If you enter
try, your pages will look like:
https://try.example.com/teslaorhttps://try.example.com/apple.
Important: Do not use a subdomain that is already in use elsewhere.
IPv4 Address: Use the IP address provided by GenPage. You’ll see this in your GenPage brand settings.
TTL: Set to Auto if available. If not, any value will work.
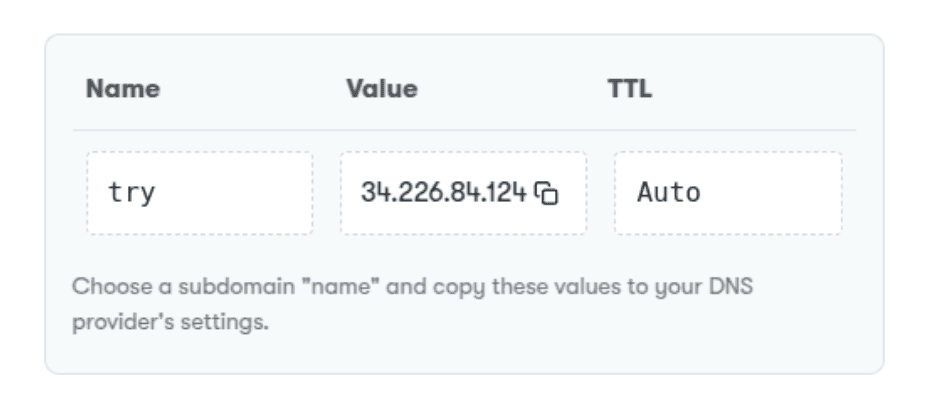
Copy the IP value from your GenPage settings
Note: If you’re using GoDaddy, 101domain, or another provider, the interface may look slightly different from Cloudflare, but the settings are the same.
Note 2: If you’re using Cloudflare, please make sure to disable the "proxy" option in order to proceed.

Cloudflare A record settings
Step 2 - Configure in GenPage
Go to GenPage Settings → Brand.
Fill out your custom domain information (ex:
https://try.example.com/)Click Save.
GenPage will automatically check if your domain is set up correctly:
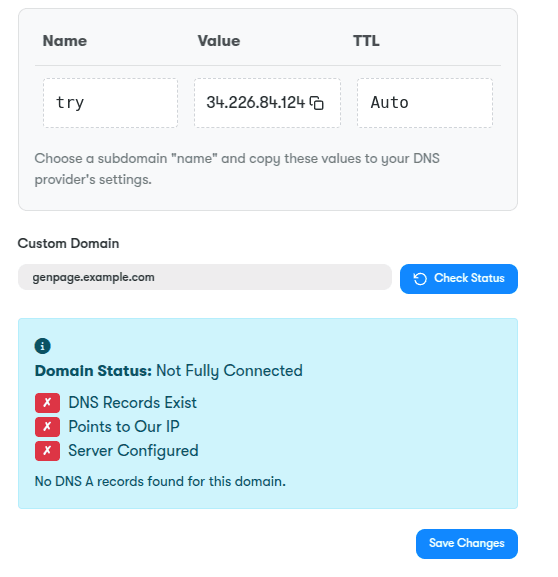
Custom domain connection in GenPage
Step 3 - Troubleshooting
If there are issues, you’ll see red error boxes with one of the following messages:
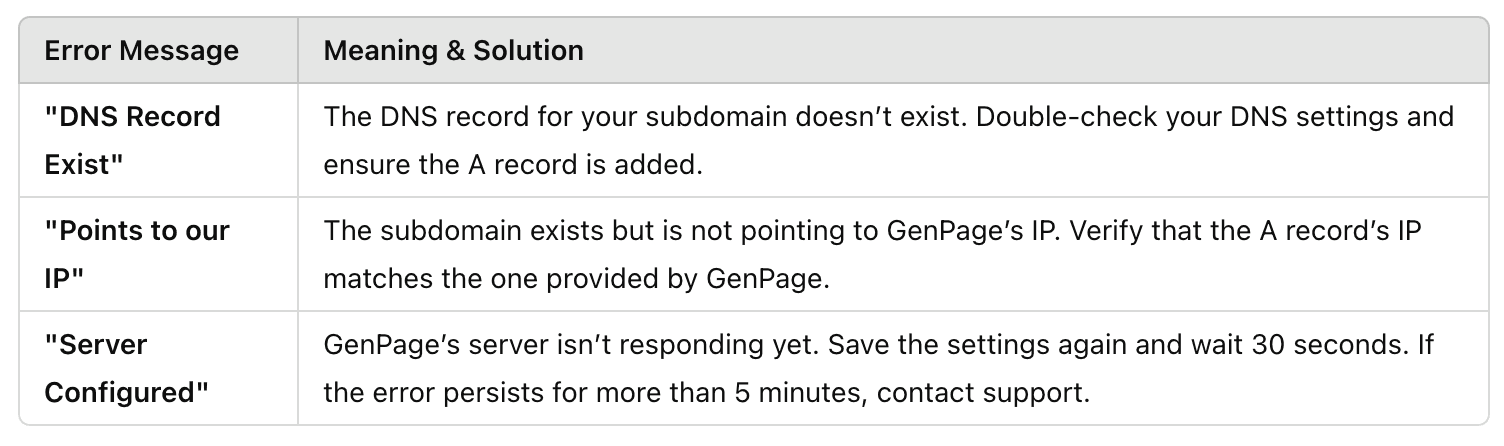
Possible errors and solutions
Success
Once all checks turn green, your custom domain is live!
You can now check your leads, and the links will use your domain, like:
https://try.example.com/tesla
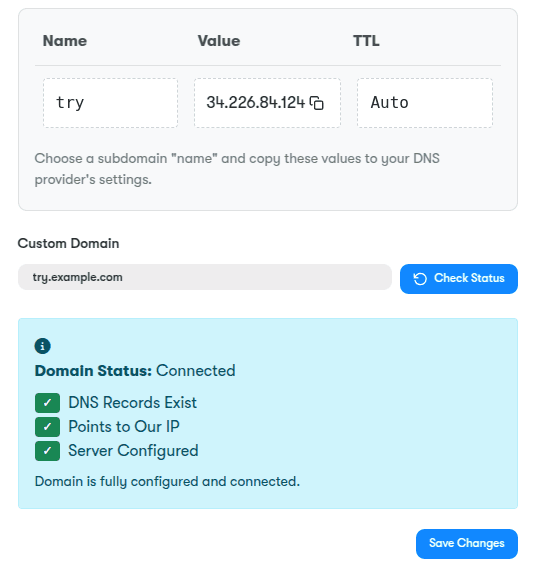
Custom domain is connected
Helpful Links
Domain registrars and hosting companies typically have their own custom panel for DNS management, but this can typically be done under Domain Settings > DNS Records.
Listed below is a list of support articles for the most commonly used domain registrars:
• NameCheap. Adding A Record
• GoDaddy. Adding A Record
• Ionos 1&1. Adding A Record
• Gandi. Adding A Record