

With the Persana AI x GenPage integration, you can create a lean, AI-powered outbound workflow.
That means you can:
Build targeted lead lists with Persana AI
Enrich those leads with LinkedIn bios, posts, and company news
Layer on AI-driven context variables
Auto-generate personalized landing pages in GenPage
Sync GenPage URLs back into Persana for use in your outreach
This guide walks you through the full flow, step by step.
📺 Want the full walkthrough?
Watch the replay of our launch webinar with Sriya Maram (CEO @ Persana AI) and Samy Barbier (CEO @ GenPage), where we demo the entire setup step by step.
📊 Curious about results?
Check out our case study with LeadCat, where adding GenPage links into outbound emails delivered 3X more meetings.
Step 1: Create a Lead List in Persana
Log in to Persana AI
Click "Create Lead List" (or use Persana AI's new Vibe GTM tool - just describe your ideal leads and let AI do the rest!)
Use signals (ICP filters, intent data, job changes, etc.) to build a targeted lead list
Save your list for enrichment:
Creating a targeted lead list in Persana AI with ICP filters
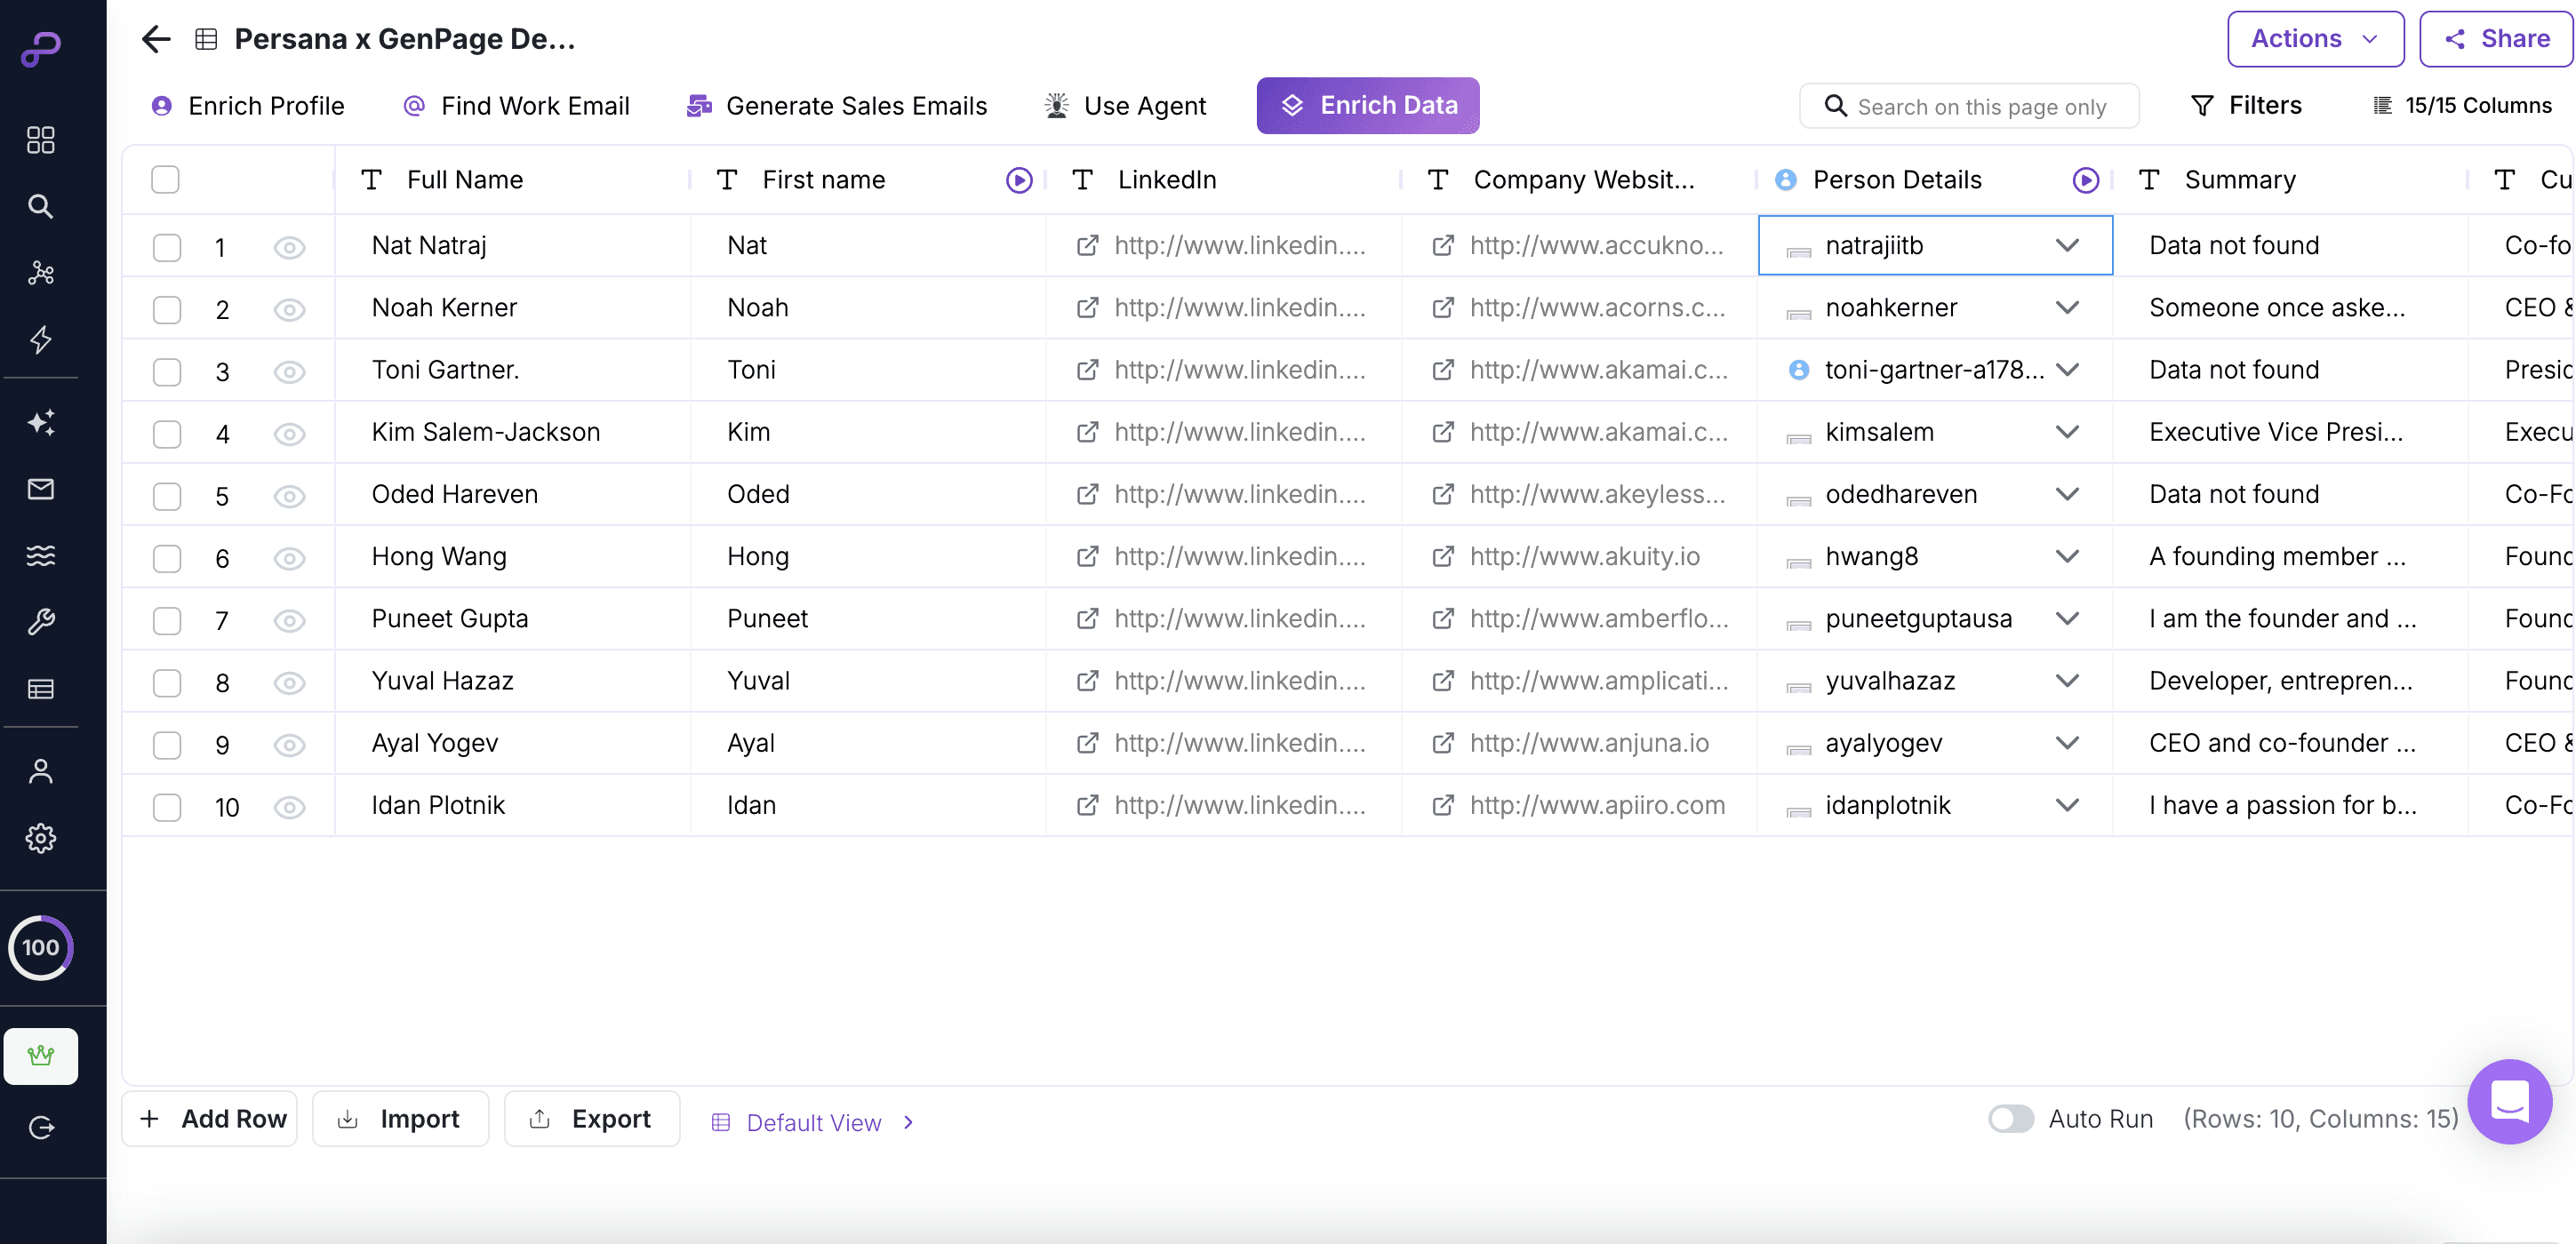
Step 2: Add Standard Enrichments
Persana provides 100+ enrichments. For this example, we'll use the following enrichments:
LinkedIn Description (headline + summary)
Recent Posts (captures tone and active topics)
Company News (latest events, press, and milestones)
These will serve as context for the AI to use to create hyper-personalized messaging for your GenPage campaigns. Feel free to use any enrichment you'd like to leverage in your landing pages or in AI variables.
To add these enrichments to your table:
Navigate to a new column
Click "Add Column"
Select "Enrichment"
Browse Persana's library, and select the enrichment you'd like to add:
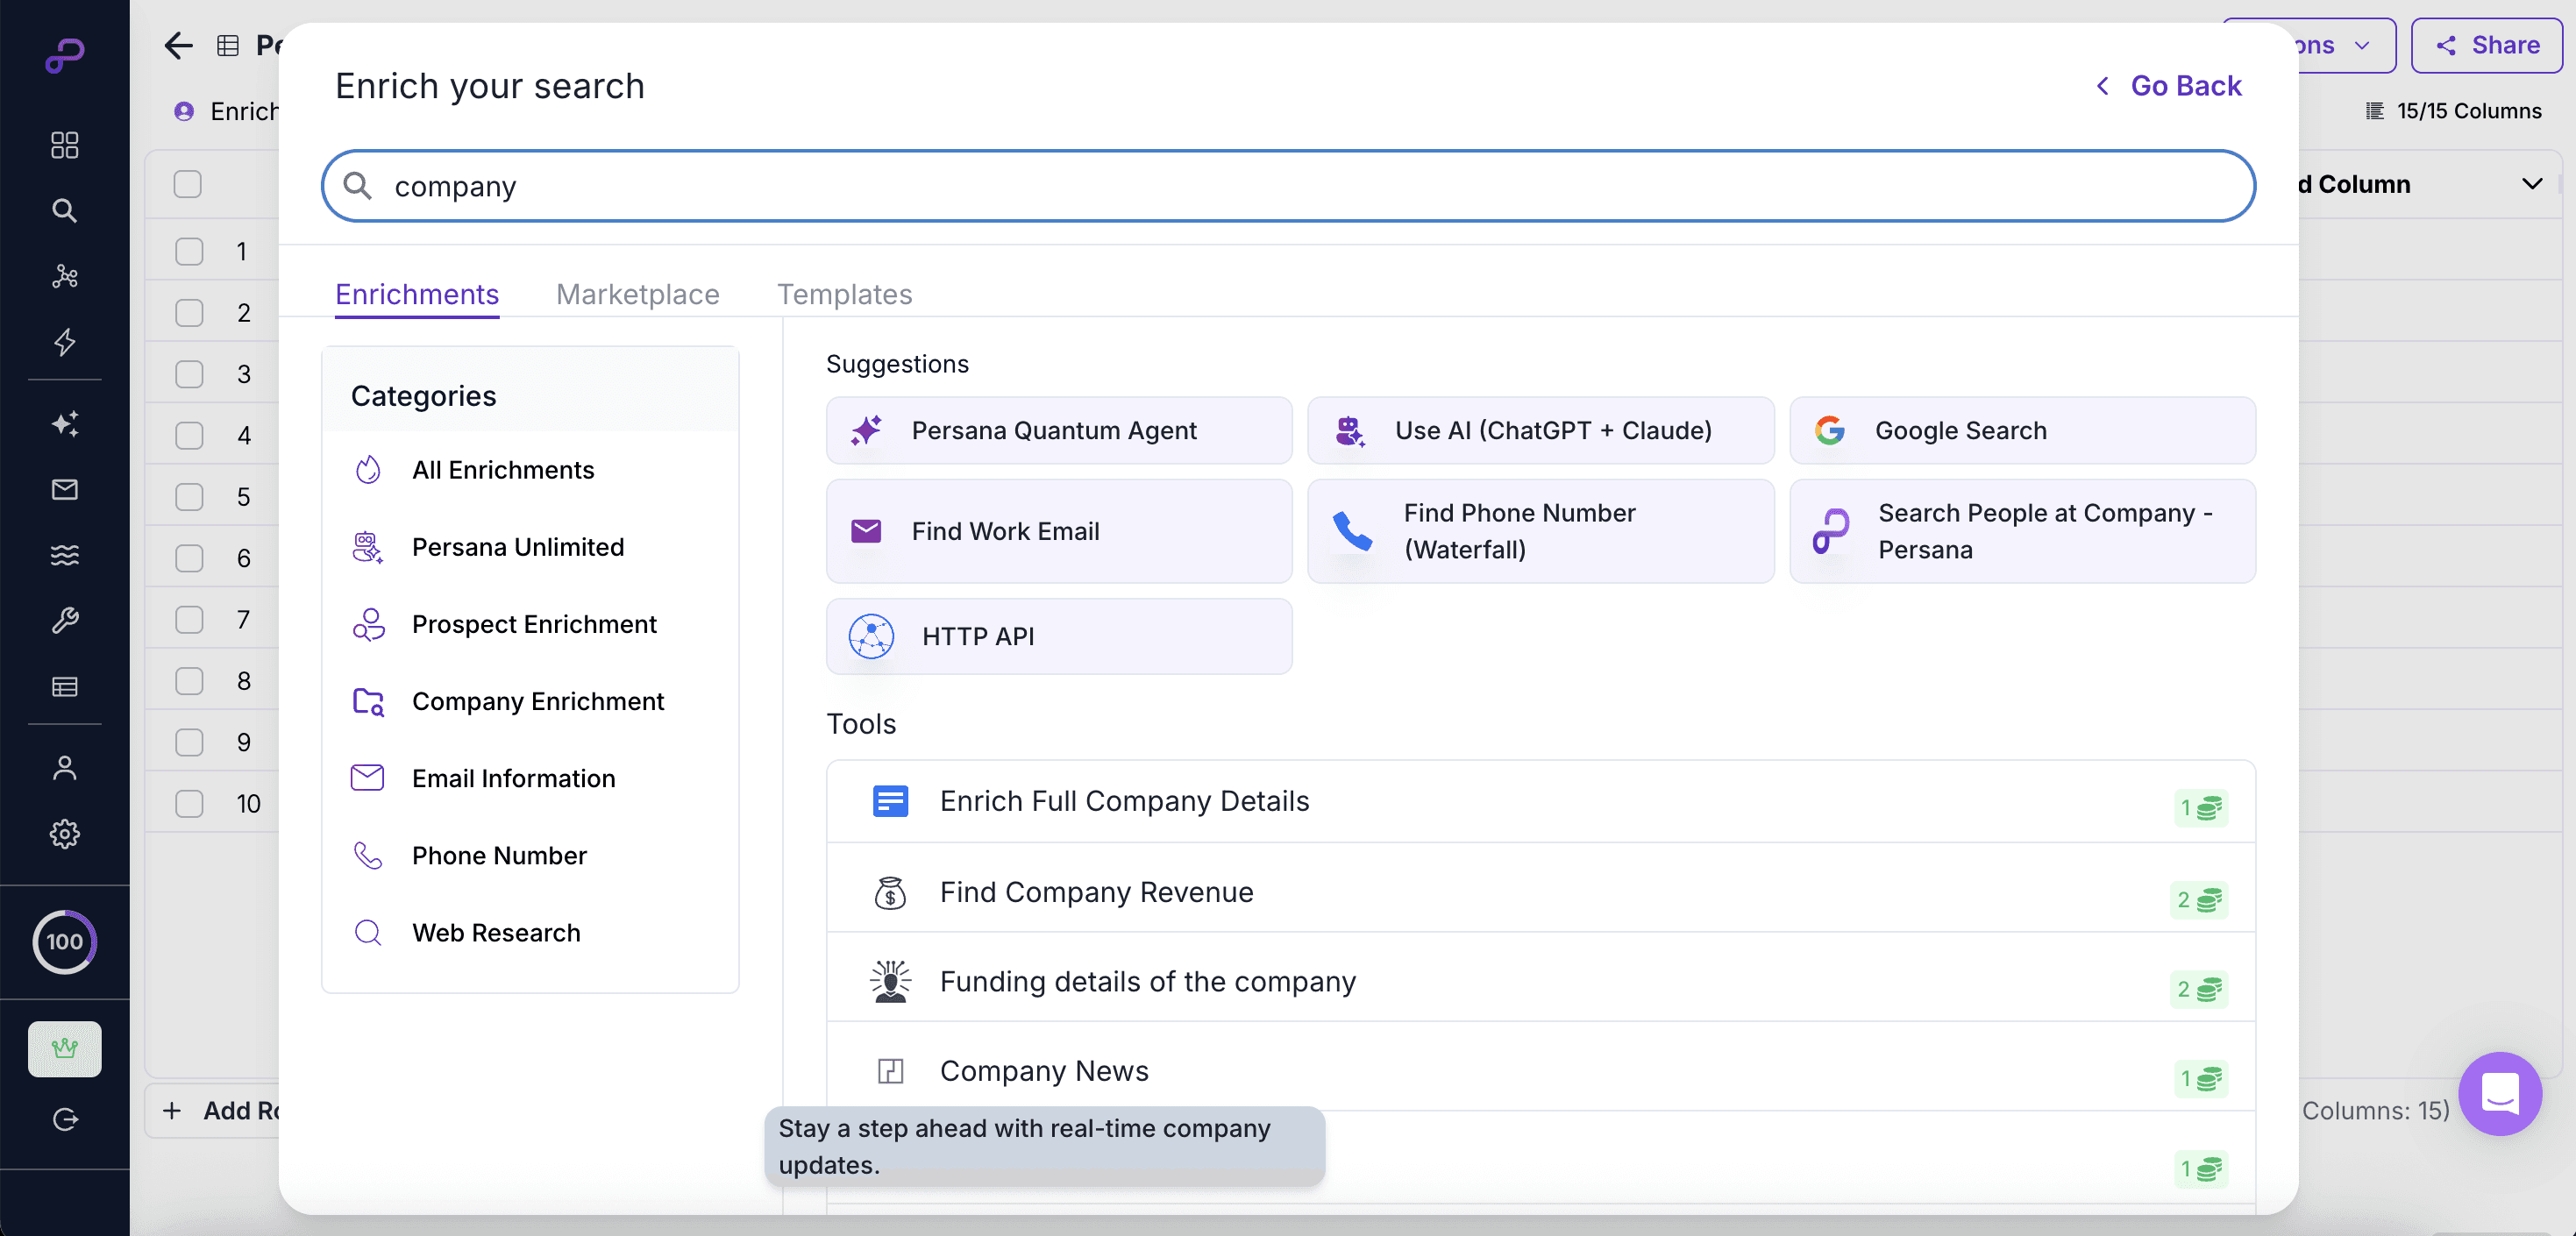
Adding enrichments to your table via Persana's enrichment library
Step 3: Add AI Enrichments
Use Persana’s AI Enrichments to generate messaging based on the context variables created in the previous step. These will then map directly to GenPage variables you can use in sections of your landing pages to display 1:1 messaging for each lead.
Note, you can also generate your own AI variables in GenPage, following this guide.
For this demo, we'll generate a personalized icebreaker for our hero section as well as a personalized footer for each lead.
Navigate to a new column
Click "Add Column"
Select "Enrichment"
Select "Use AI (ChatGPT + Claude)" in the library
Add your prompt, and reference your context variables by typing "/" and selecting the appropriate column.
It's important here to add any relevant information about your strategy, products, or services you want the AI to leverage to create your messaging:
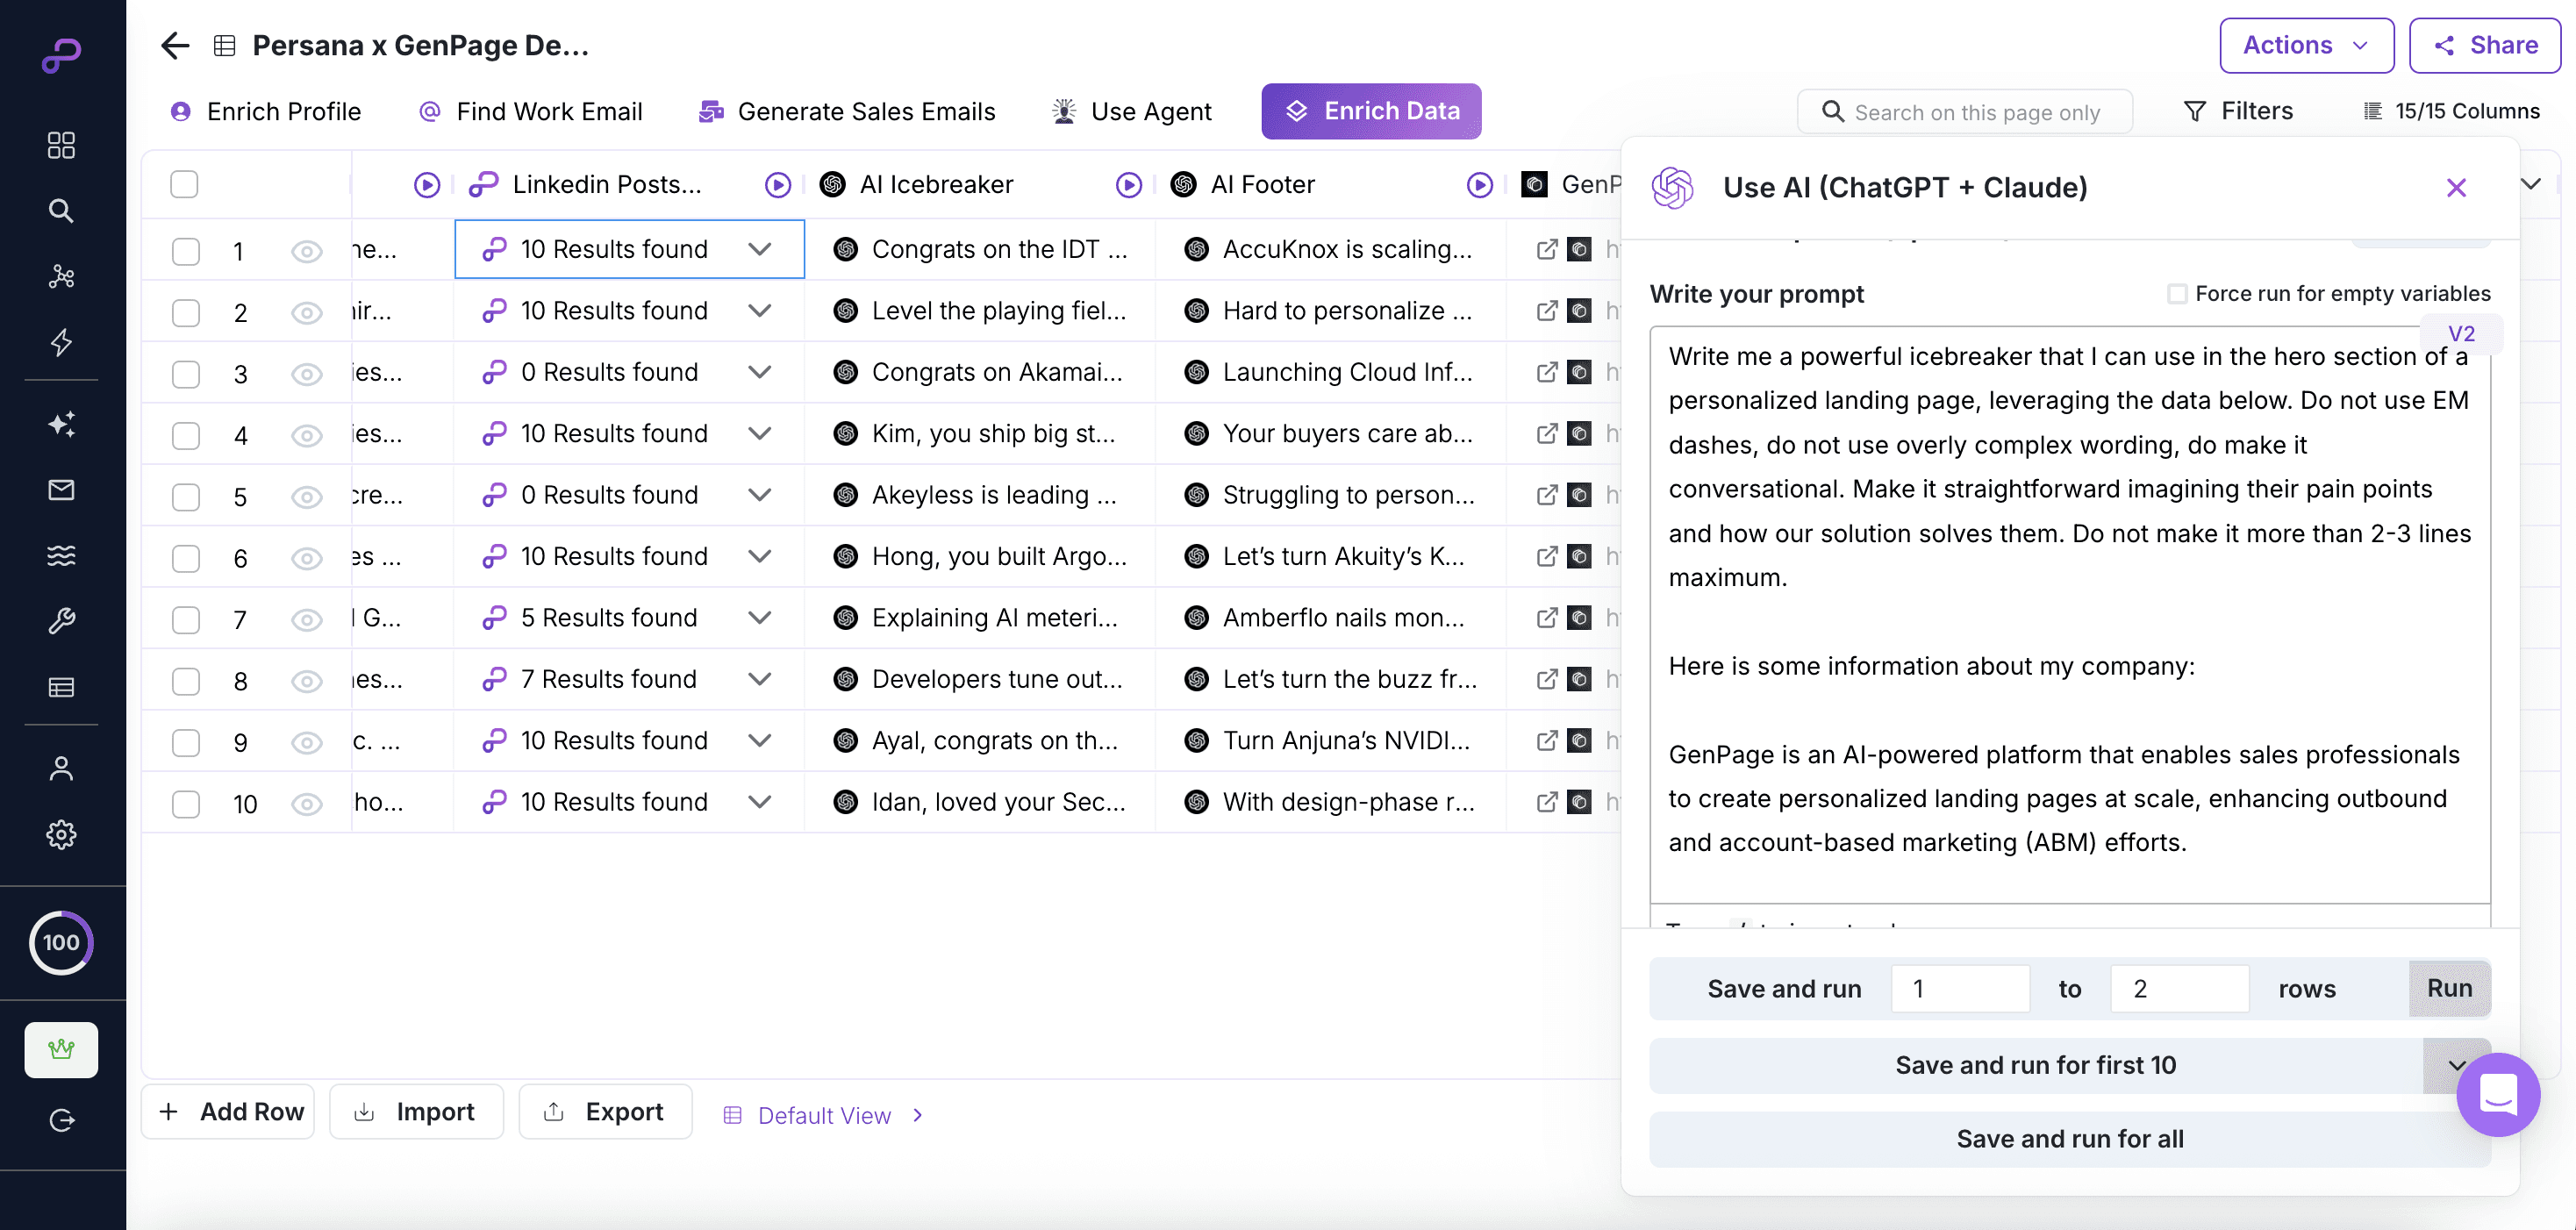
Creating a hyper-personalized AI icebreaker in Persana AI
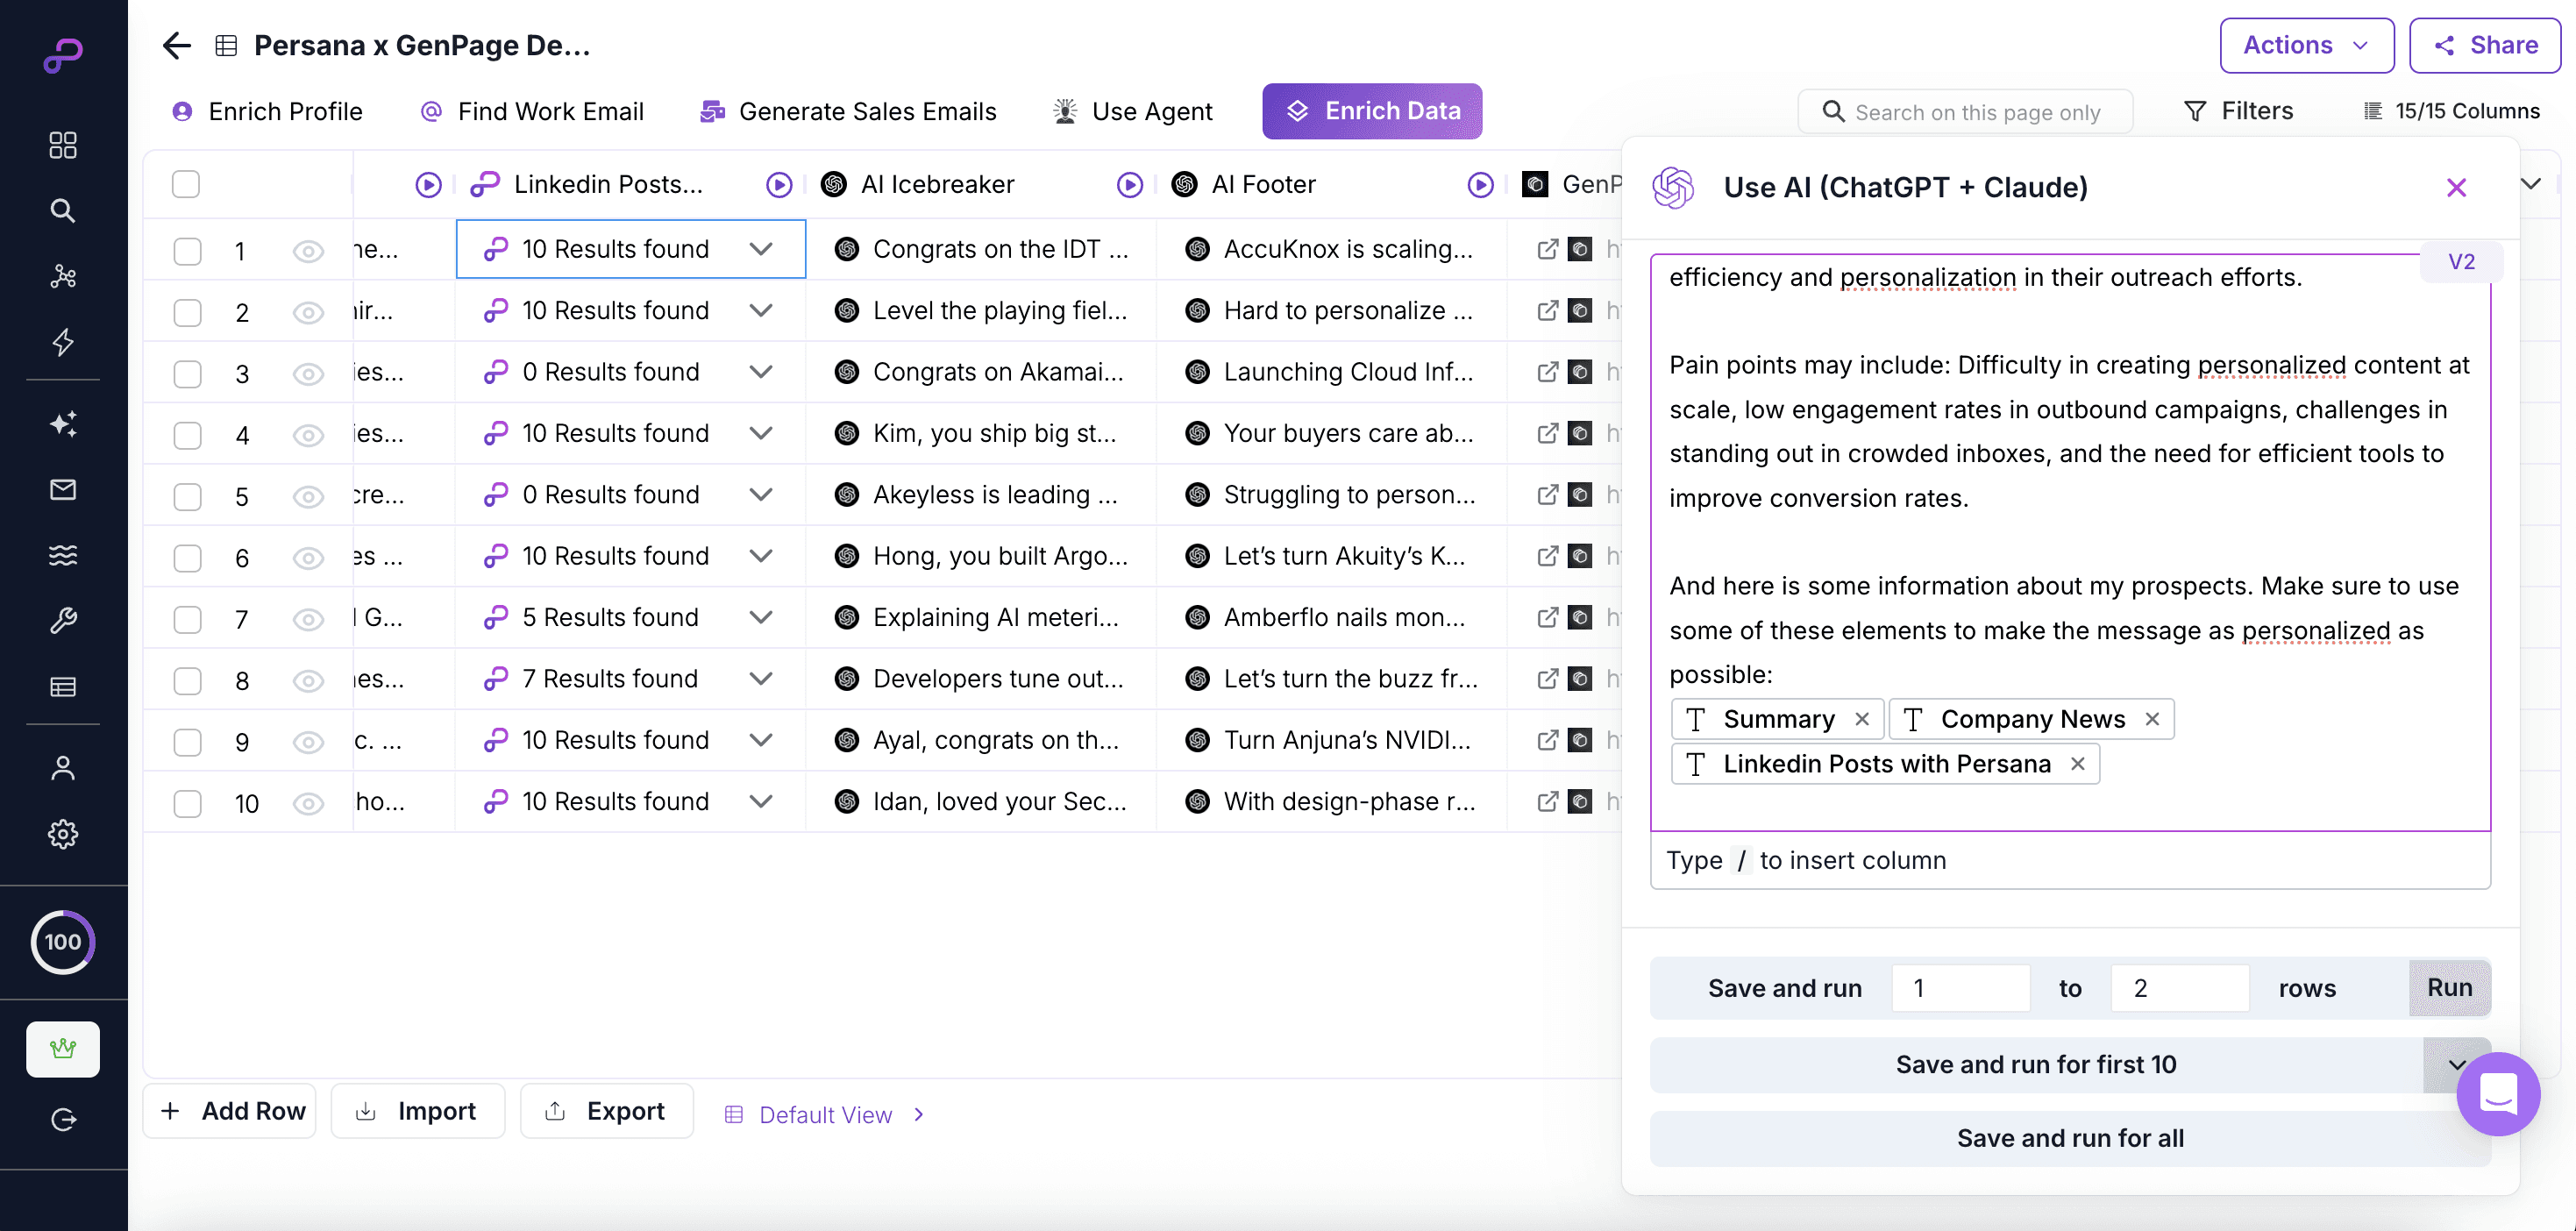
Creating AI variables referencing company news, LinkedIn summary, and recent LinkedIn posts
Step 4: Create New Variables in GenPage
In order to sync our Persana AI variables with GenPage and display them on our landing pages, we'll want to create new variables for all the non "default" variables (such as first name, company name, etc.). In this case, we're creating two new variables: AI Icebreaker and AI Footer.
Note, you only need to do this once, for new variables only. Variables you've created previously will always be available in Persana AI for future use.
Log In to GenPage
Click the "Variables" menu
Click "Create Variable"
Select "Custom Variable" and enter a name for your variable, e.g. Persana Icebreaker:
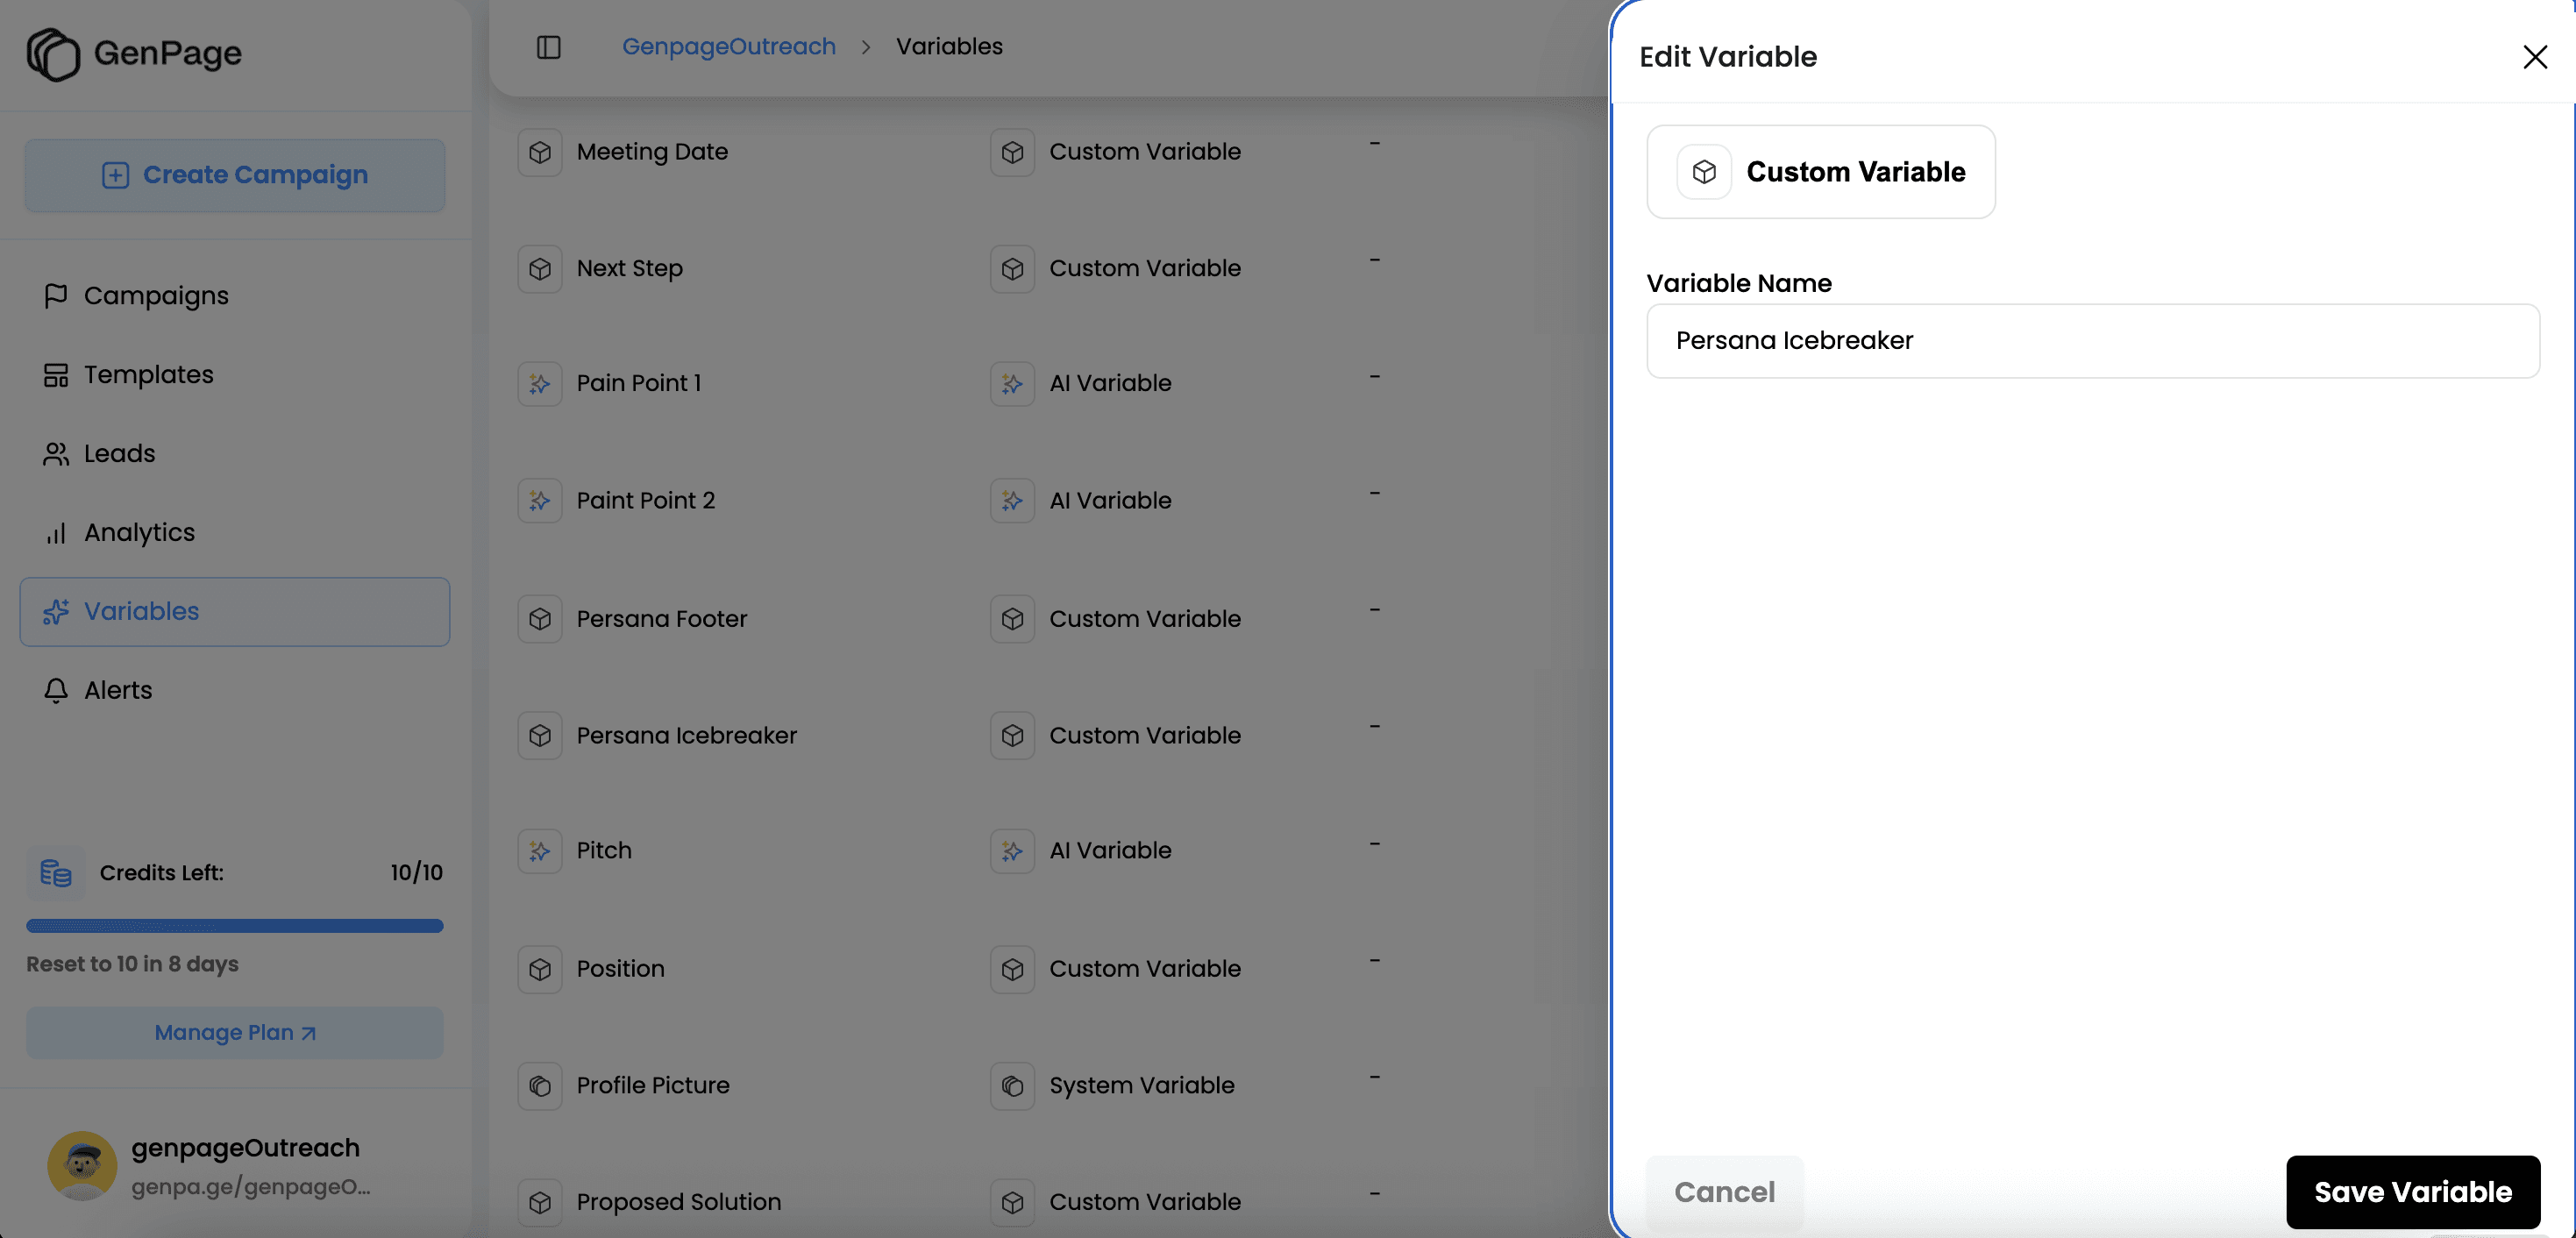
Creating a custom variable in GenPage to sync Persana AI messaging
Step 5: Create a GenPage Campaign & Add Variables
Now, we'll want to place our variables within our GenPage landing page template. This will allow the individual messaging from Persana AI to sync to GenPage, and create a unique variation of your landing page for each lead.
In GenPage, click "Create Campaign" (or use an existing campaign)
Click "Template"
Create your landing page template using our pre-made blocks
Navigate to the section you'd like to place a variable into
Select your variable from the dropdown:
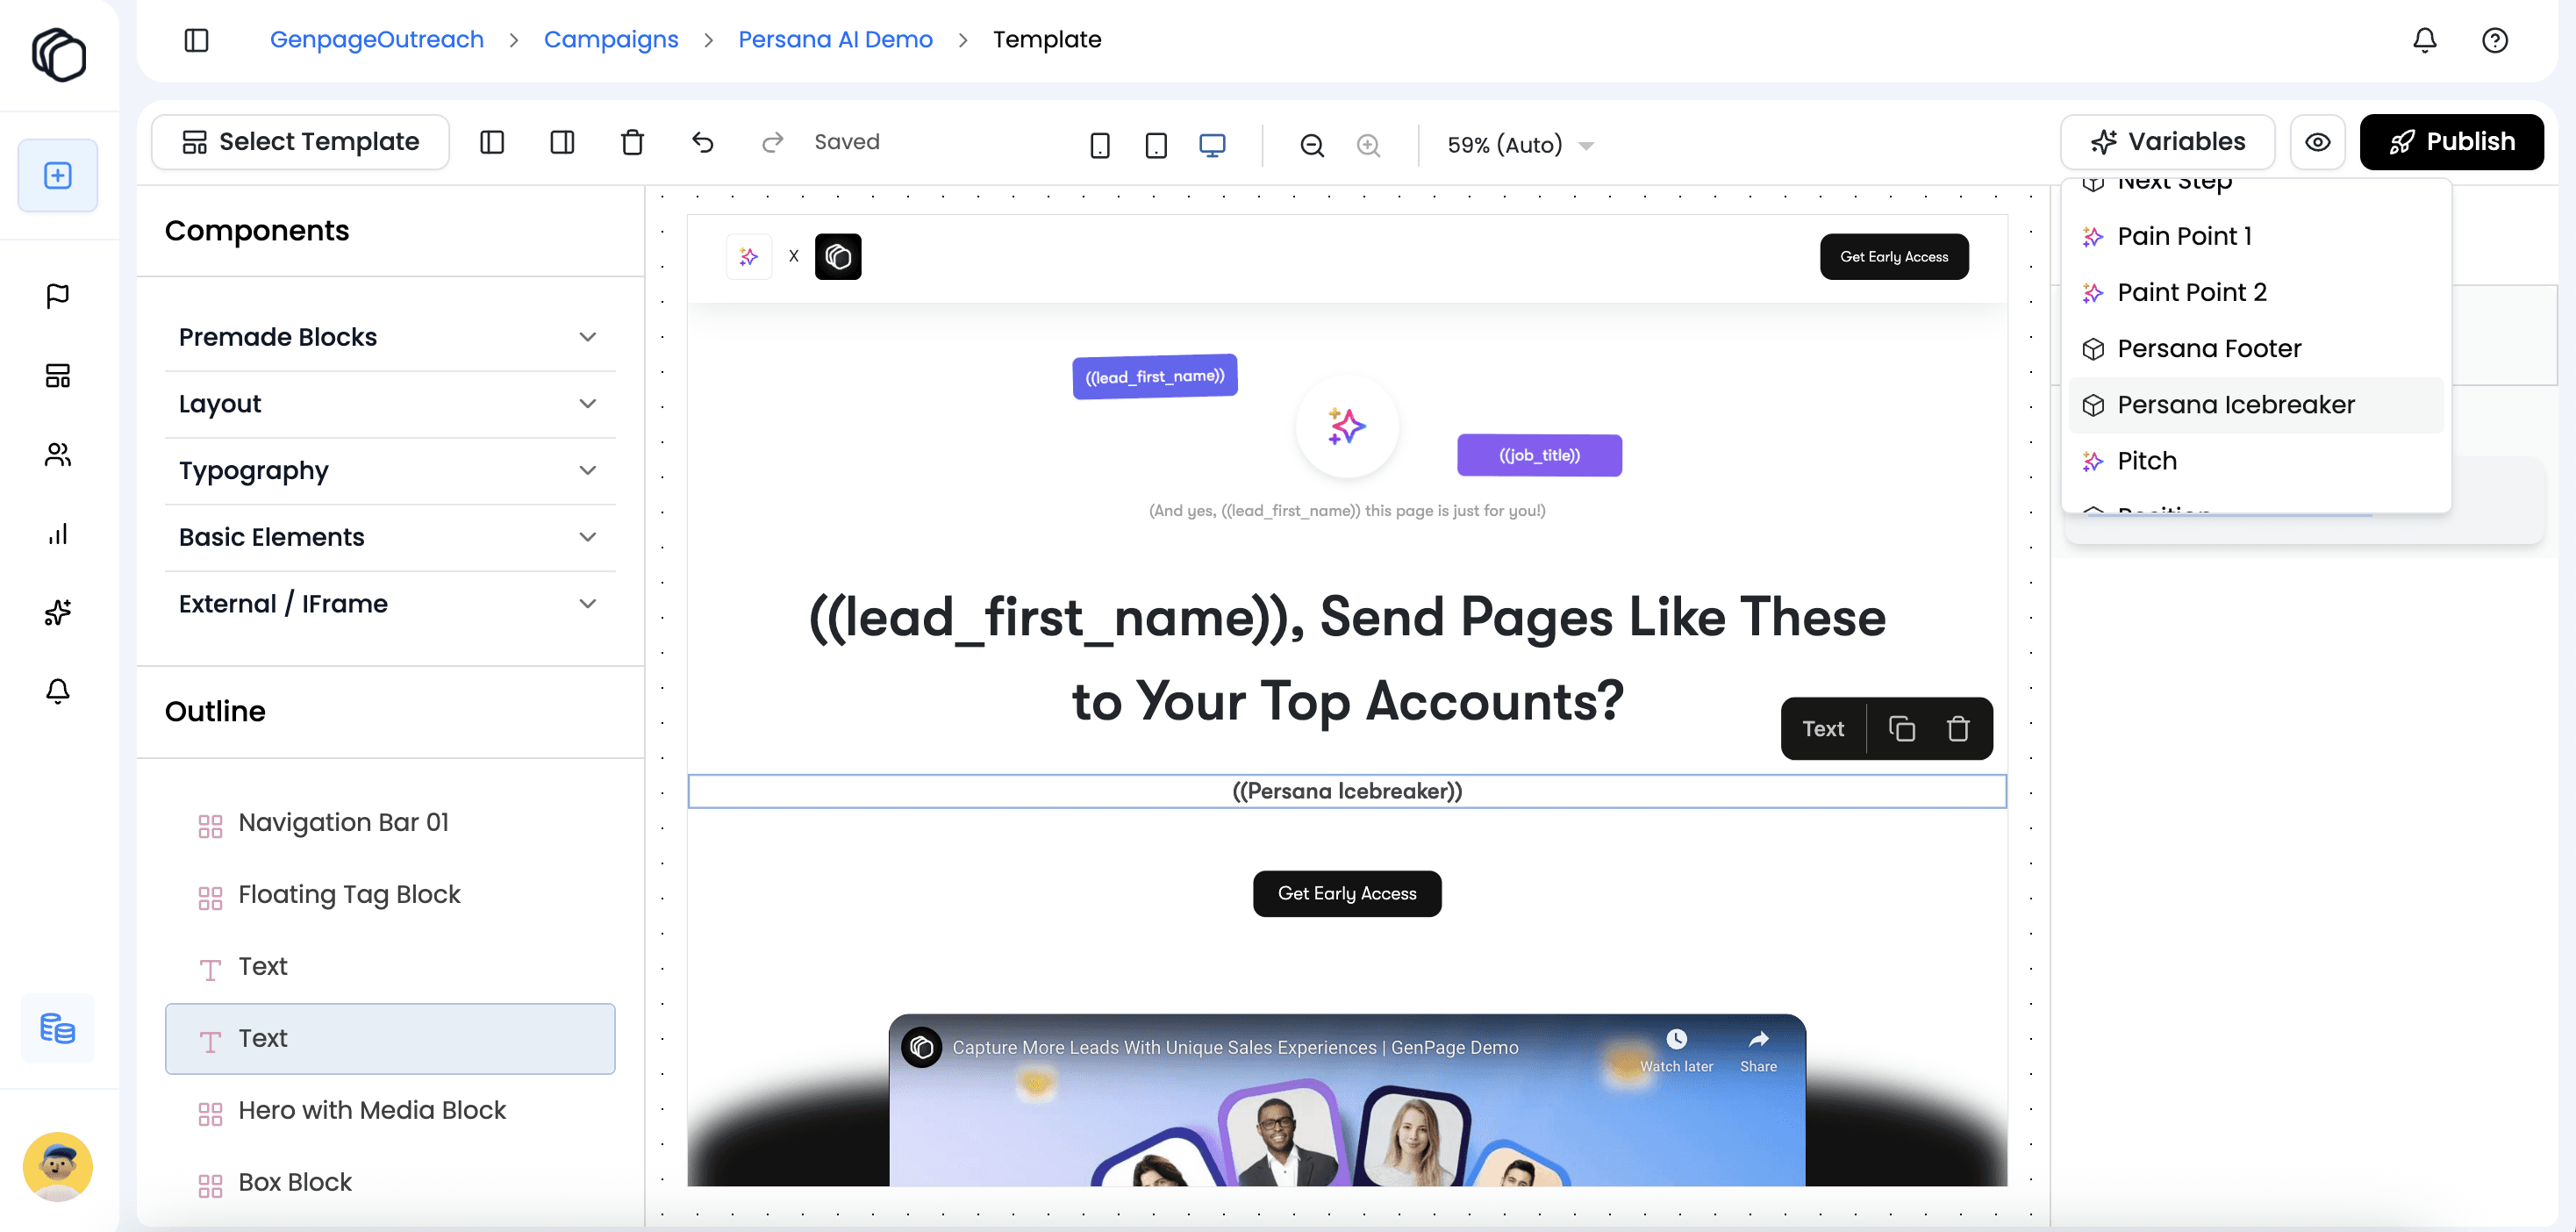
Adding Persana variables to your landing page template
Step 6: Generate Landing Pages at Scale
We're almost there! The next step will be to connect Persana AI and GenPage via API to sync leads and lead data, and generate a unique landing page for each of them.
Navigate to a new column
Click "Add Column"
Select "Enrichment"
Select "Generate Landing Page (GenPage)" in the library:
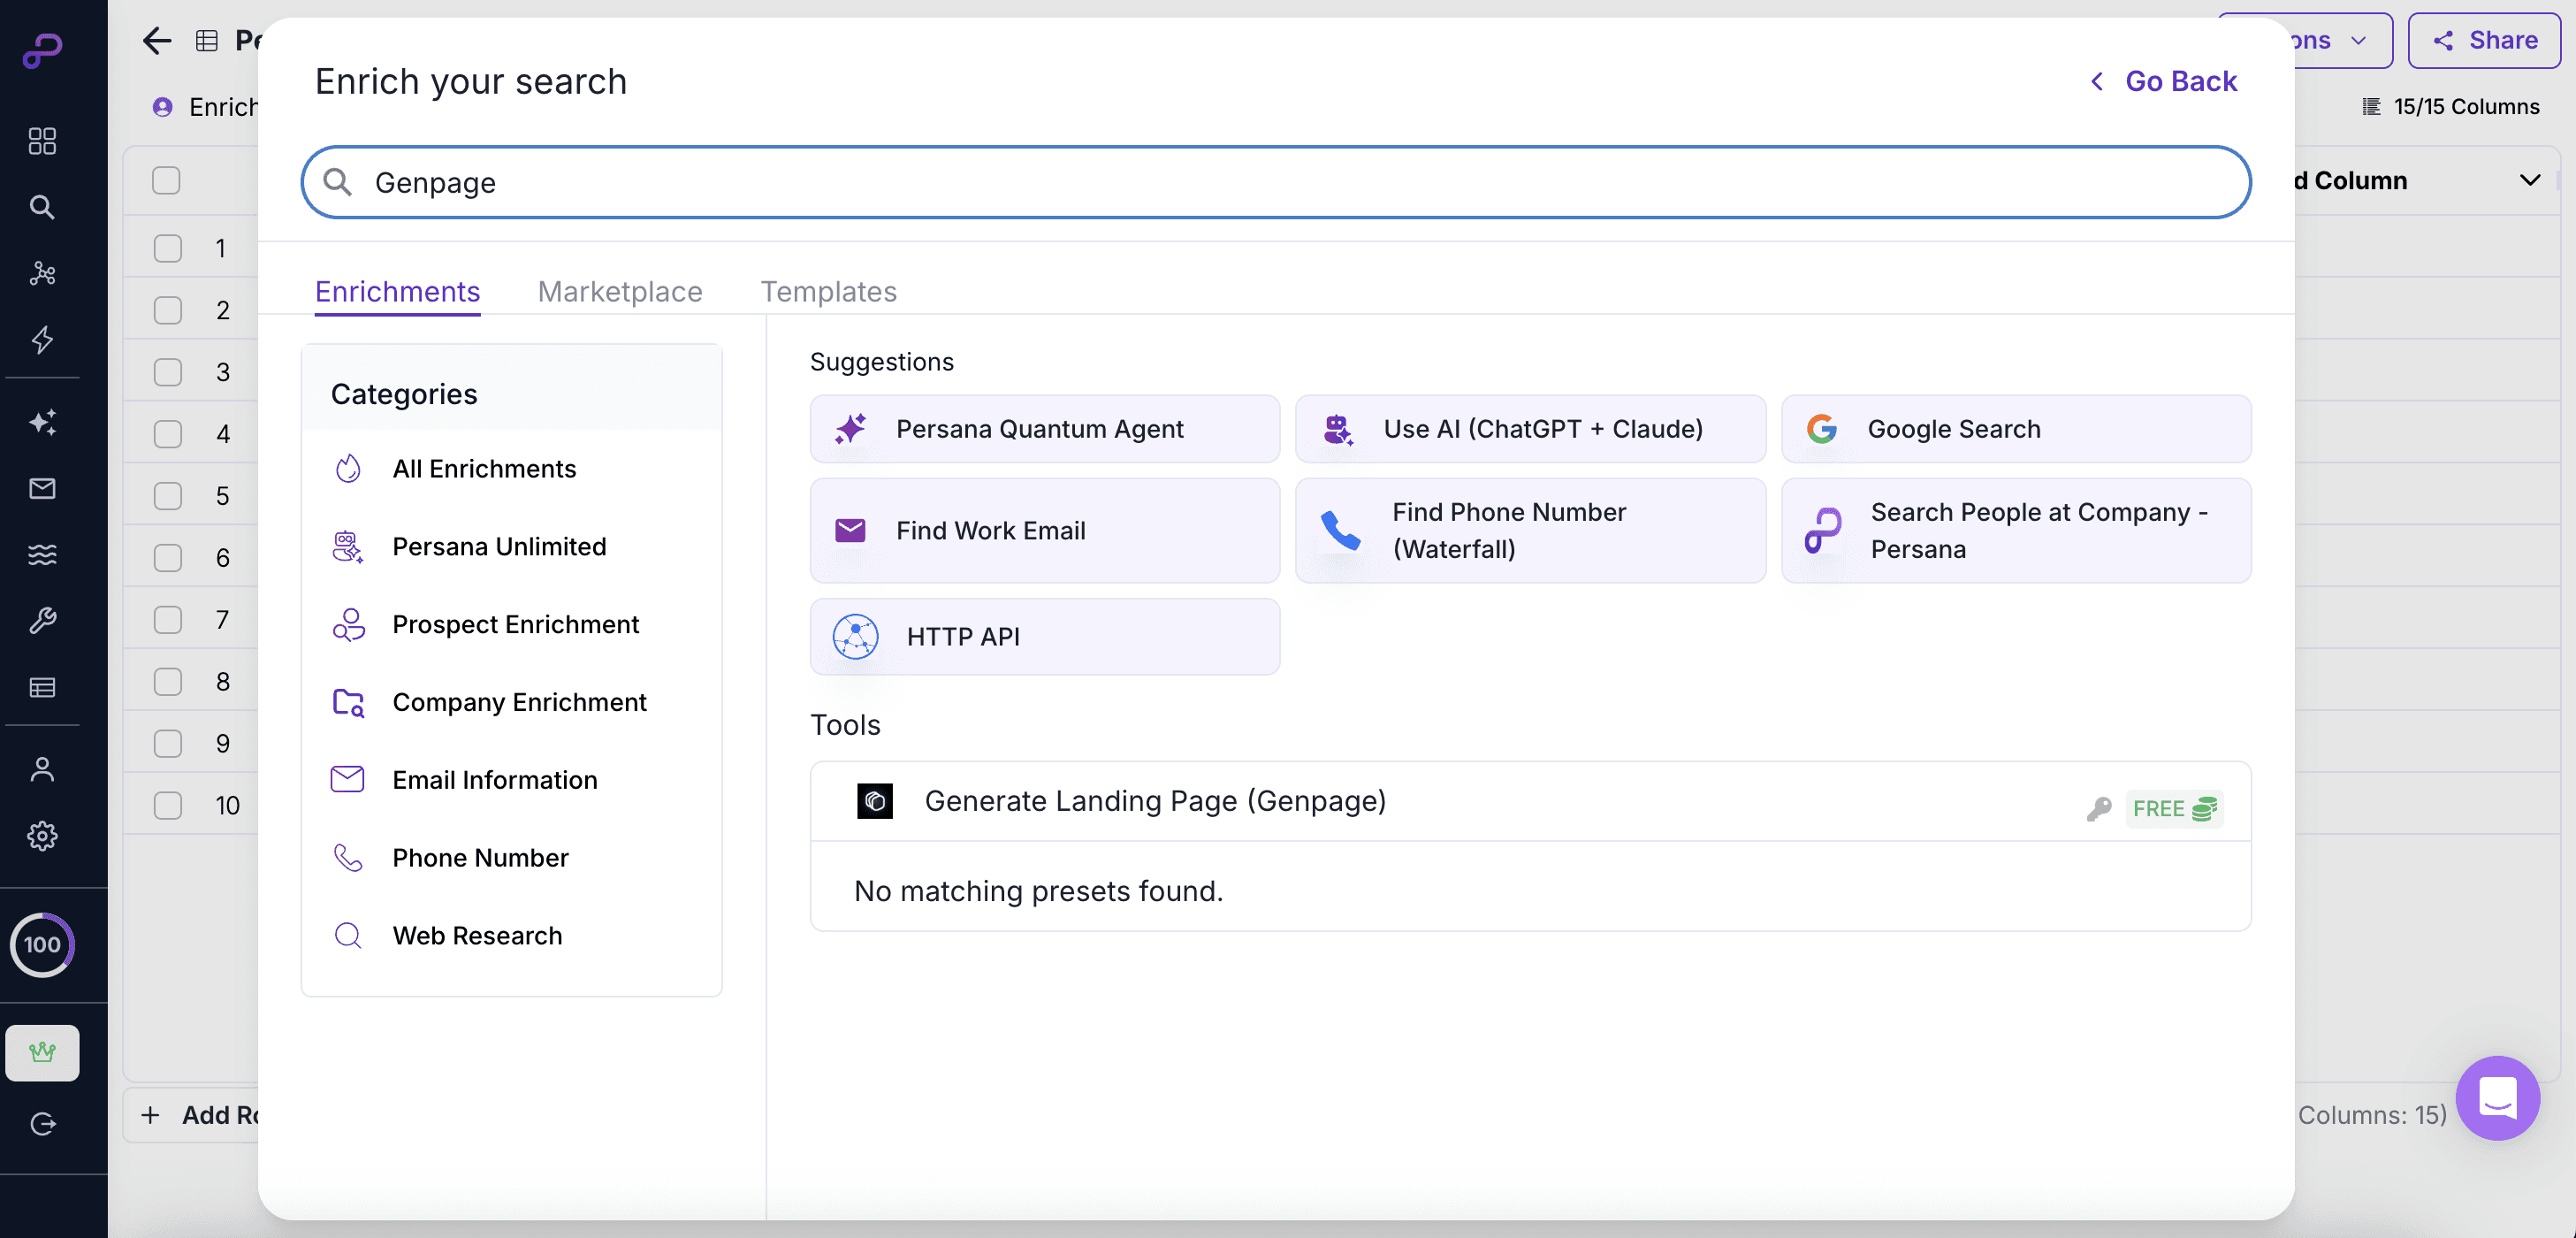
Selecting the GenPage enrichment in Persana AI
Then, you'll want to add your GenPage API Key. Here's how to find it:
Log In to GenPage
Go to Settings
Click "Integrations"
Click "GenPage API"
Name your Key, e.g. "Persana" and click "Get API Key"
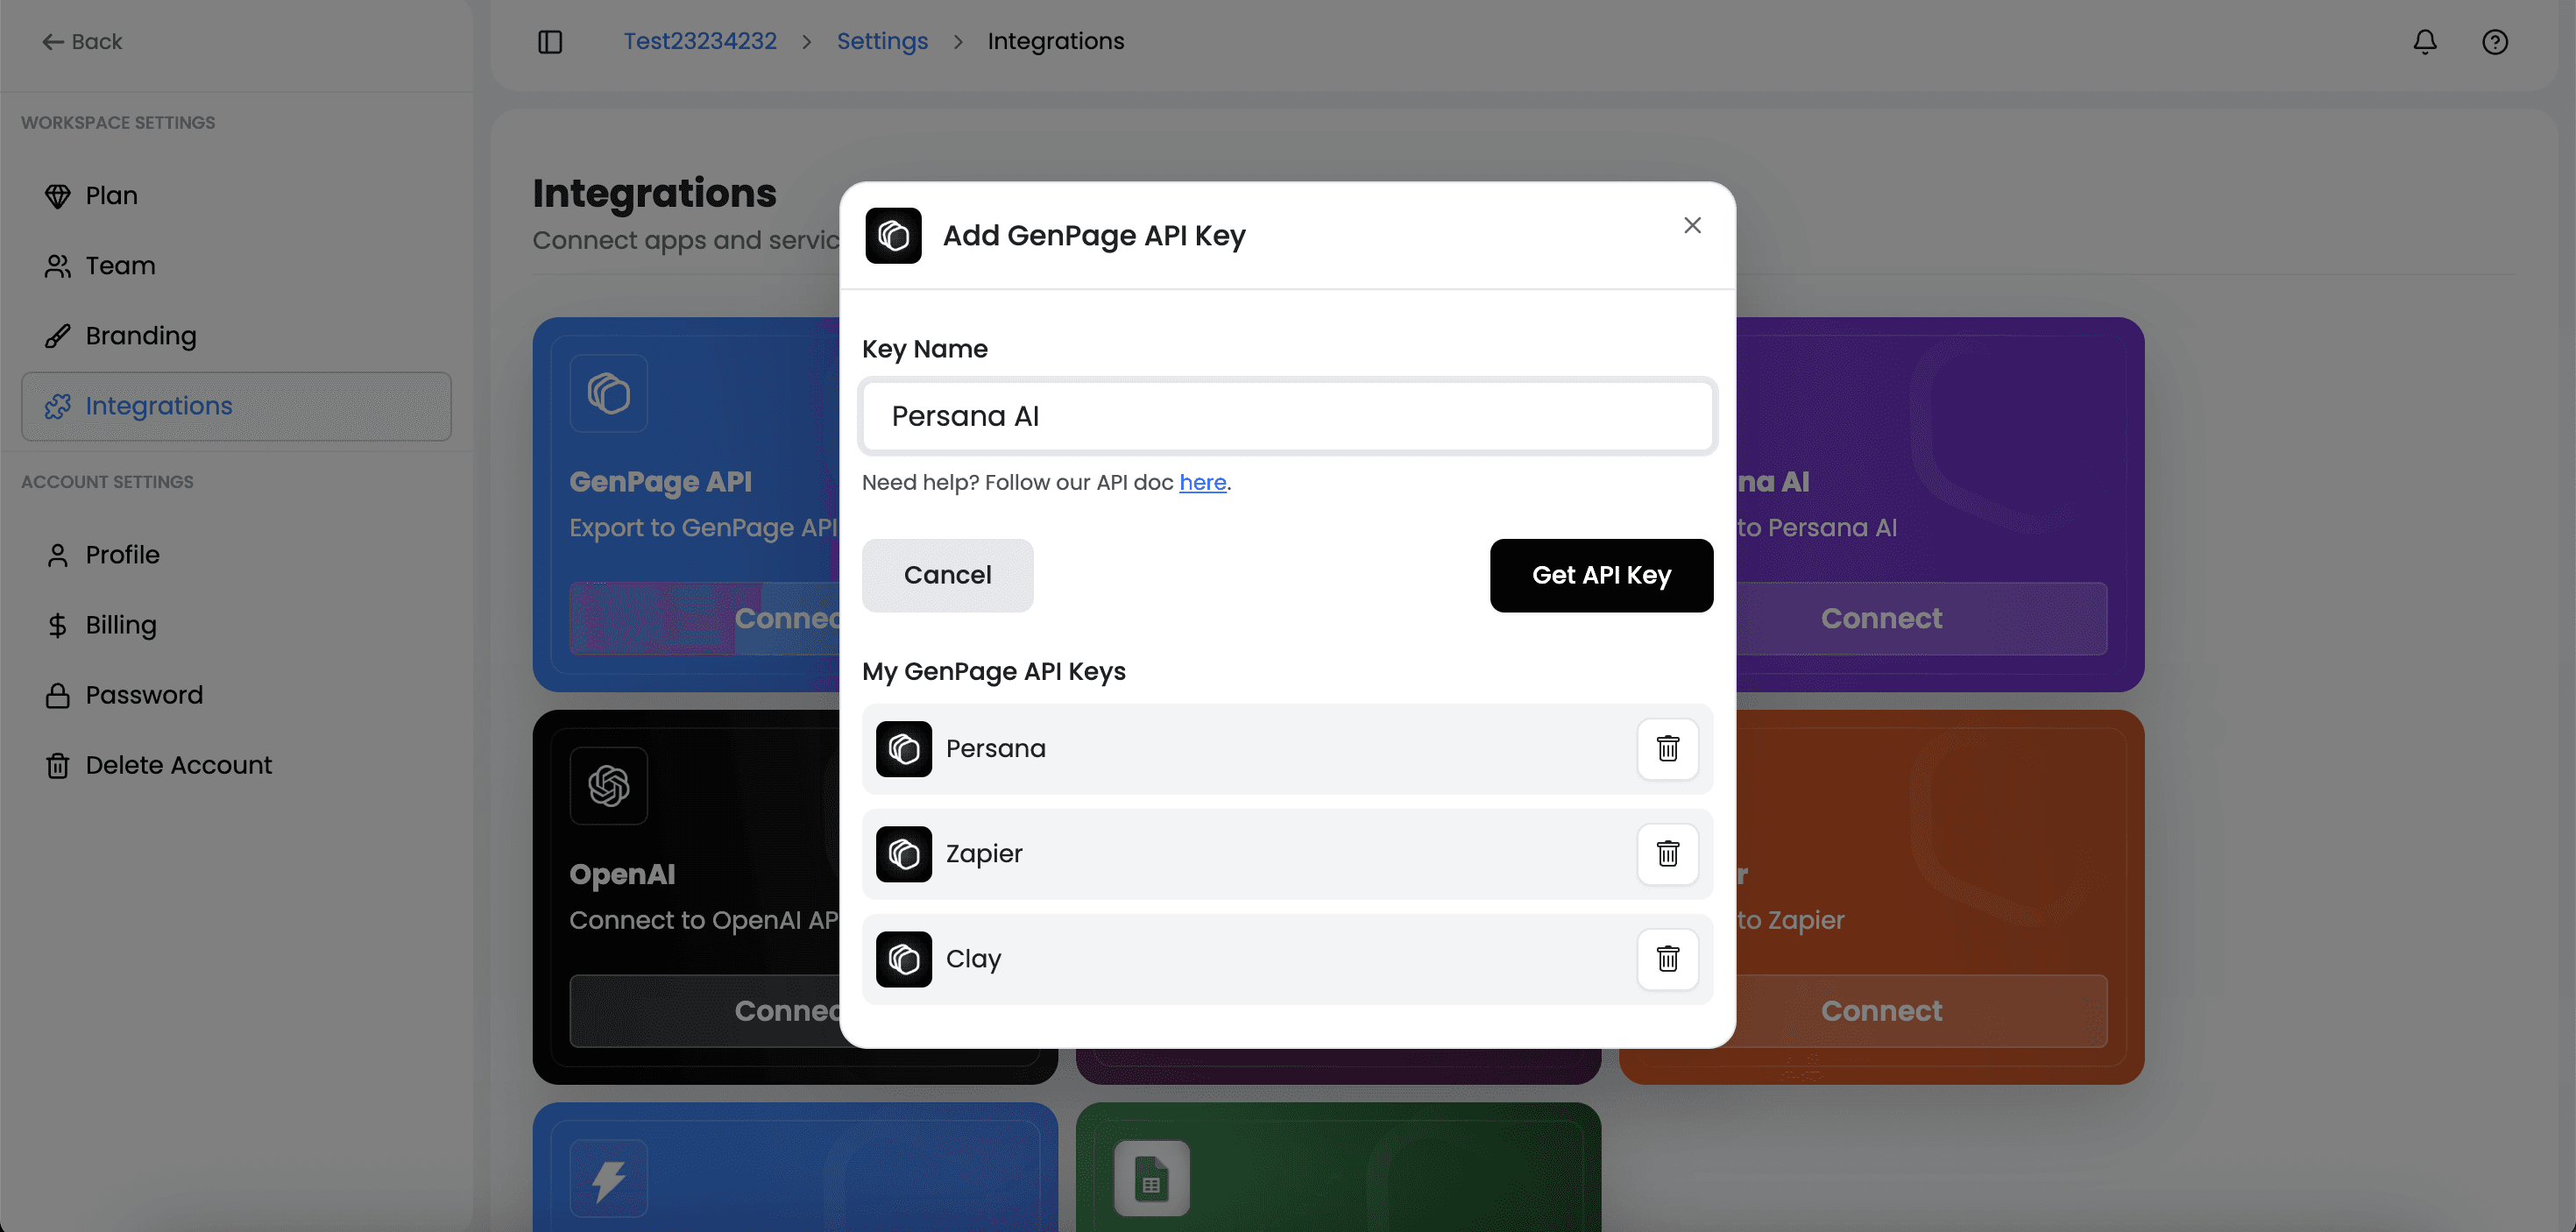
Creating a GenPage API Key to sync in Persana
Next, head back into Persana:
Add your GenPage API Key
Select your workspace
Select your audience (Default)
Select your campaign:
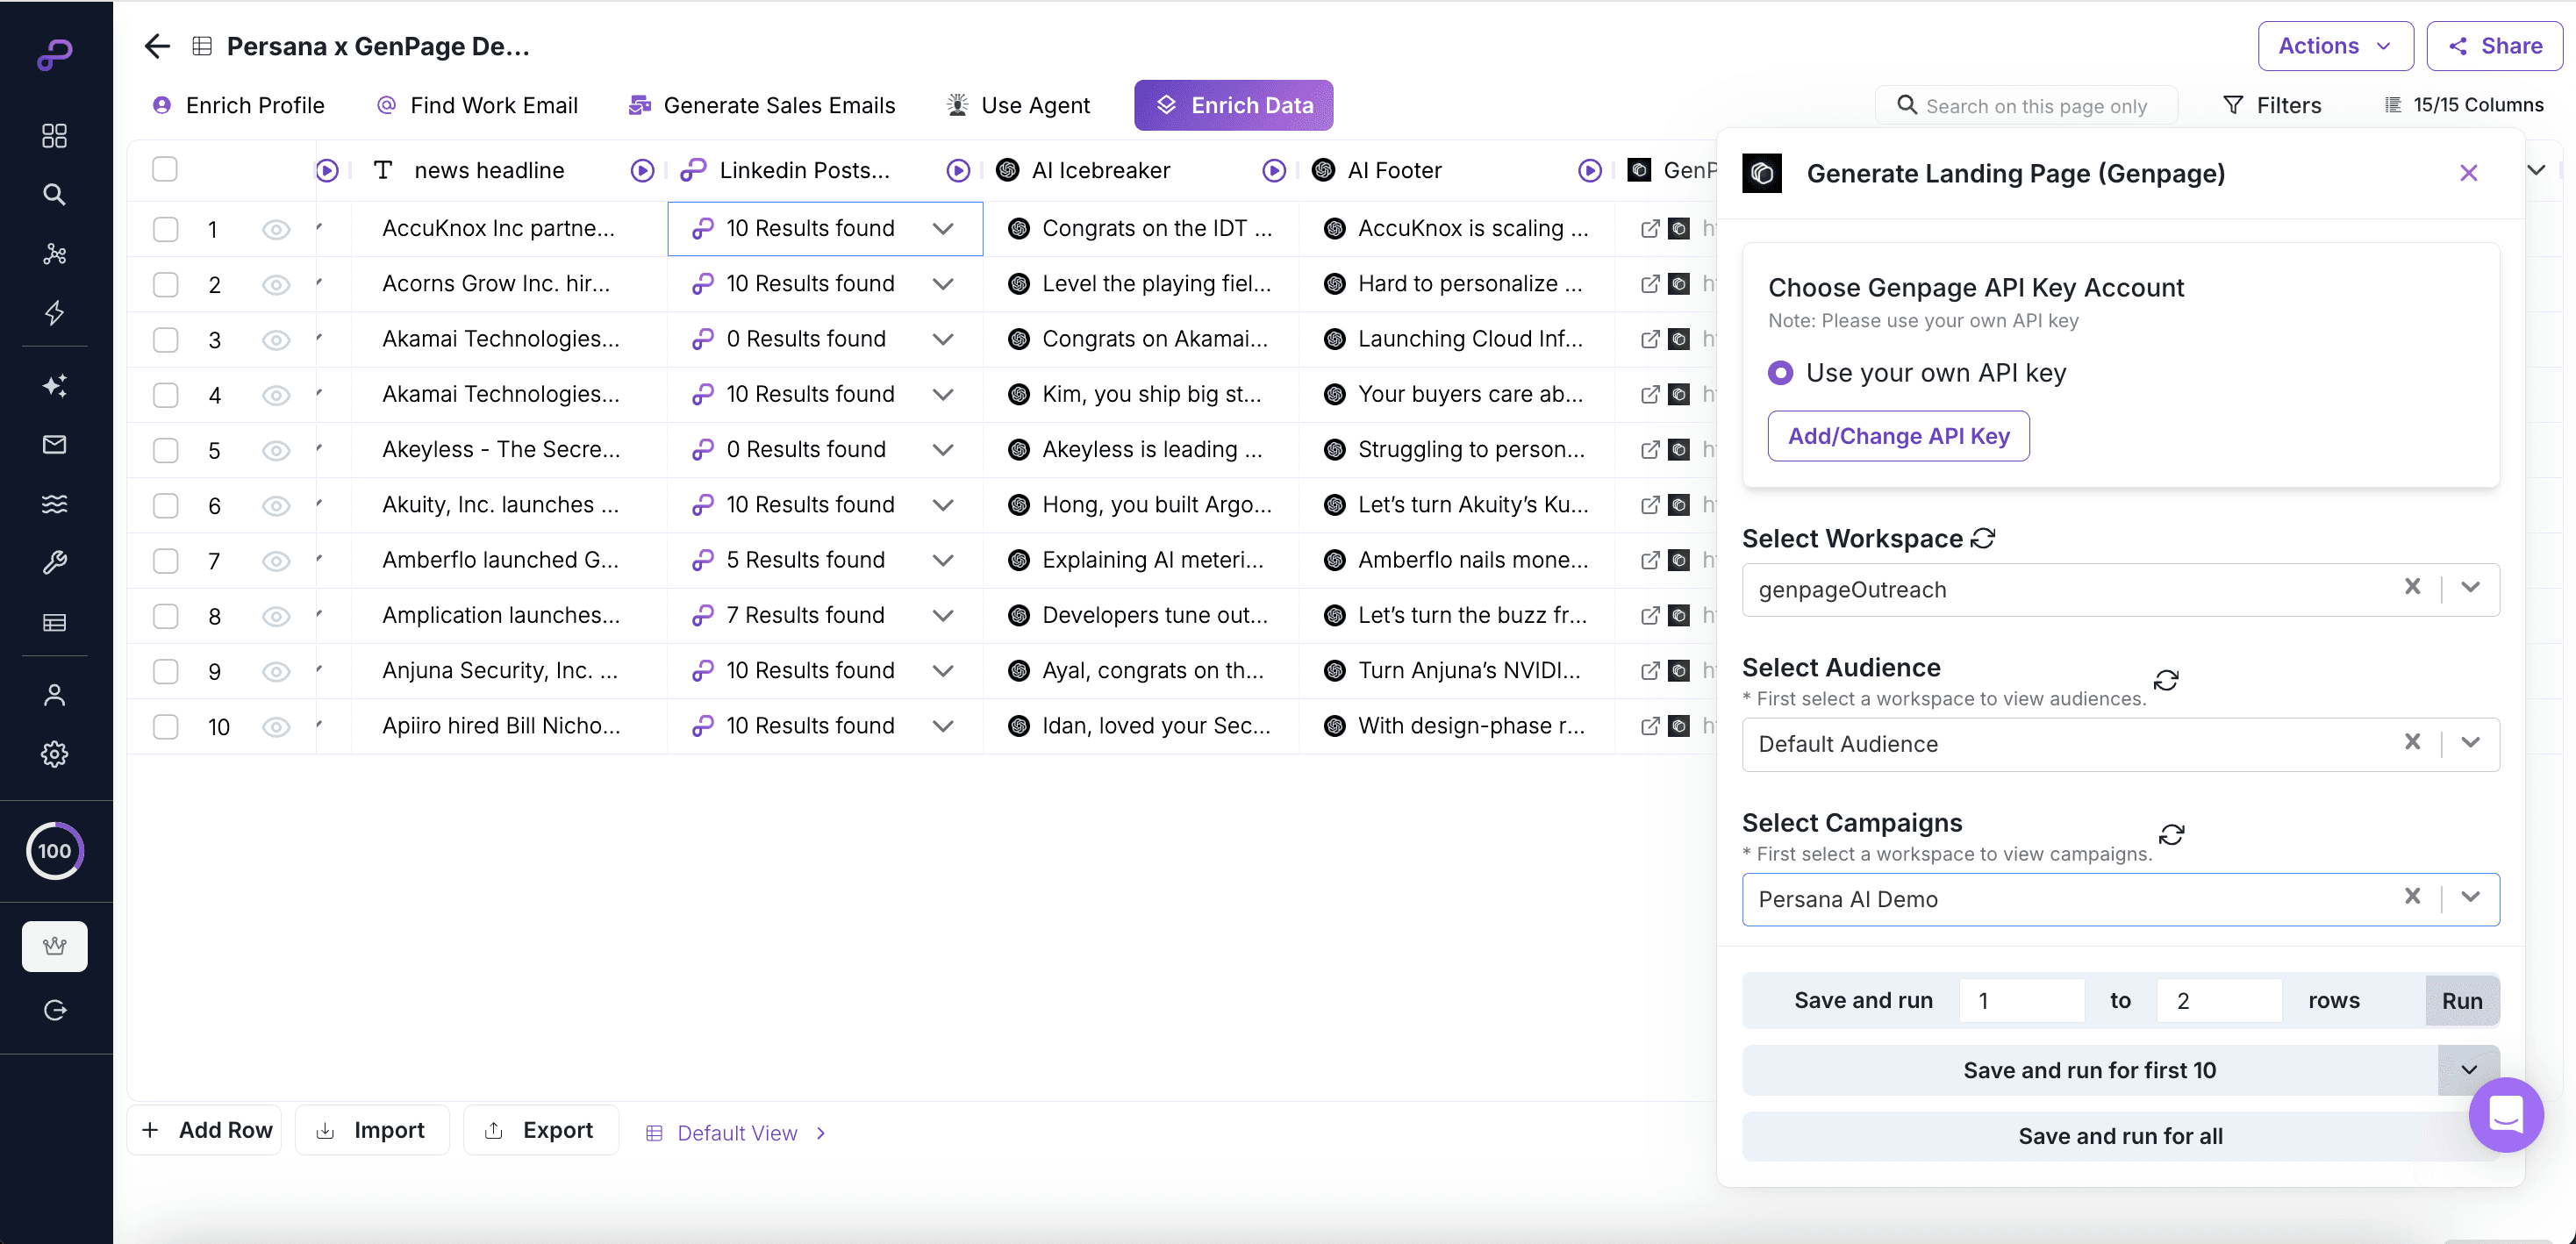
Adding your GenPage API Key in Persana and syncing your campaigns
Map all the Persana variables you'd like to display in your landing page to GenPage variables.
Make sure to also map at least the LinkedIn profile URL or the email address of your leads. This is what acts as an identifier and allows you to create lead records in GenPage.
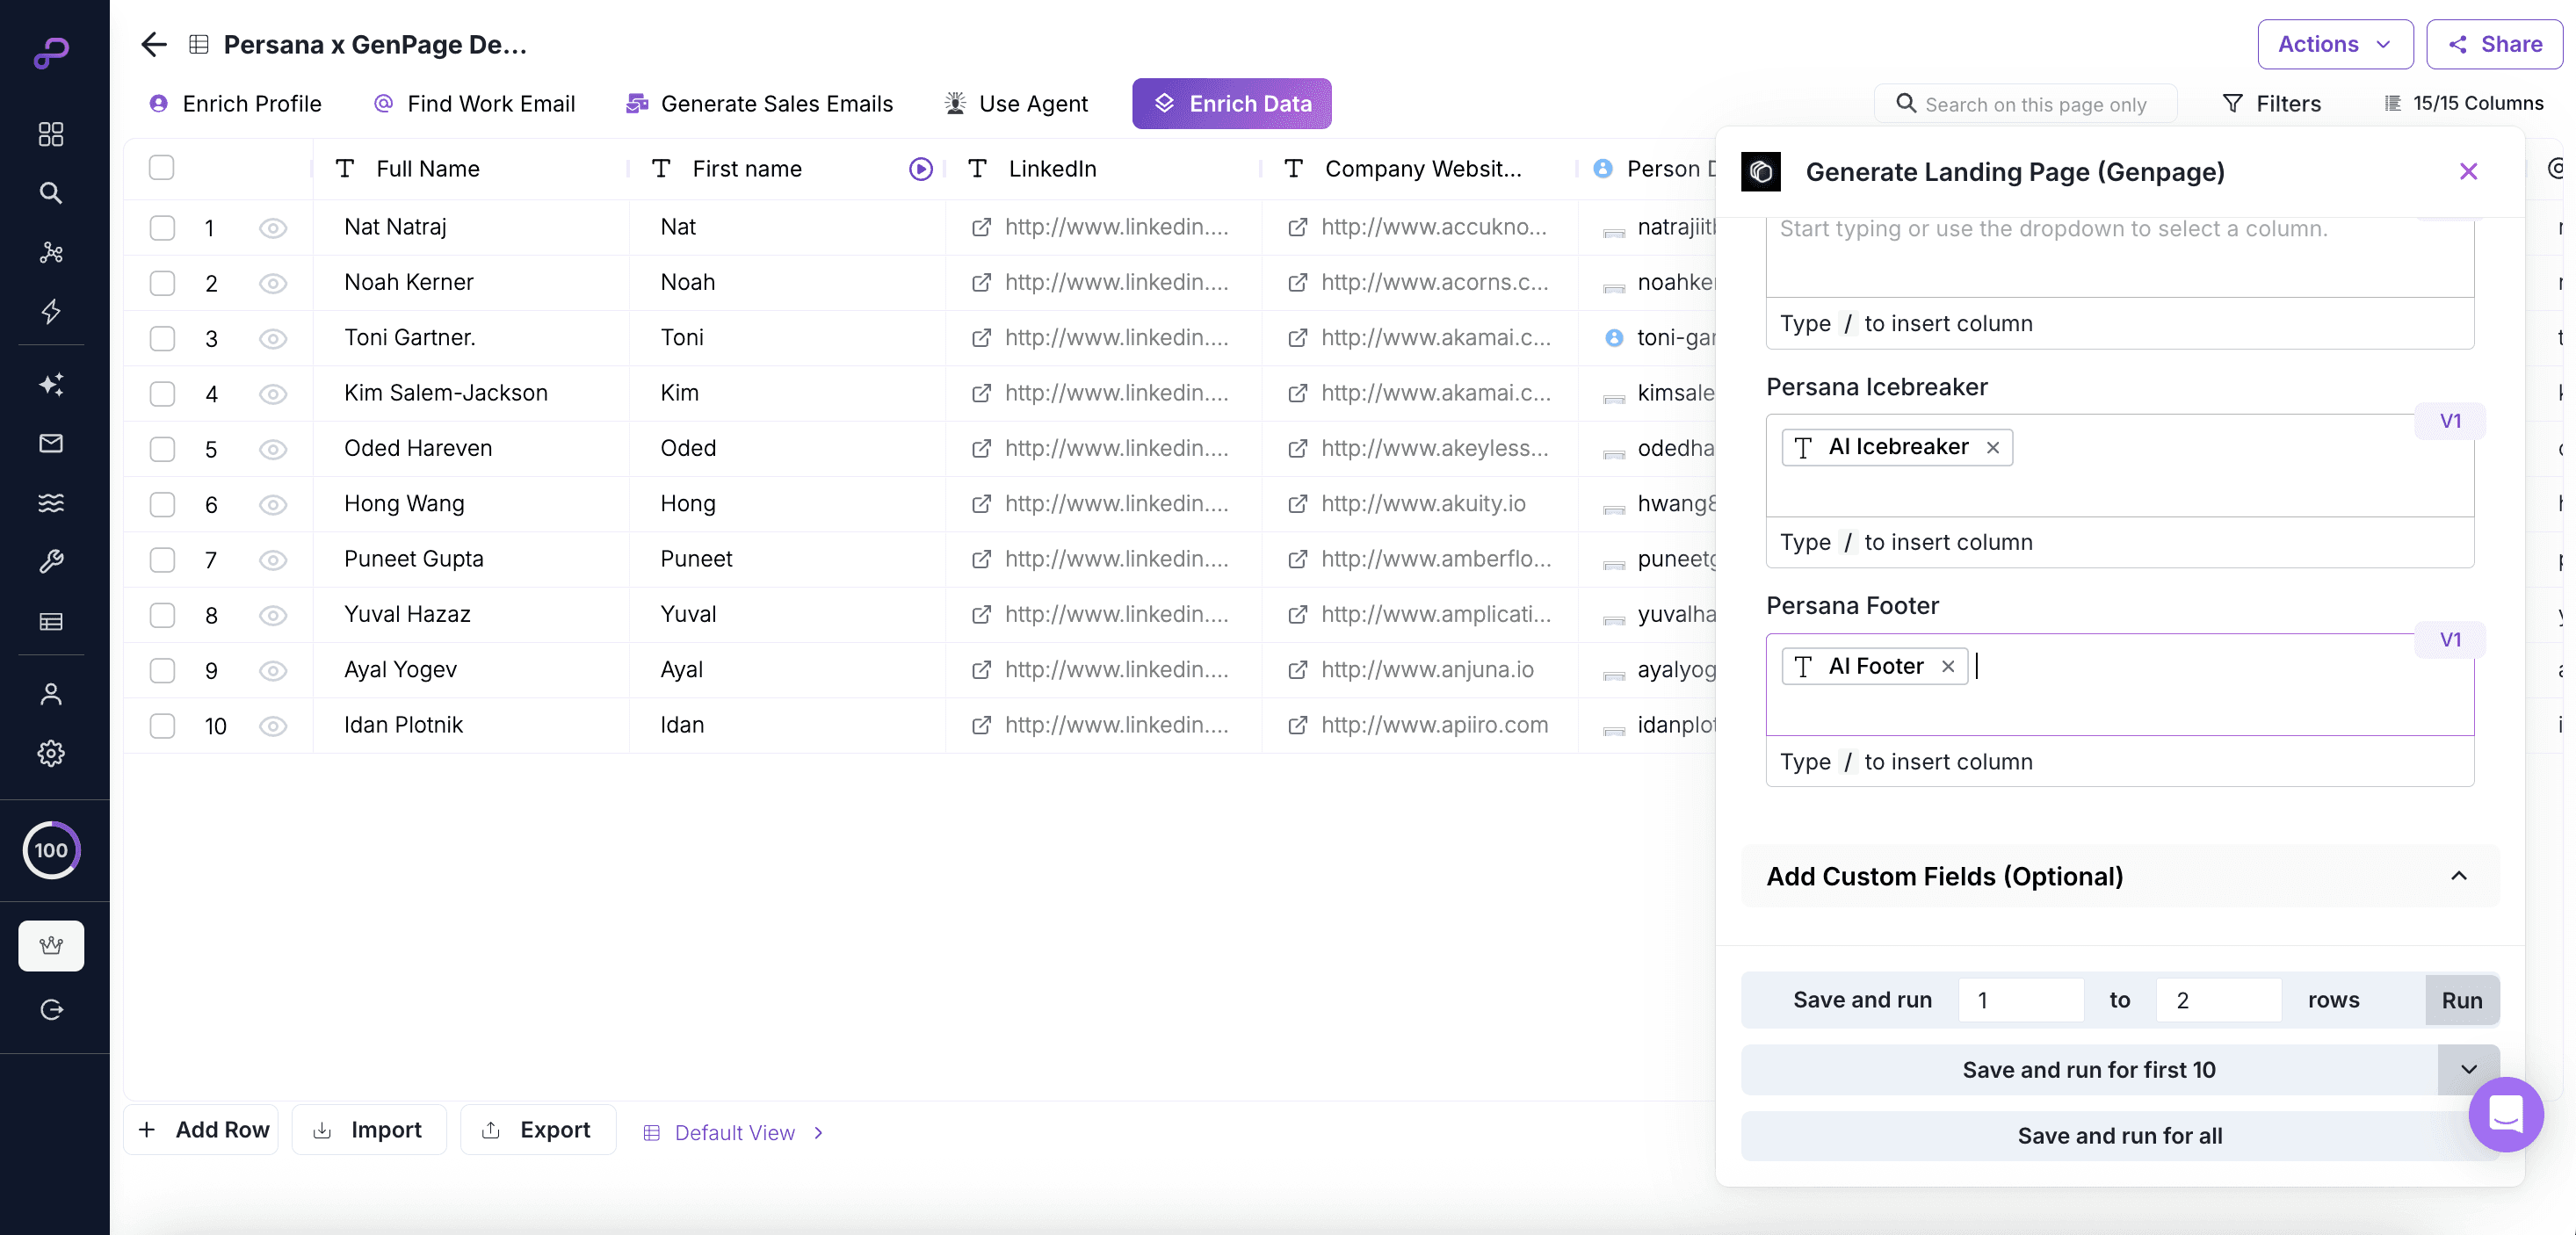
Mapping variables between Persana <> GenPage
Run a test row, confirm you've received the landing page URL back into Persana, then run for each row. You should now have your GenPage landing page URLs available in your Persana AI lead list:
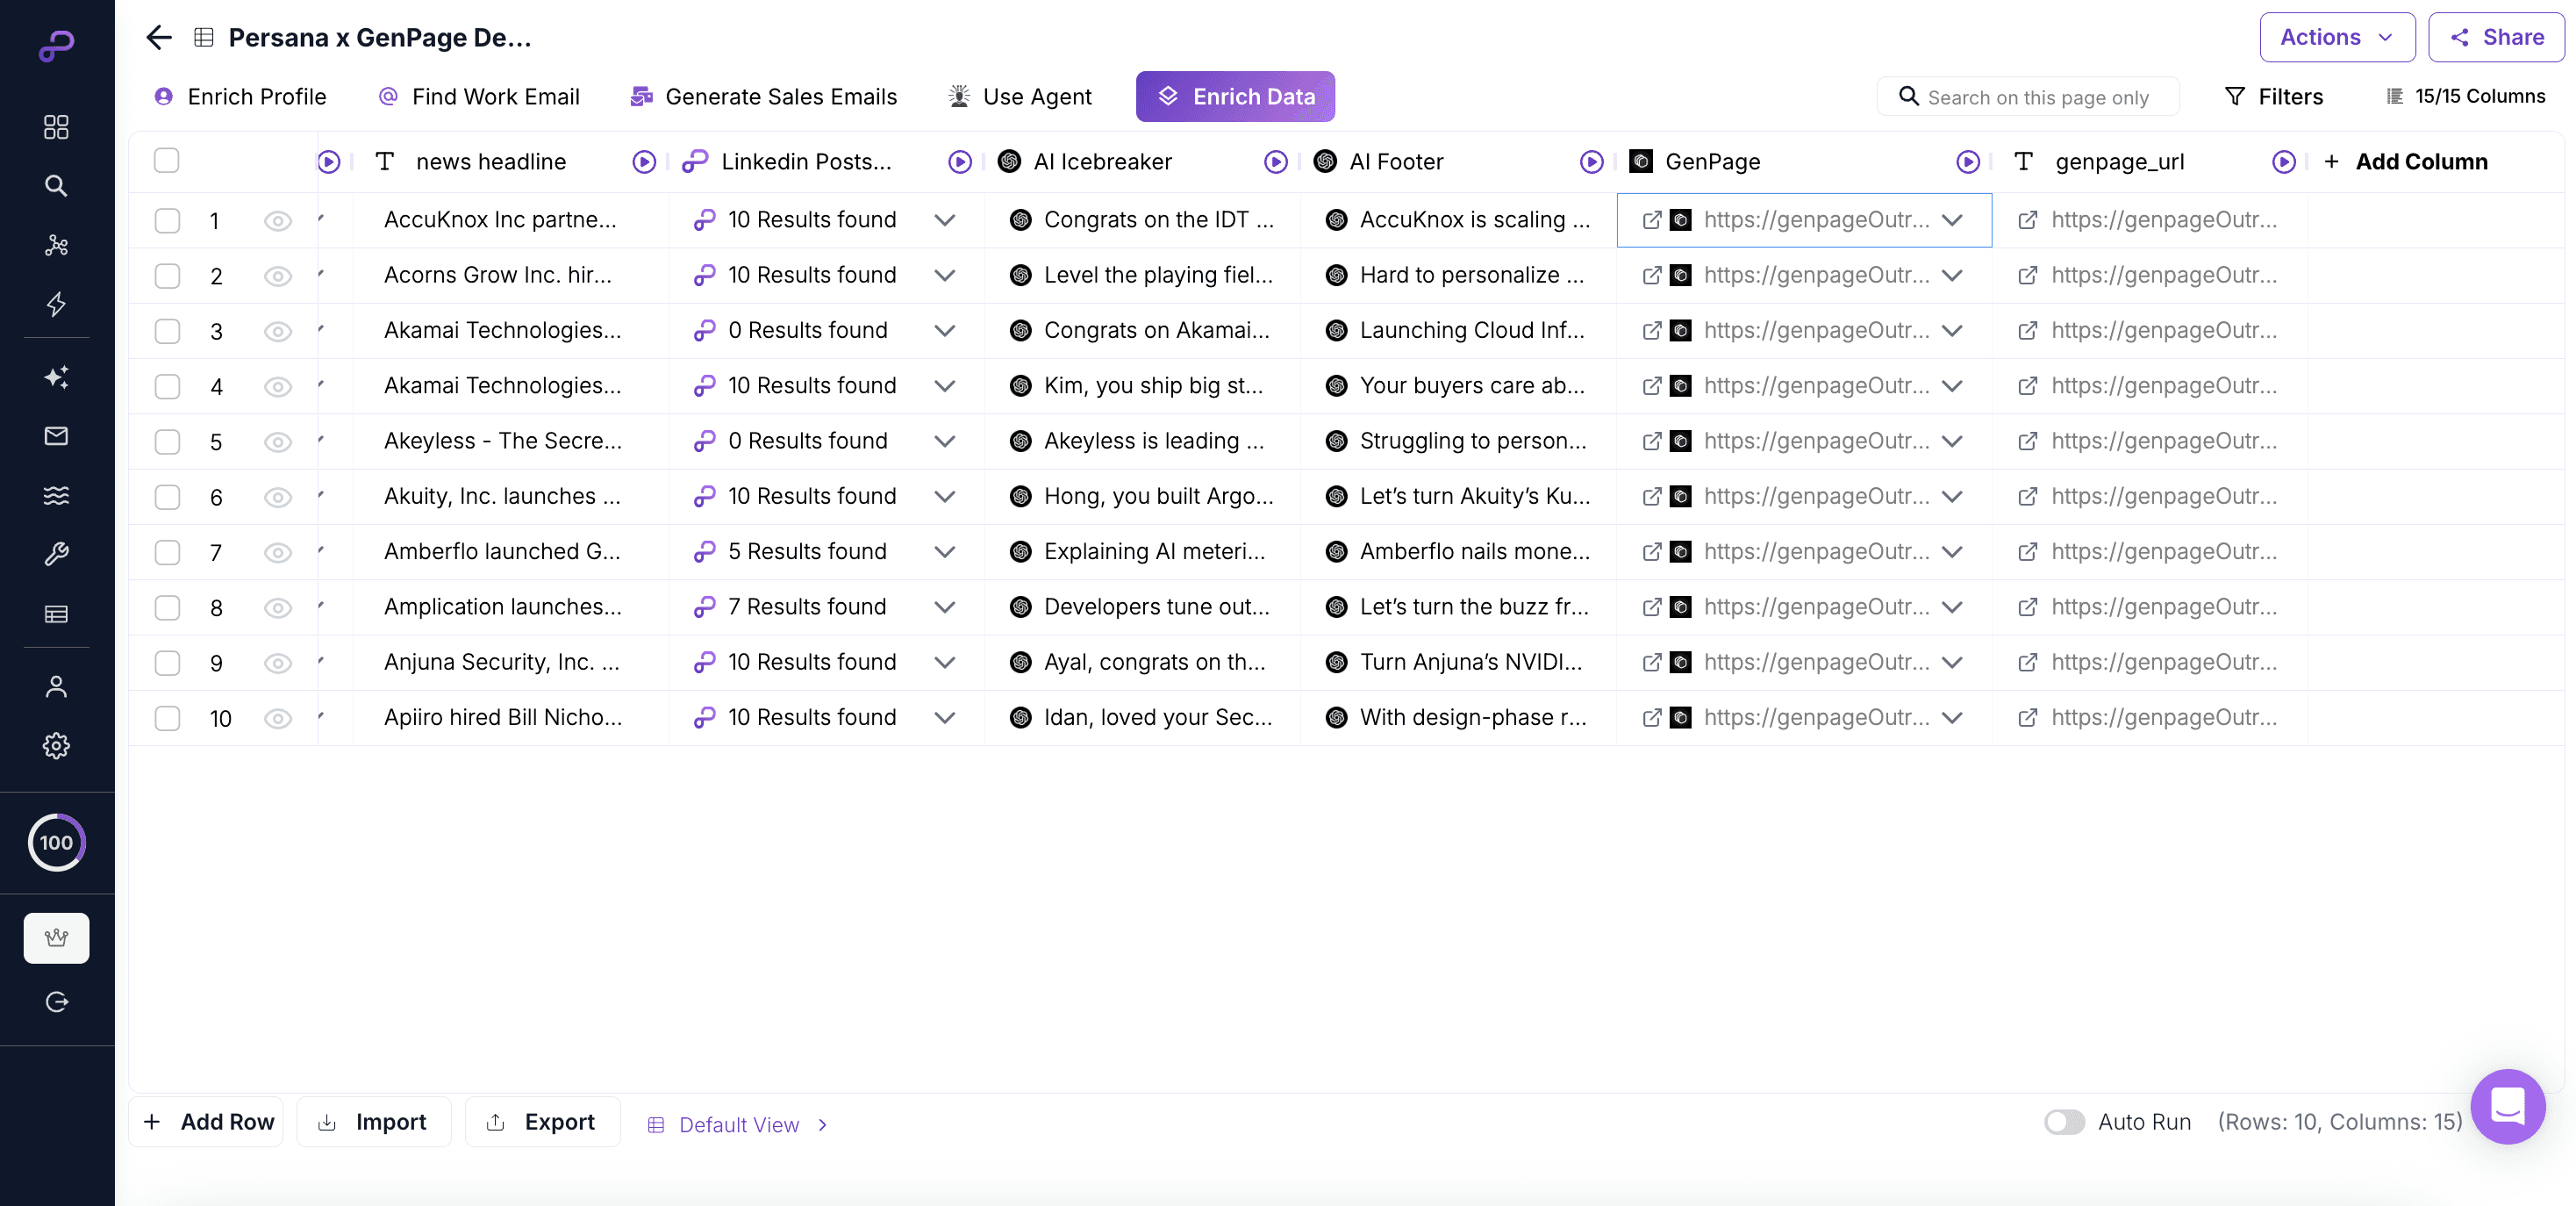
Generating GenPage landing page URLs from a Persana AI lead list
You’re All Set!
Your Persana AI and GenPage accounts are now seamlessly connected. Every lead enriched in Persana automatically gets its own personalized GenPage - and every page URL flows back into your outreach stack, ready to send.
💡 Need help? Reach out to support or book a quick onboarding call with our team - we’re happy to walk you through setup.