

This guide walks you through using Clay’s HTTP API enrichment to send leads to GenPage, generate personalized pages, and fetch the final GenPage URLs back into your Clay table.
Step 1: Create your GenPage API key
To begin, grab your API key from GenPage:
Log into GenPage
Go to Settings → Integrations
Select "GenPage API", create an API key and copy it:
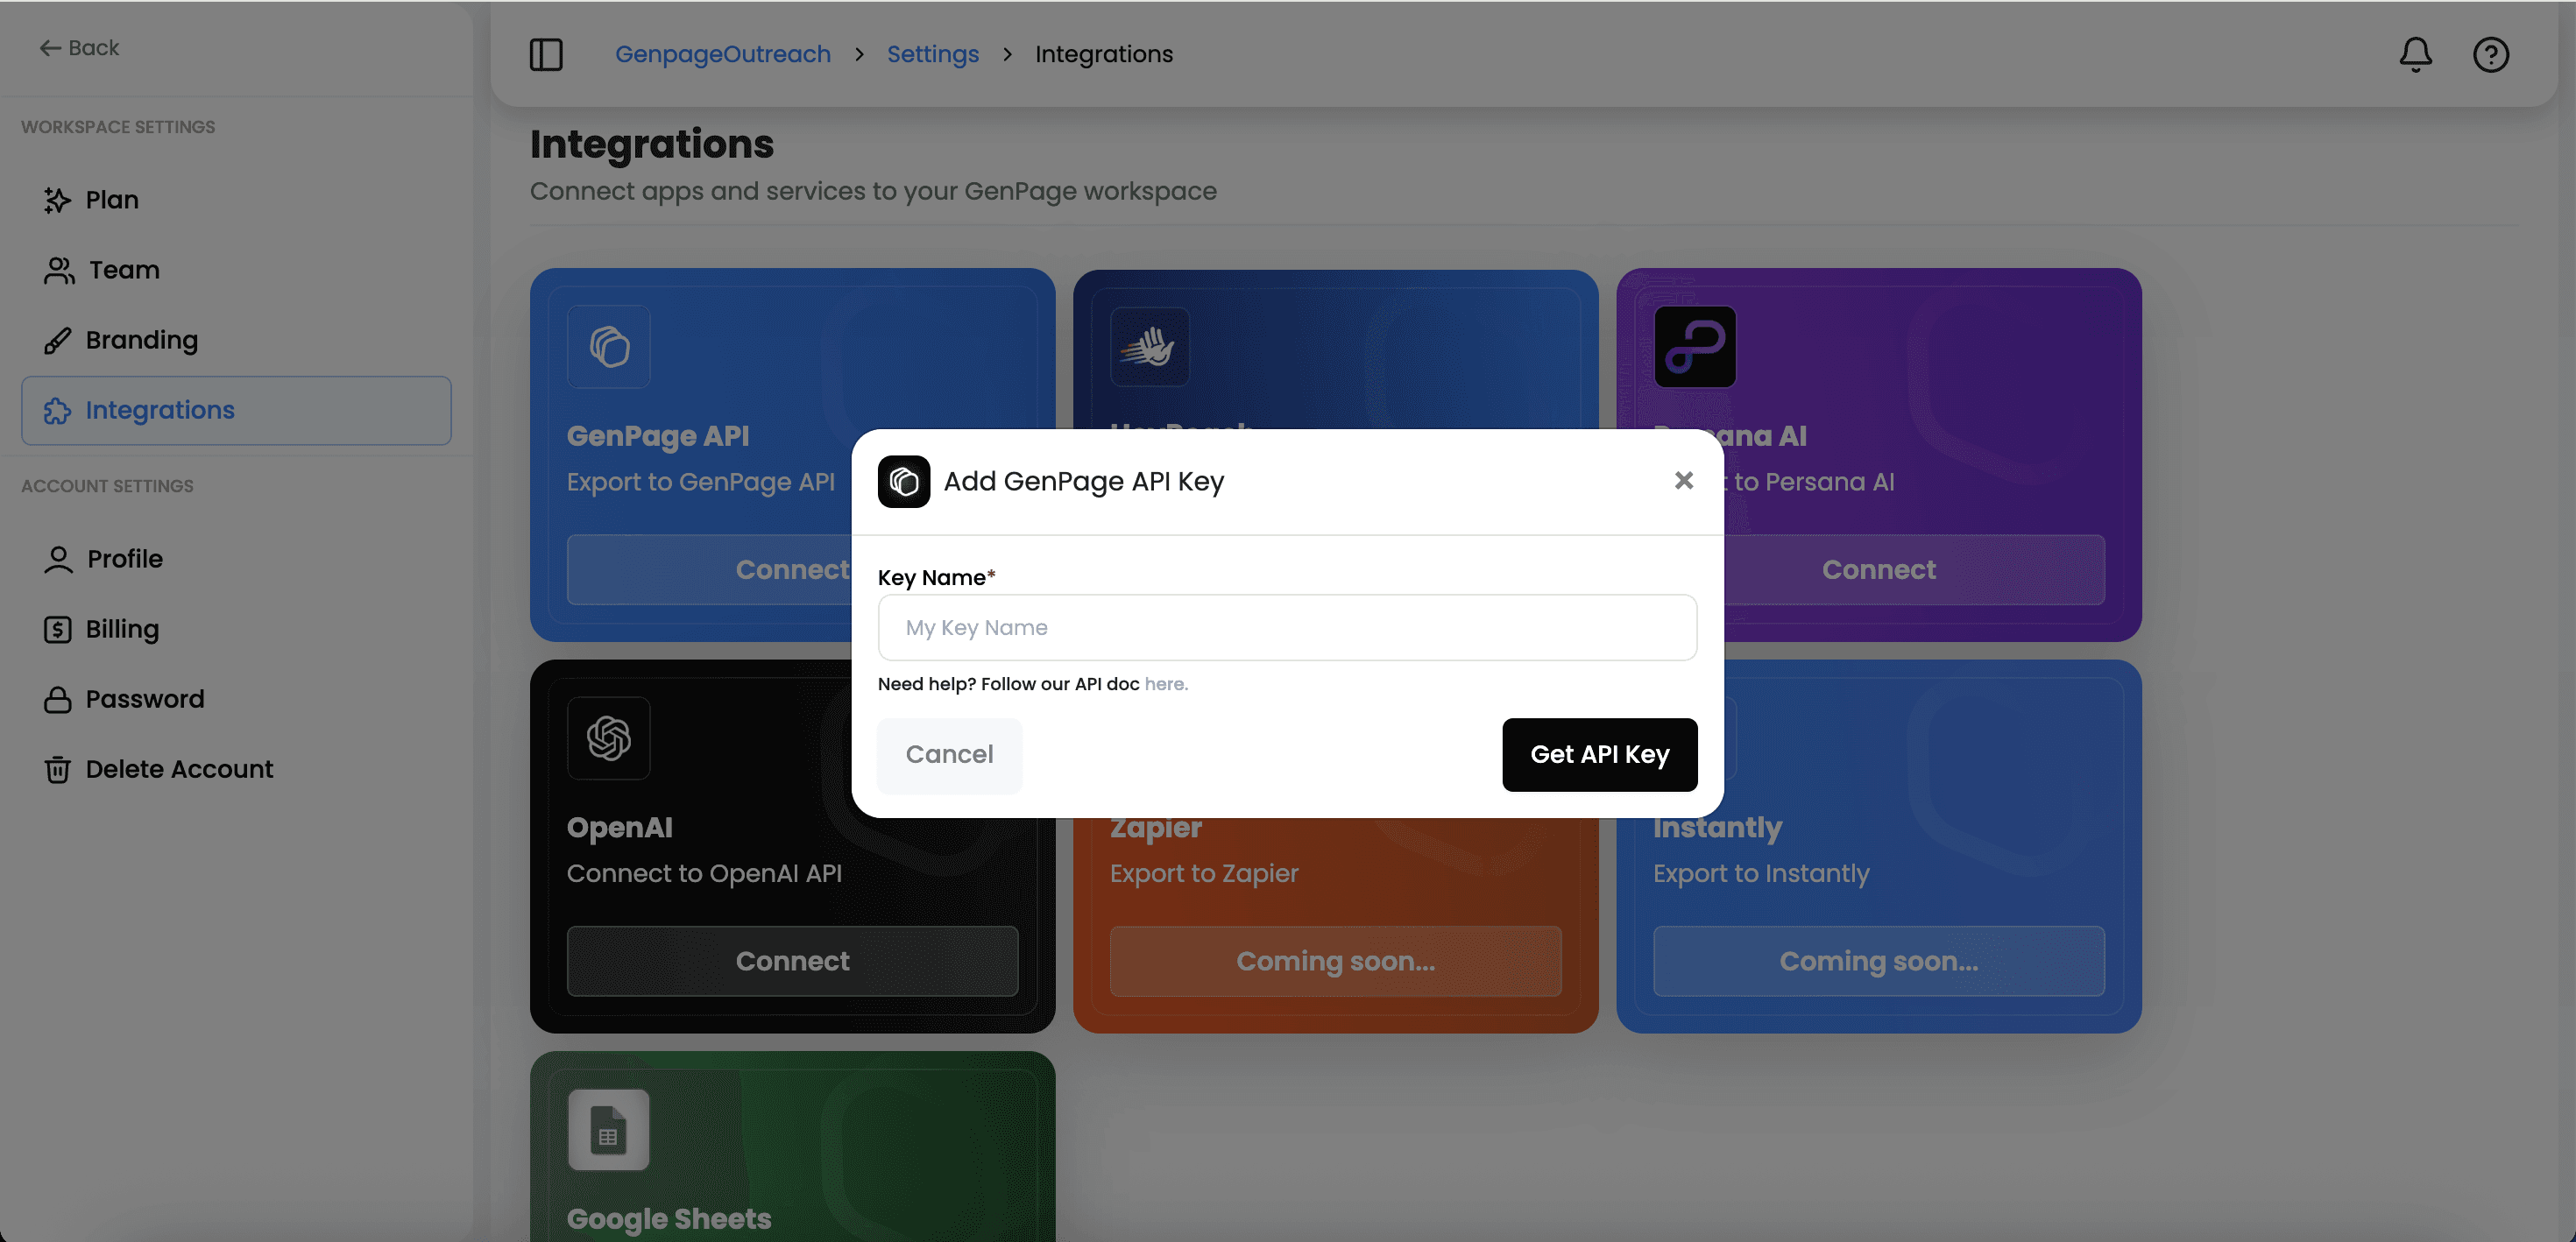
Creating a new API Key in GenPage
Step 2: Add an HTTP API enrichment in Clay
In your Clay table, add a new column
Choose Enrichment → HTTP API
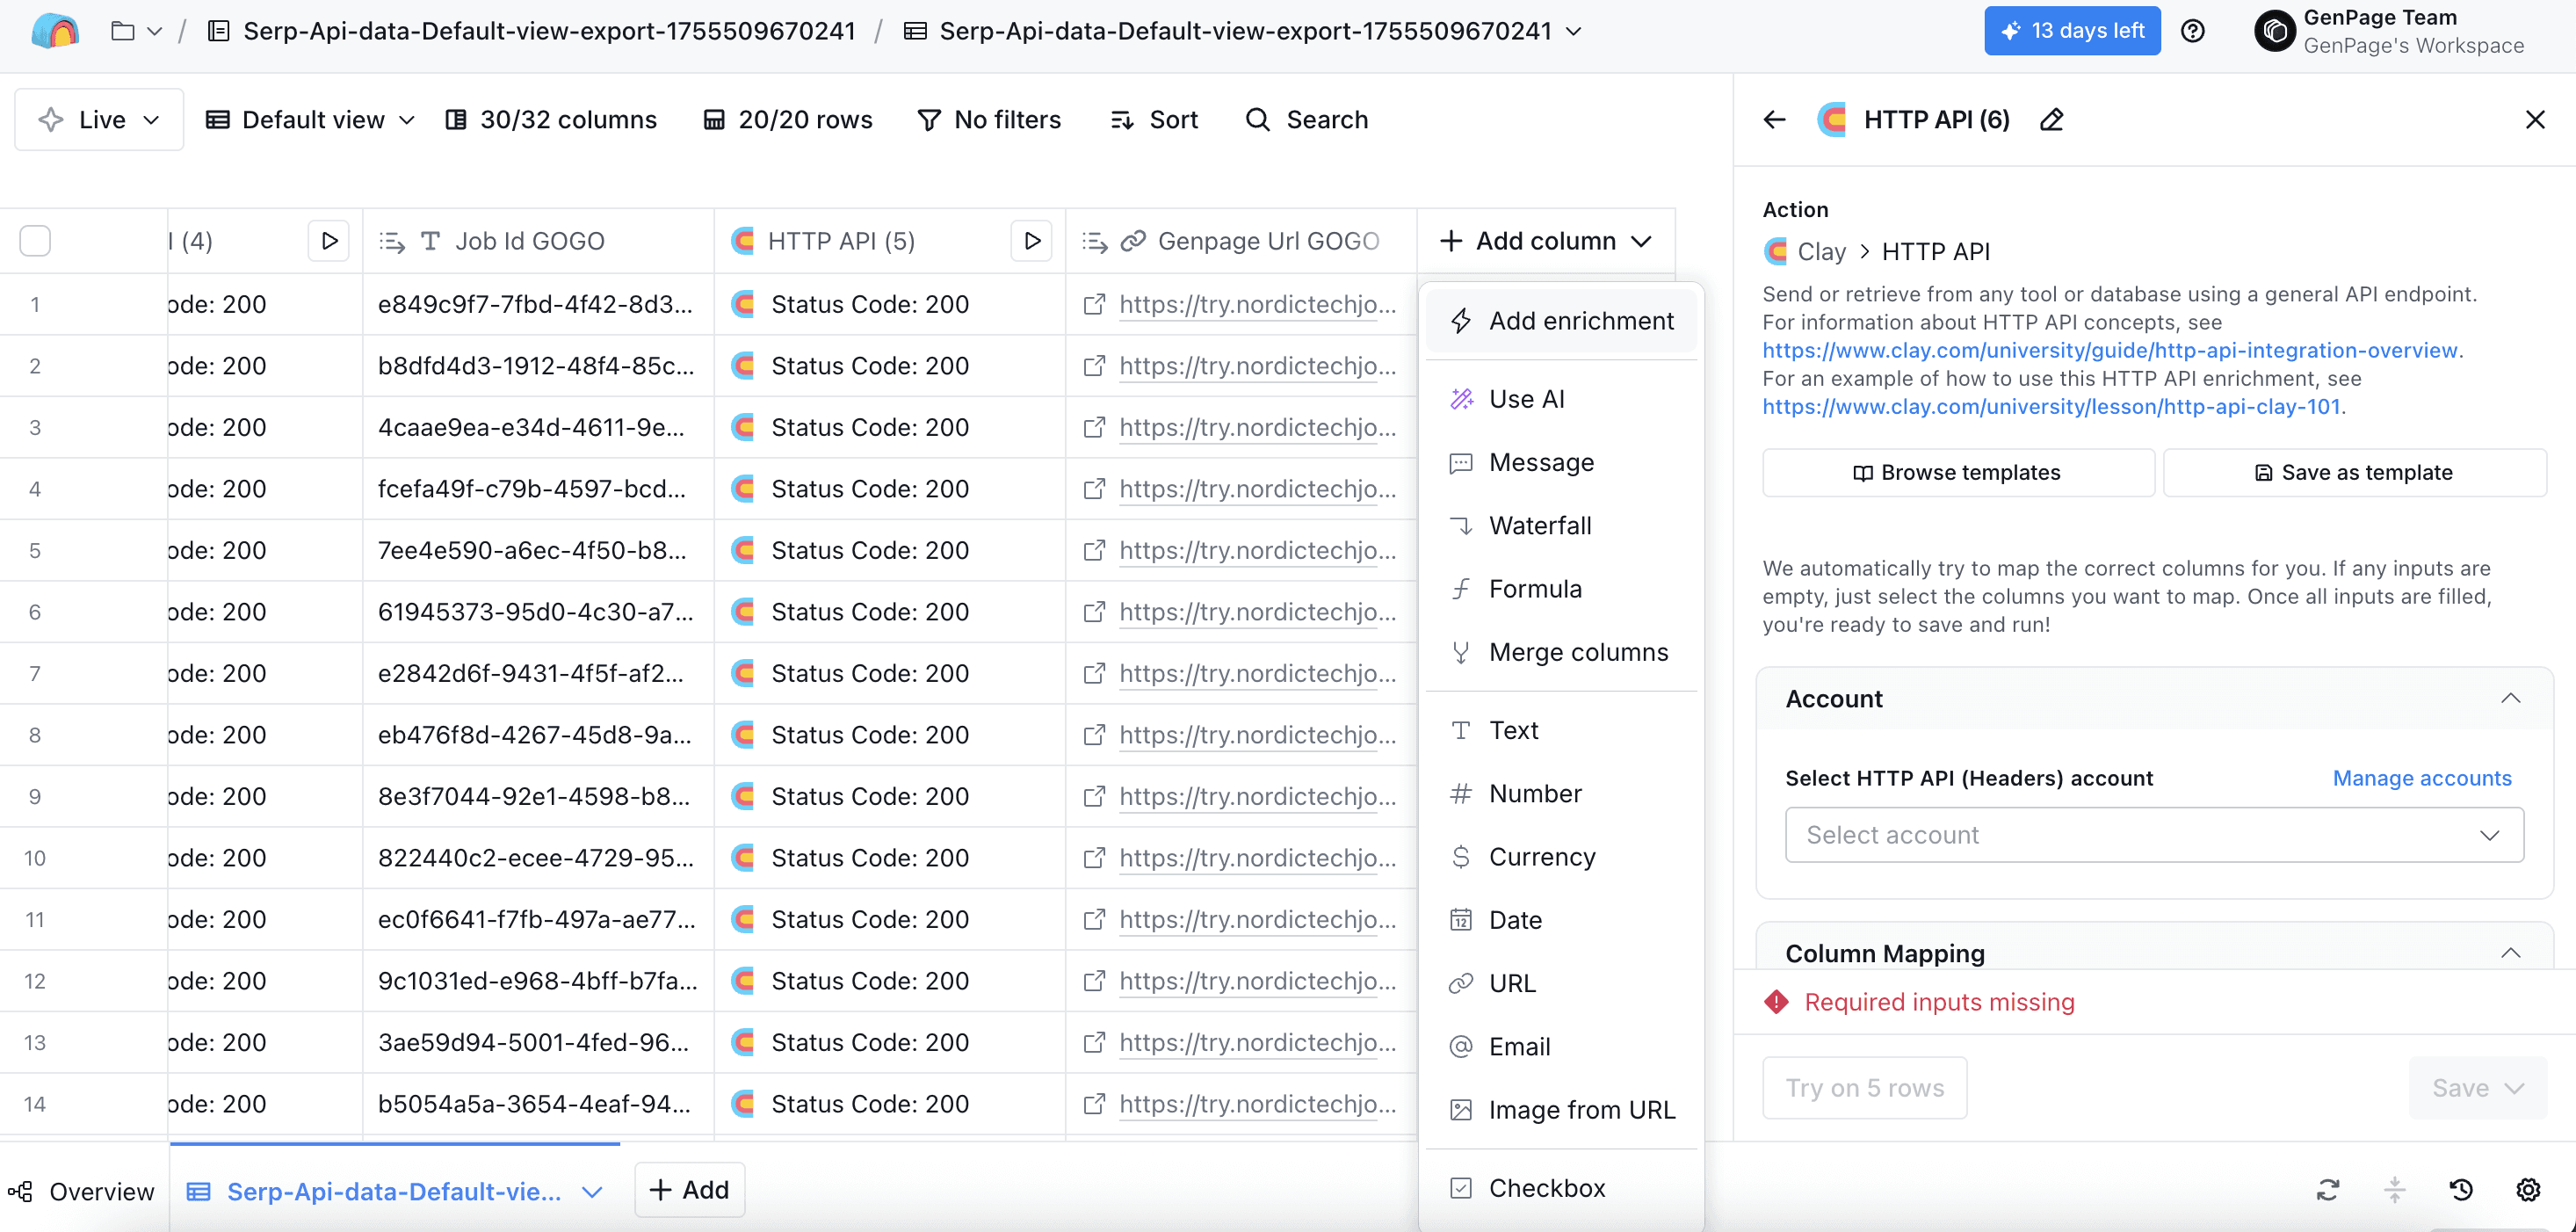
Selecting the "HTTP API" enrichment from Clay as a new enrichment column
Step 3: Set up your HTTP API with GenPage
Under "Select HTTP API (headers) account", click "Add New"
Give it a memorable name like “GenPage API”
Add your auth header:
- Under Key:Authorization
- Under Value:Bearer <API Token>
Important: there’s a space after Bearer. Example: Bearer sk_live_abc123
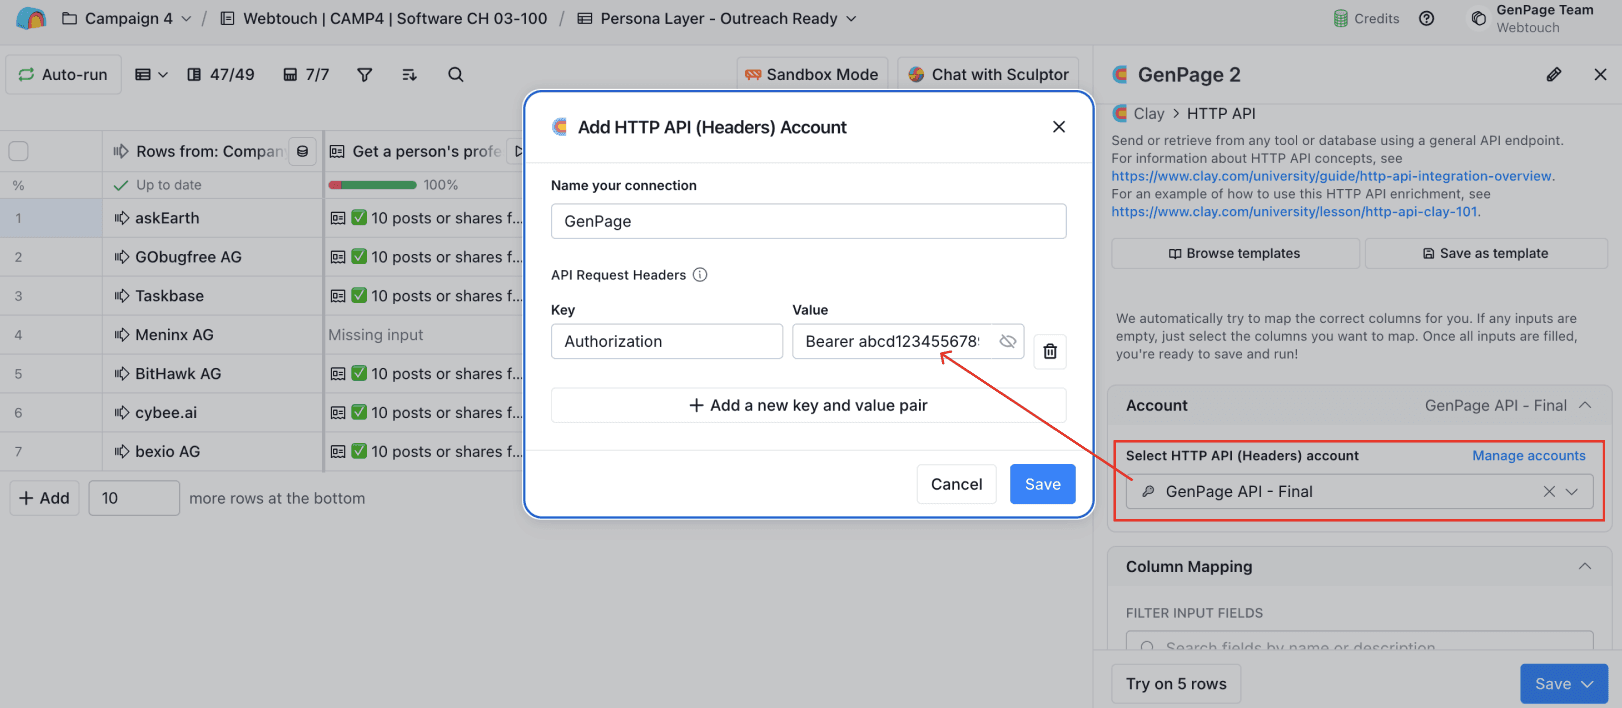
Adding GenPage as an HTTP API (Headers) Account in Clay
Hit save - you're ready for the next step.
Step 4: Configure your request
Under the "Method" field, choose
POST
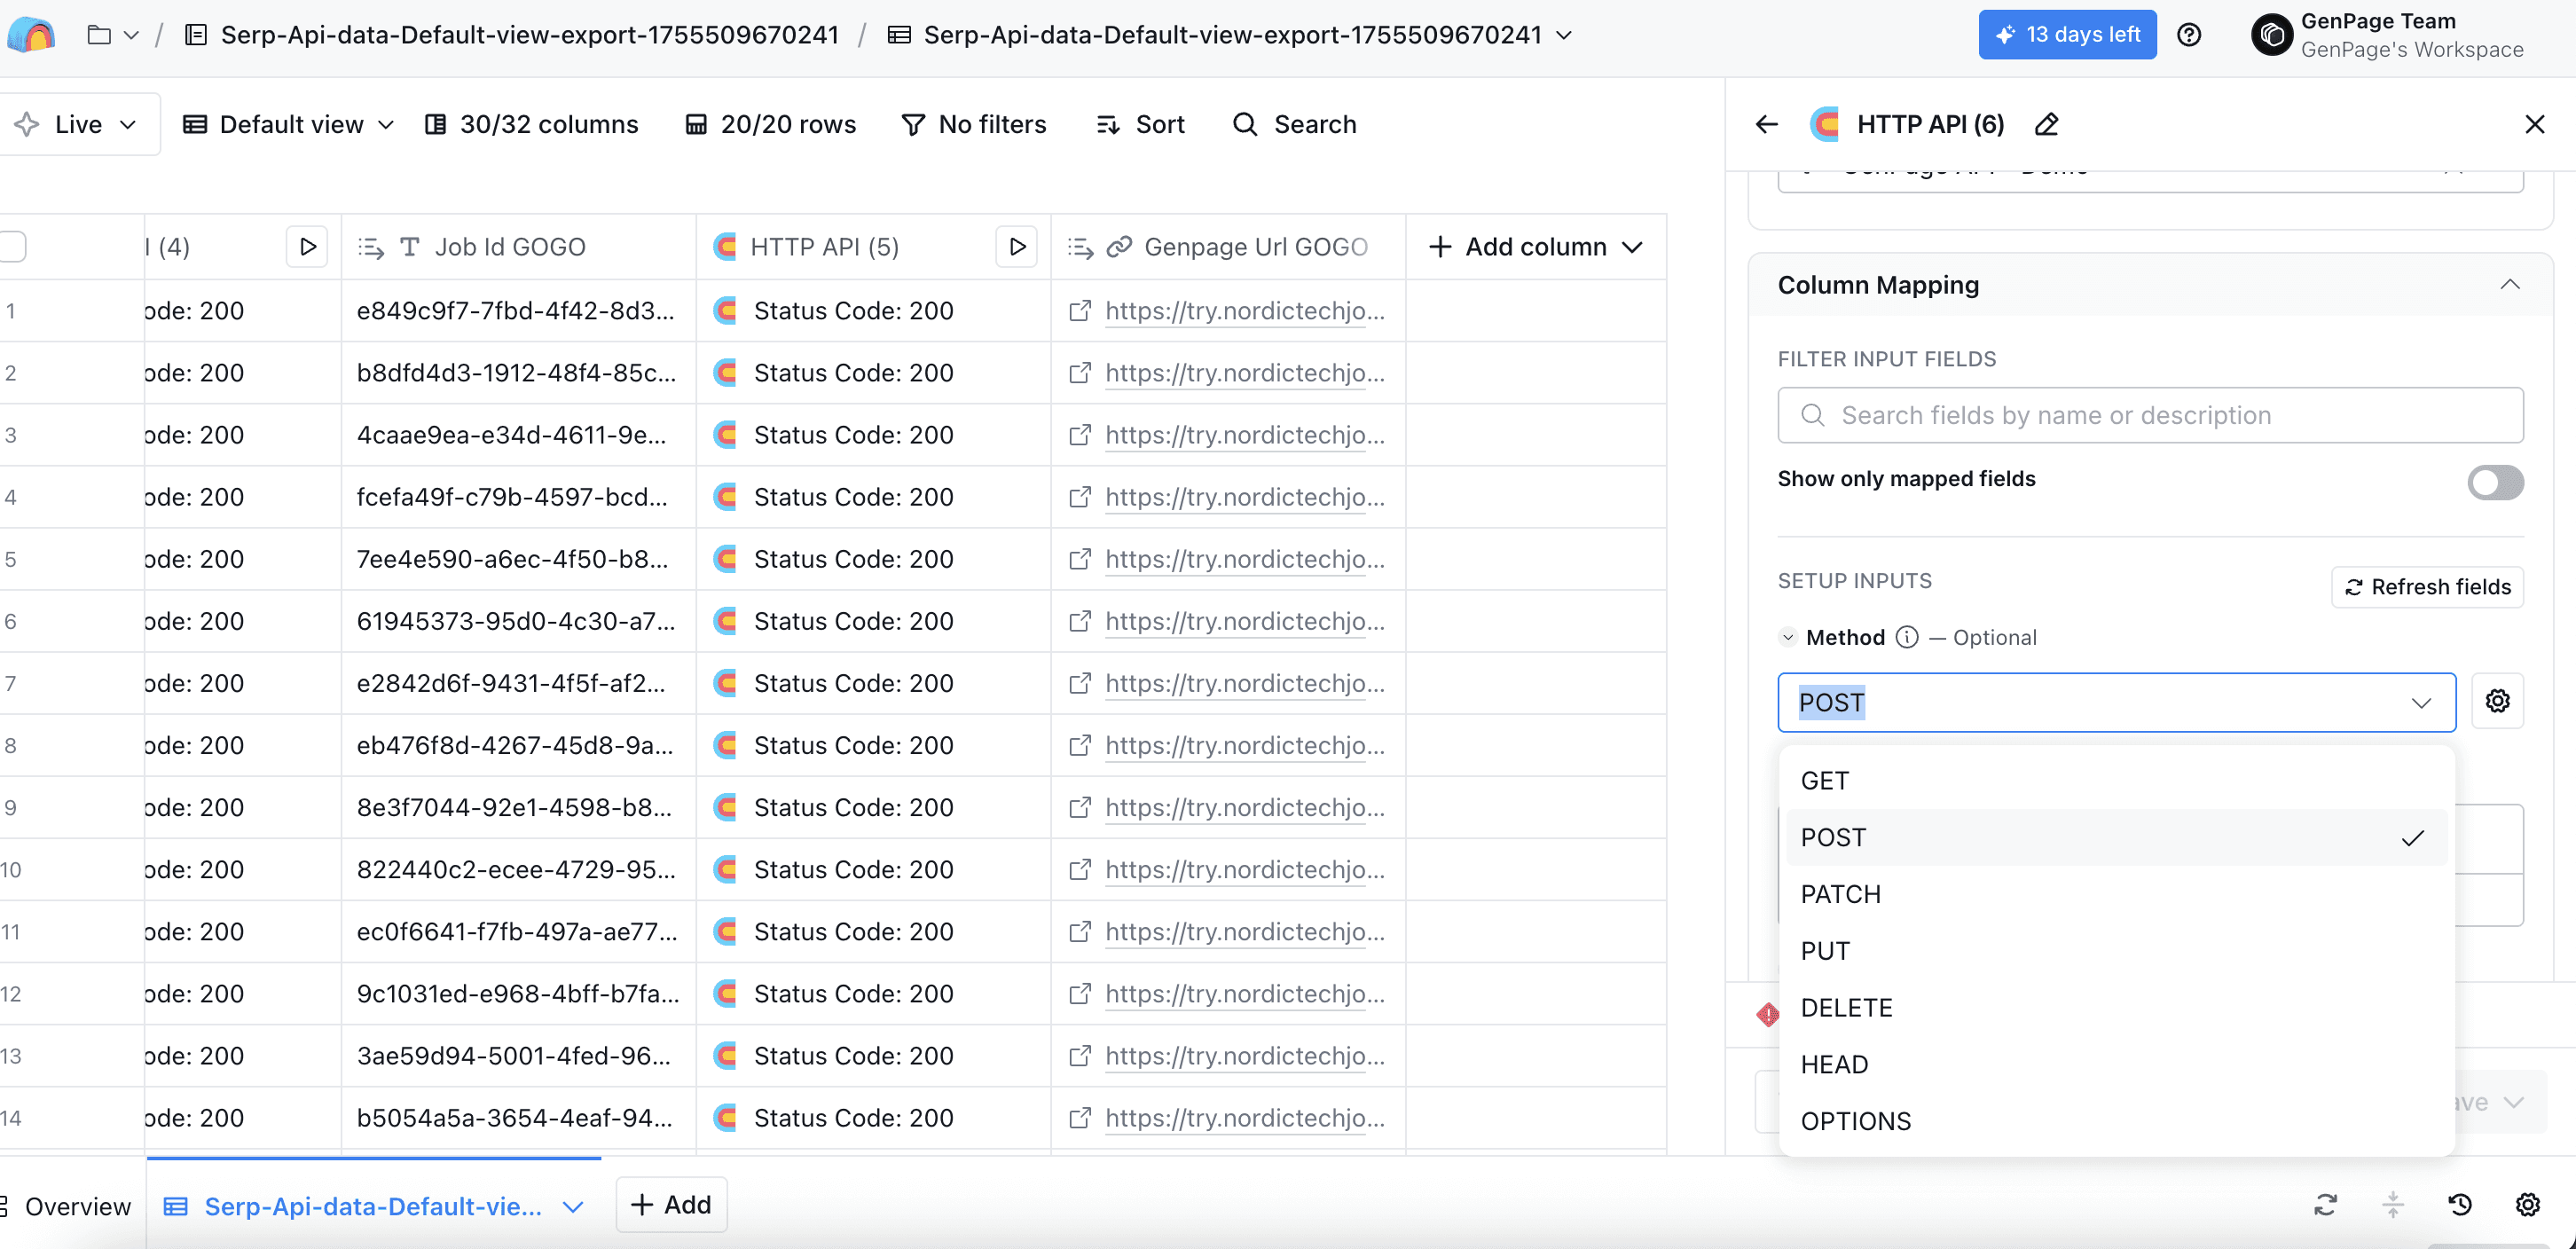
Choosing the POST method for the API request
Under the "Endpoint" field, add the "Upsert Leads" endpoint for GenPage, with the following URL:
https://backend.genpage.ai/api/external/v1/leads/upsert-lead

Selecting the appropriate GenPage API endpoint in Clay
Under the "Body" field, add the following sample JSON string:
{
"from": "Clay",
"campaign_id": 1234567890,
"values": {
  "first_name": "Alex",
  "company_name": "Microsoft",
  "domain": "microsoft.com",
  "email": "alex@microsoft.com"
   "linkedin_profile_url": "https://www.linkedin.com/in/my-profile-name"
}
}
Important: The variables above (first_name, company_name, domain, email, and linkedin_profile_url) are default GenPage variables.
If you are linking any of these variables from your Clay table to GenPage, ensure you are using this exact formatting so they can be recognized in GenPage and trigger GenPage-native enrichments. Other non-default variables will simply be treated as custom variables in GenPage.
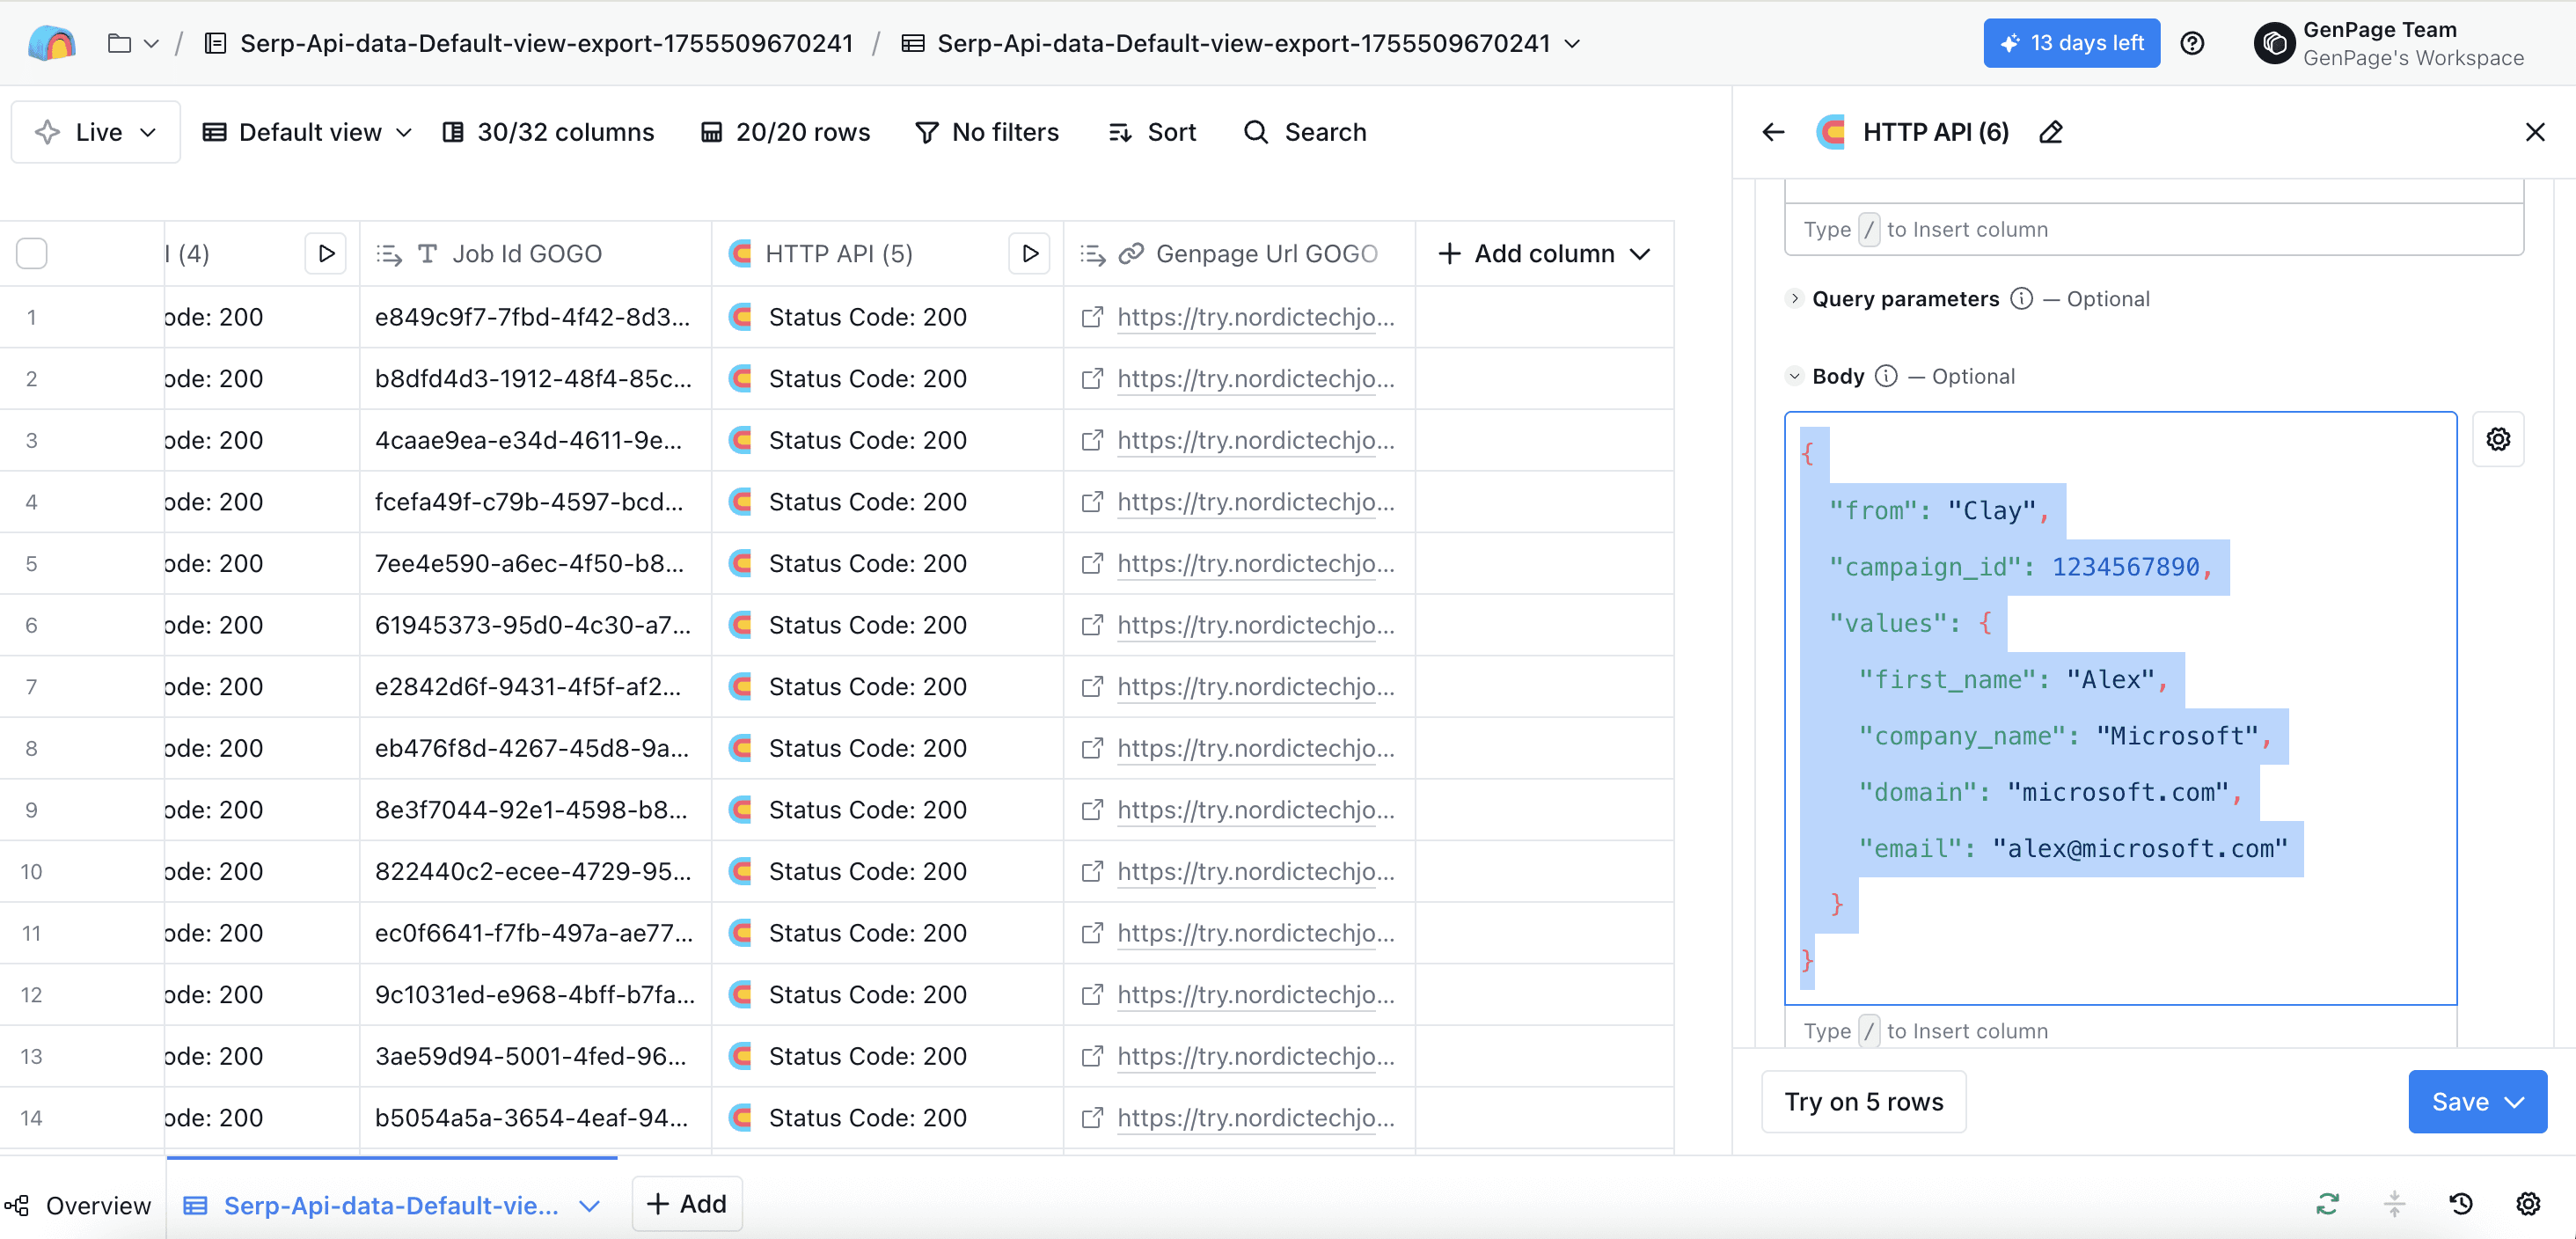
Adding the sample JSON string to your HTTP API body
You will need to replace the campaign ID. To find your
"campaign_id",hop back into GenPage, and add the number in the URL of the campaign you'd like this workflow to create leads for (in this case, the campaign ID is 3802):
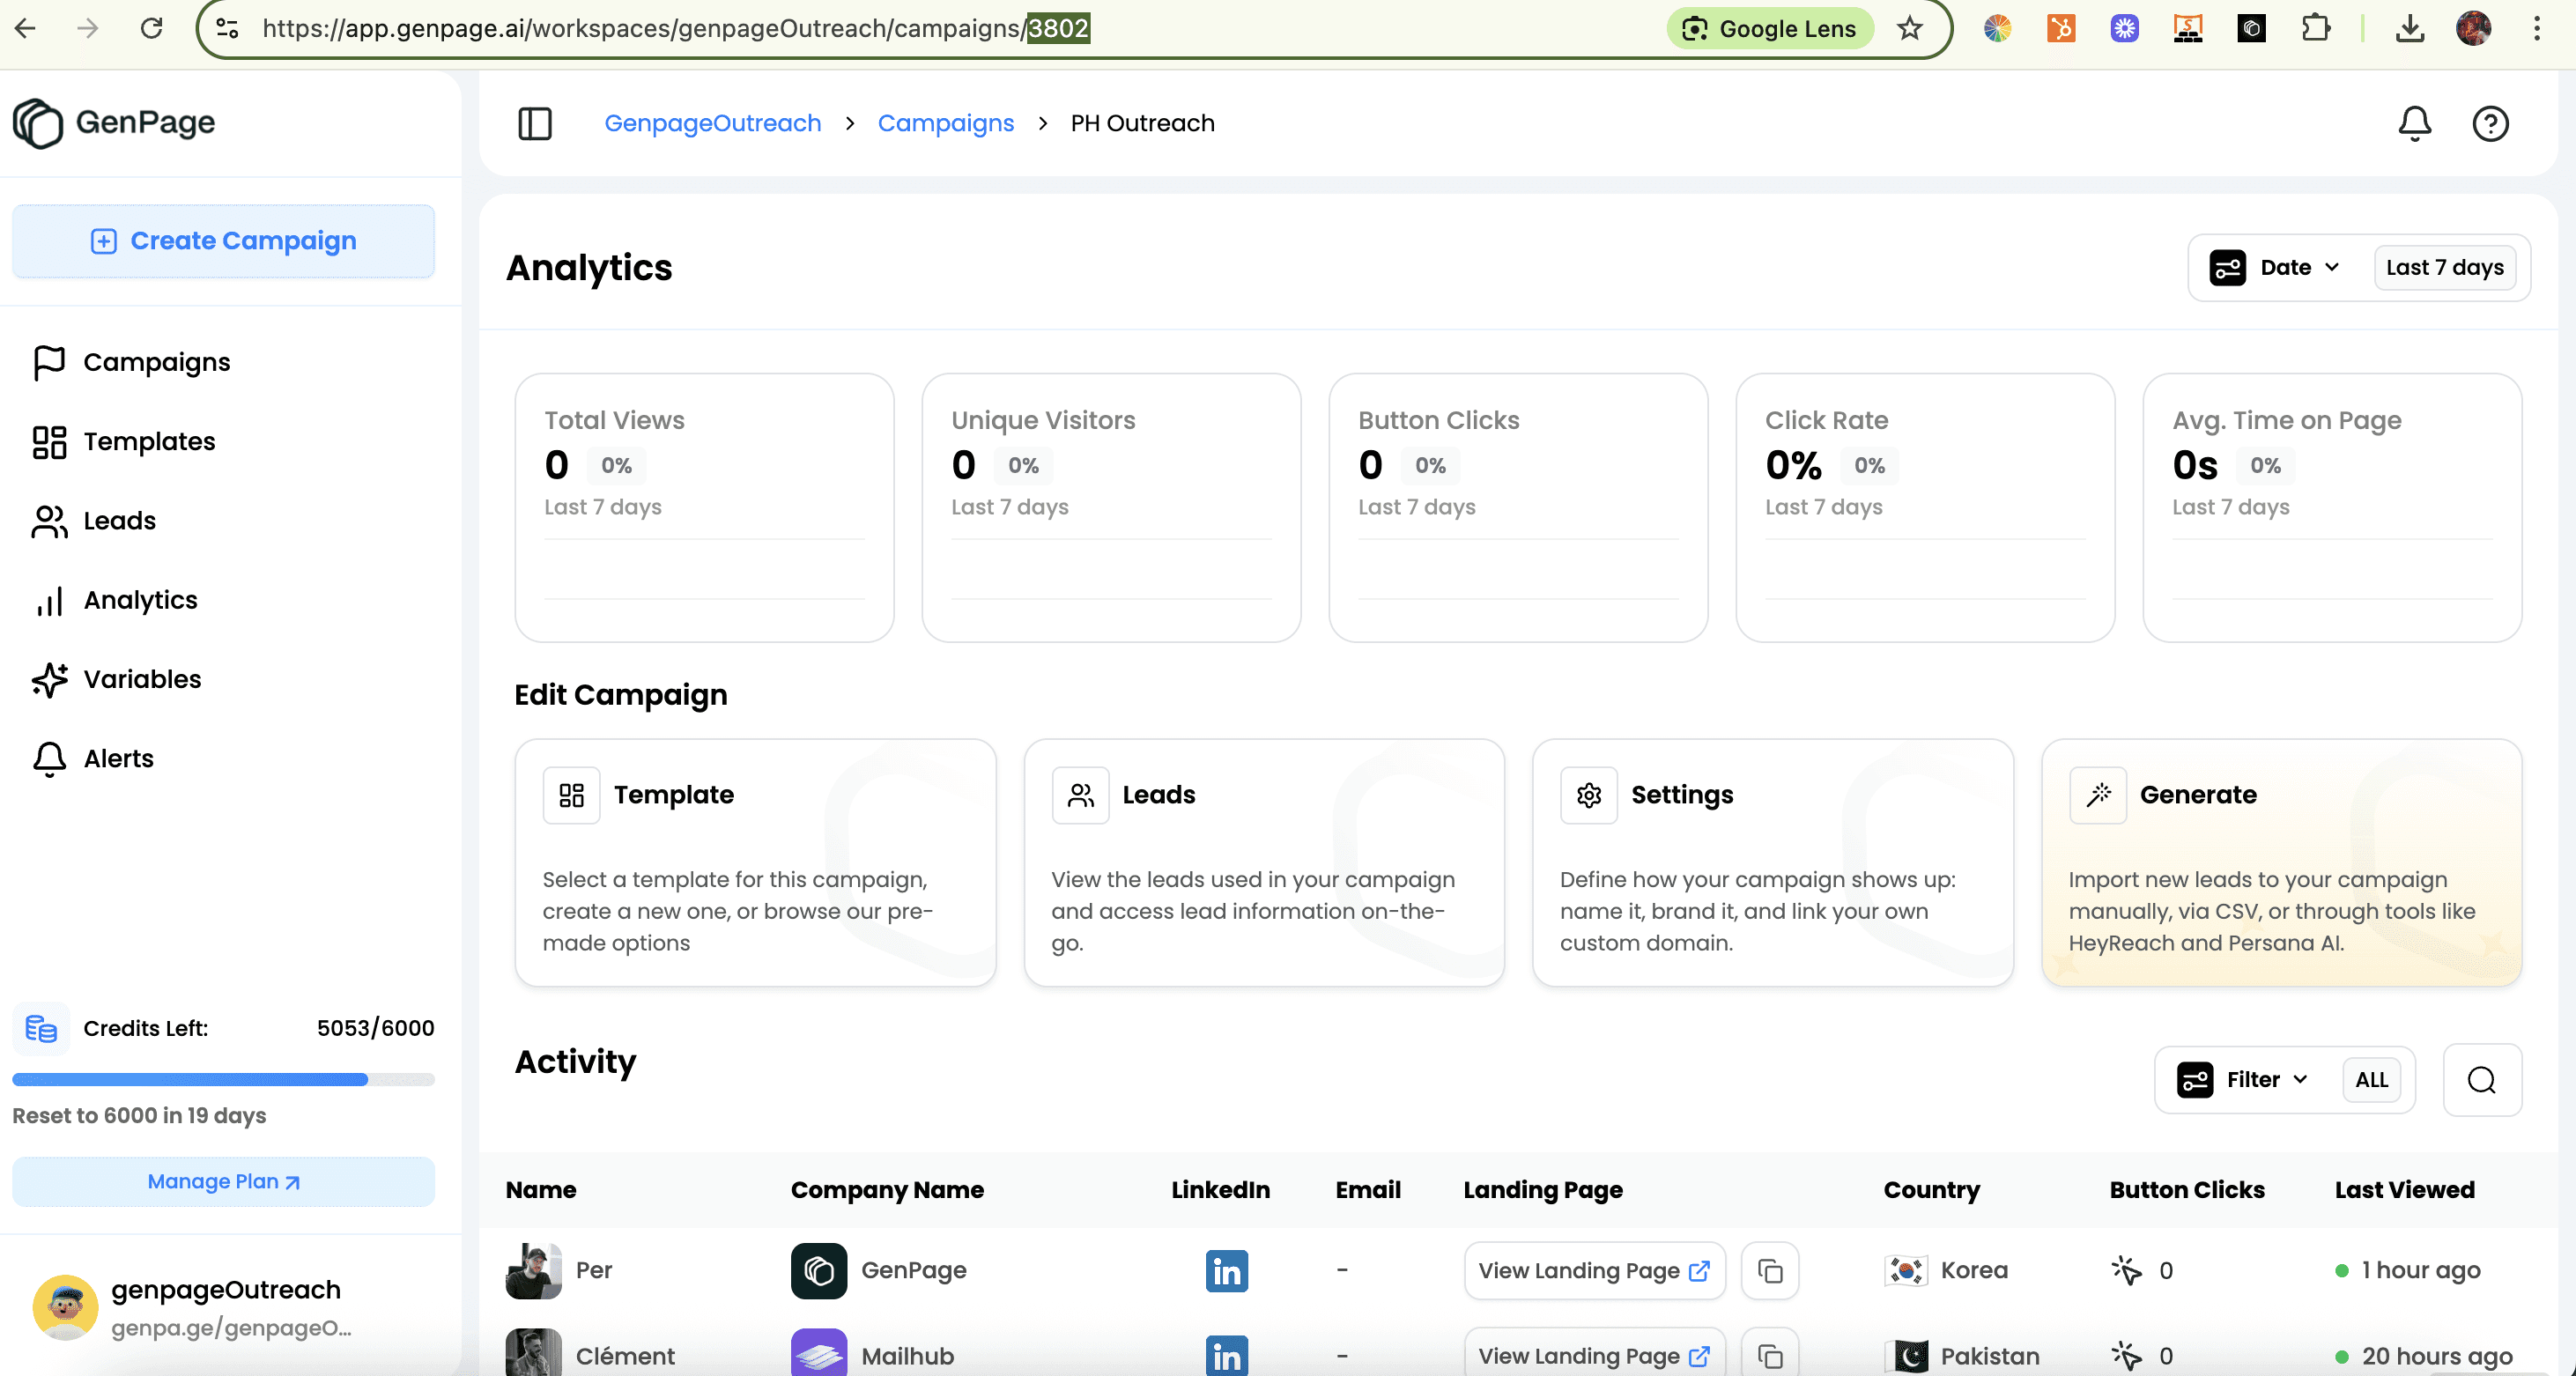
Finding your Genpage campaign ID in the campaign URL of your browser
Map your Clay columns with GenPage variables:
- The values highlighted in green are your GenPage variables
- The second value in quote marks can either be hardcoded, or a Clay column. Simply type "/" to search within your Clay columns and map a column to a GenPage variable. Make sure this second value is within quote marks, e.g. "Clay column A".
- To add a new value, add a comma, go to a new line, and repeat the process above.
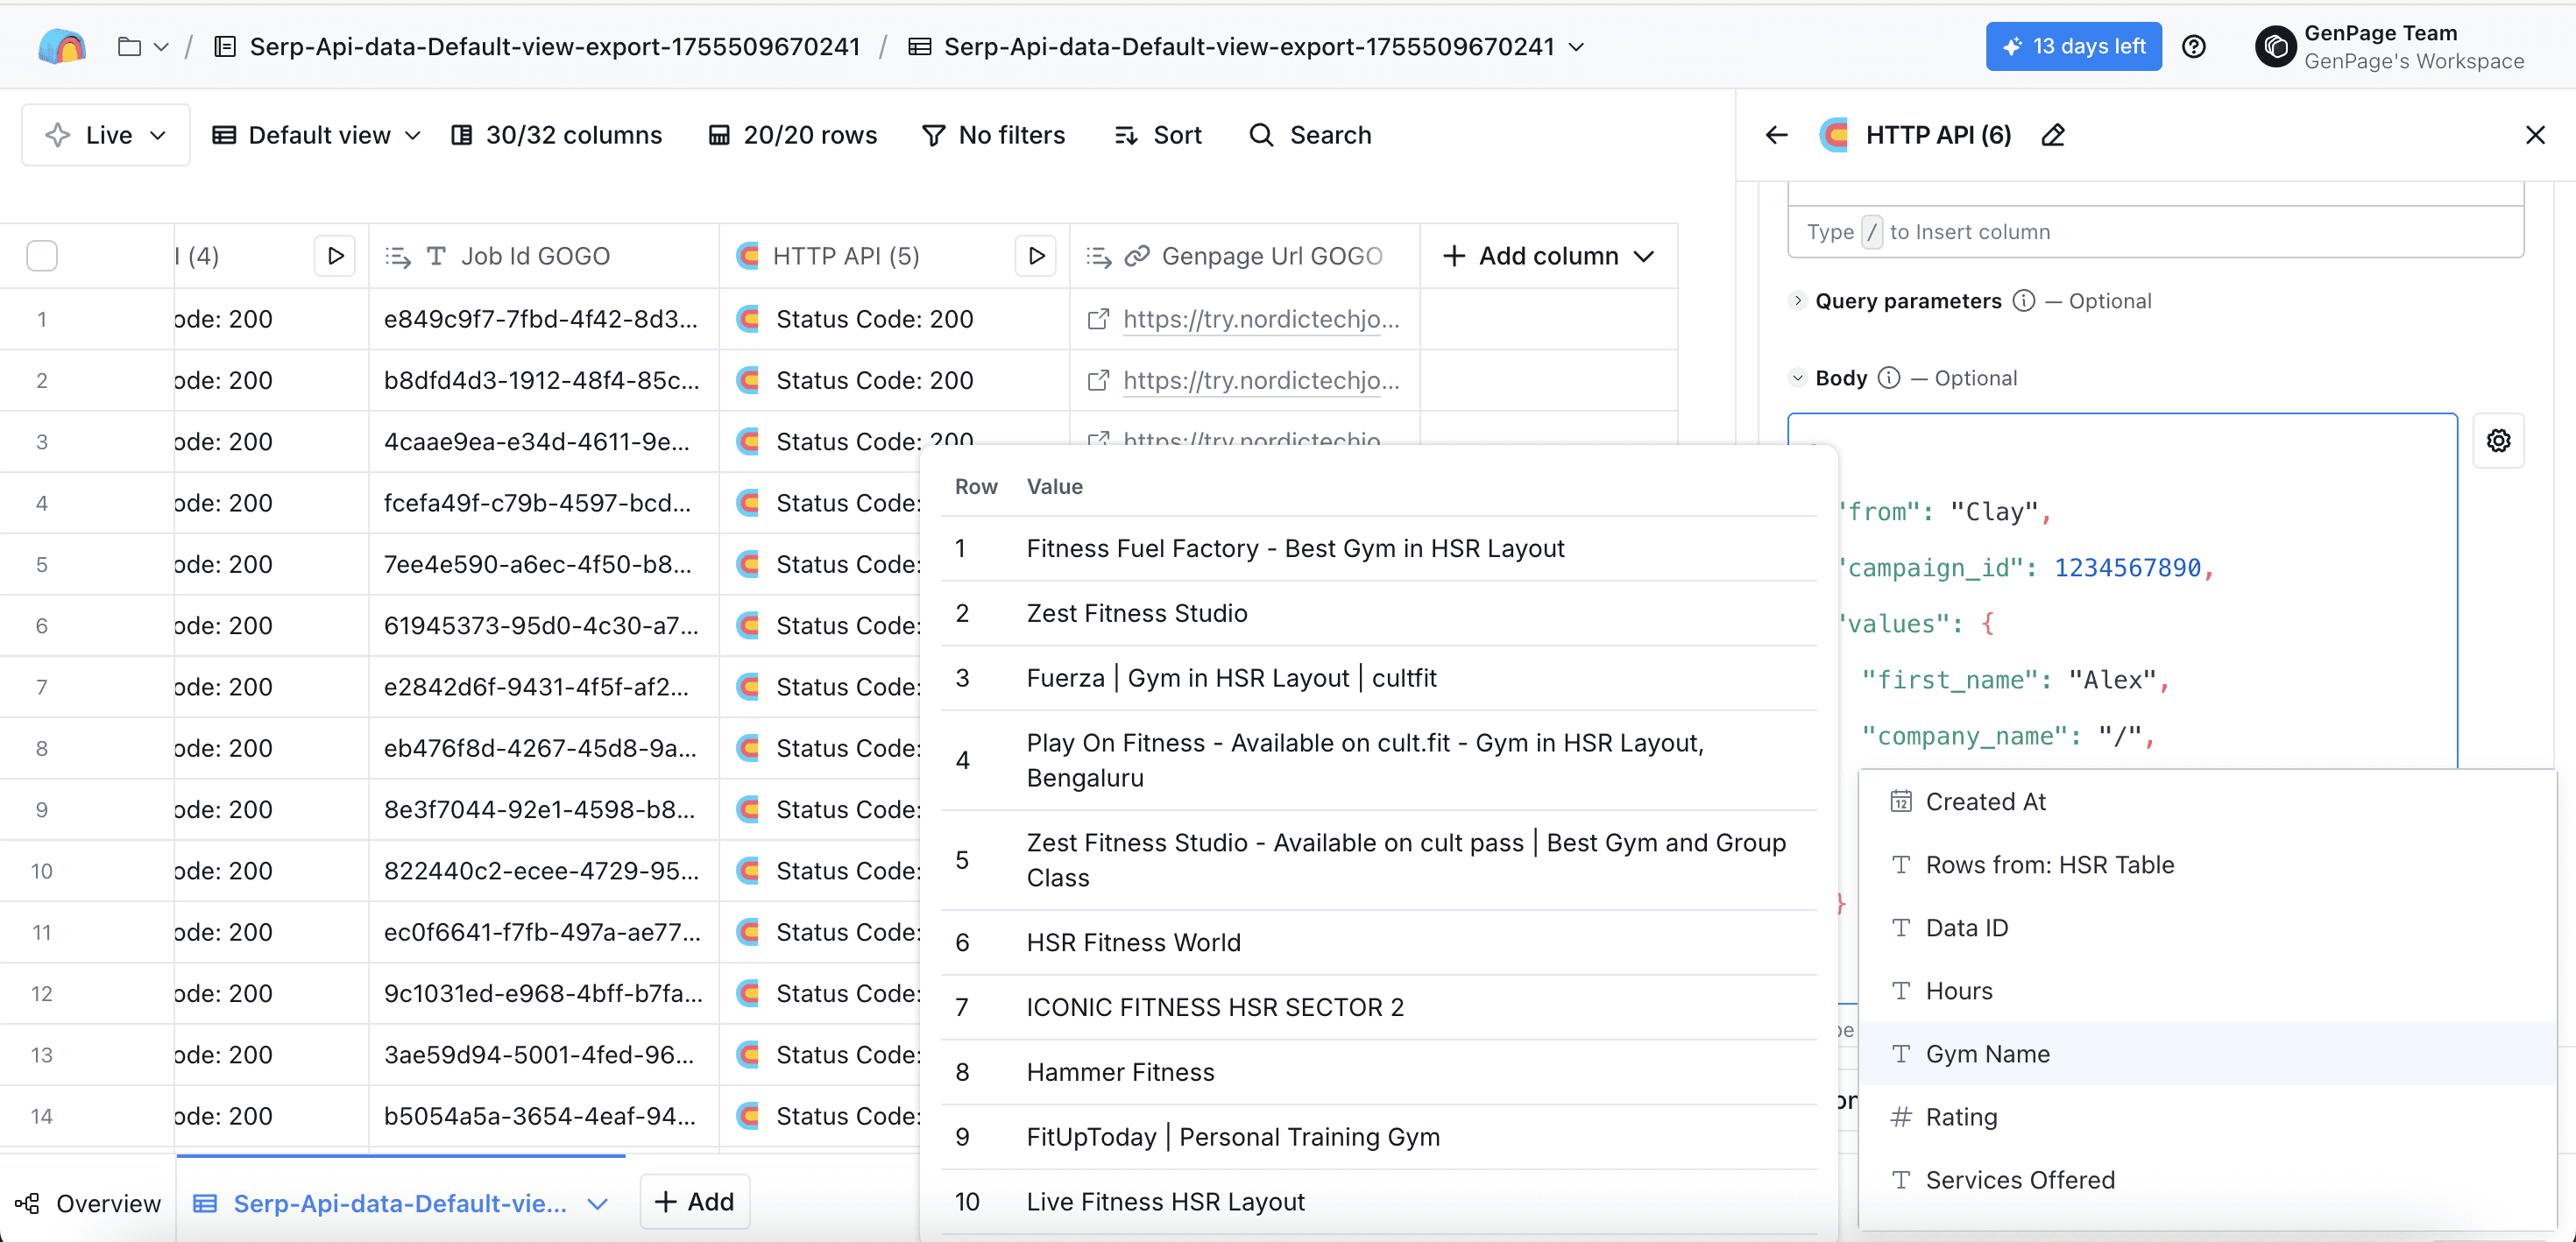
Mapping Clay columns to variables in GenPage
If the JSON input is wrong, the input box will be highlighted in red. This means you need to fix your formatting. You can click outside the box after you fix the input to confirm the input is now valid.
To ensure the API call retries in case of errors, you can navigate to the "max retries" field and set it to 5:
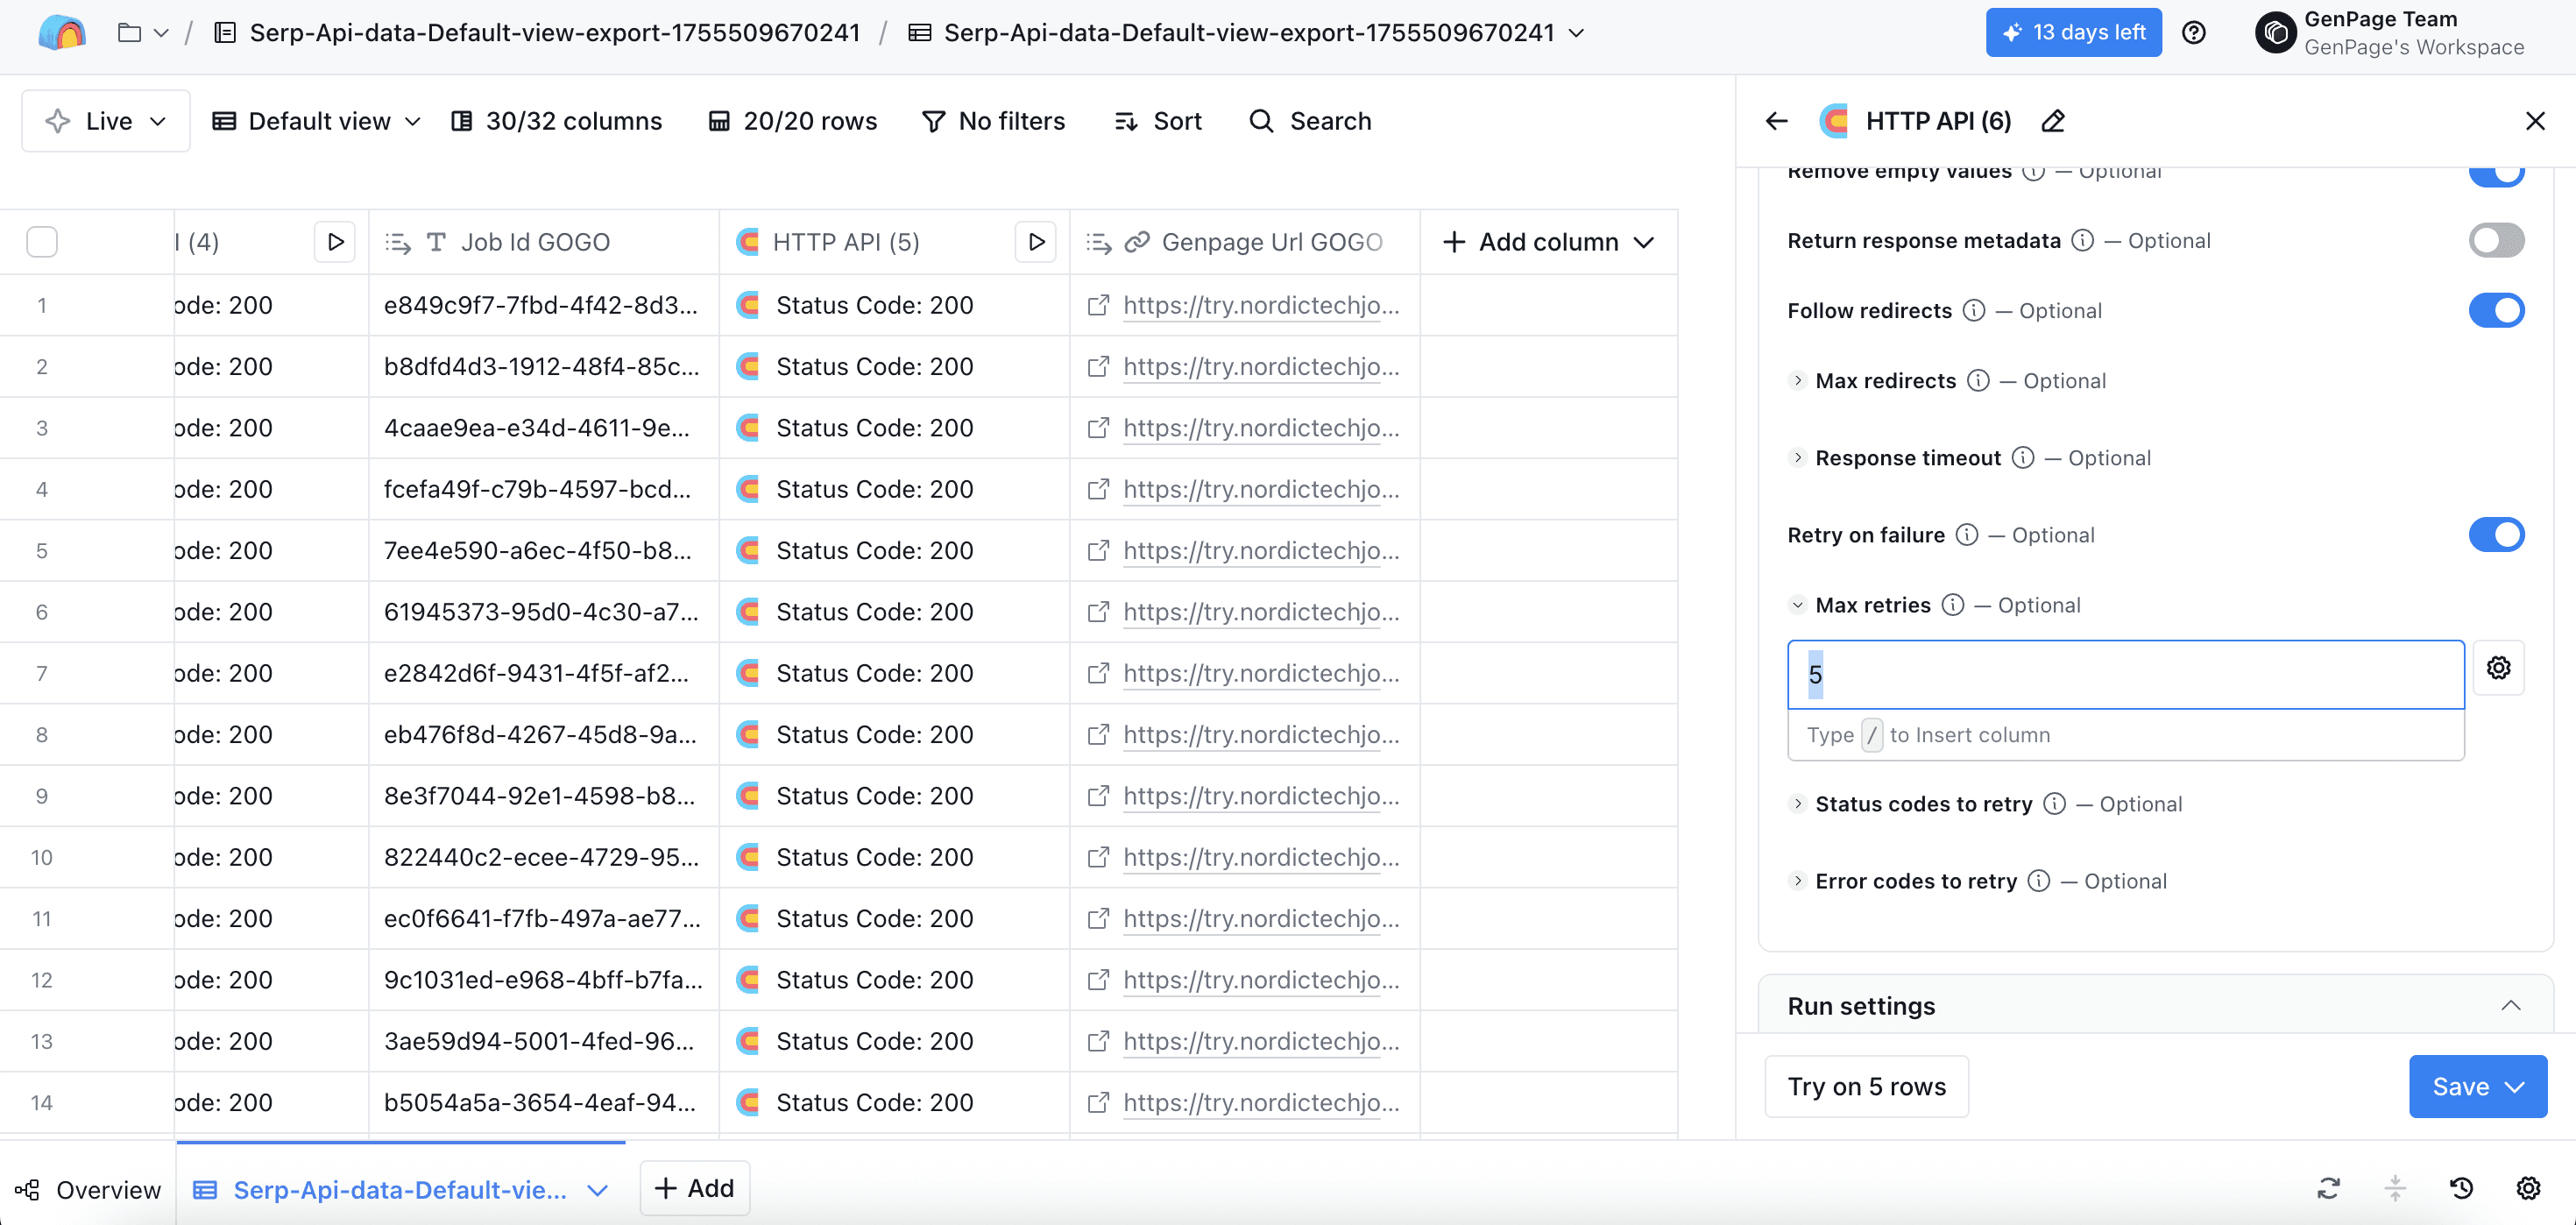
Adding a number of max retries for your API request
In the "status codes to retry" field, also add
429 and 500(add a comma after your input to add it to the field). This is to ensure the page gets correctly generated even in case of errors.
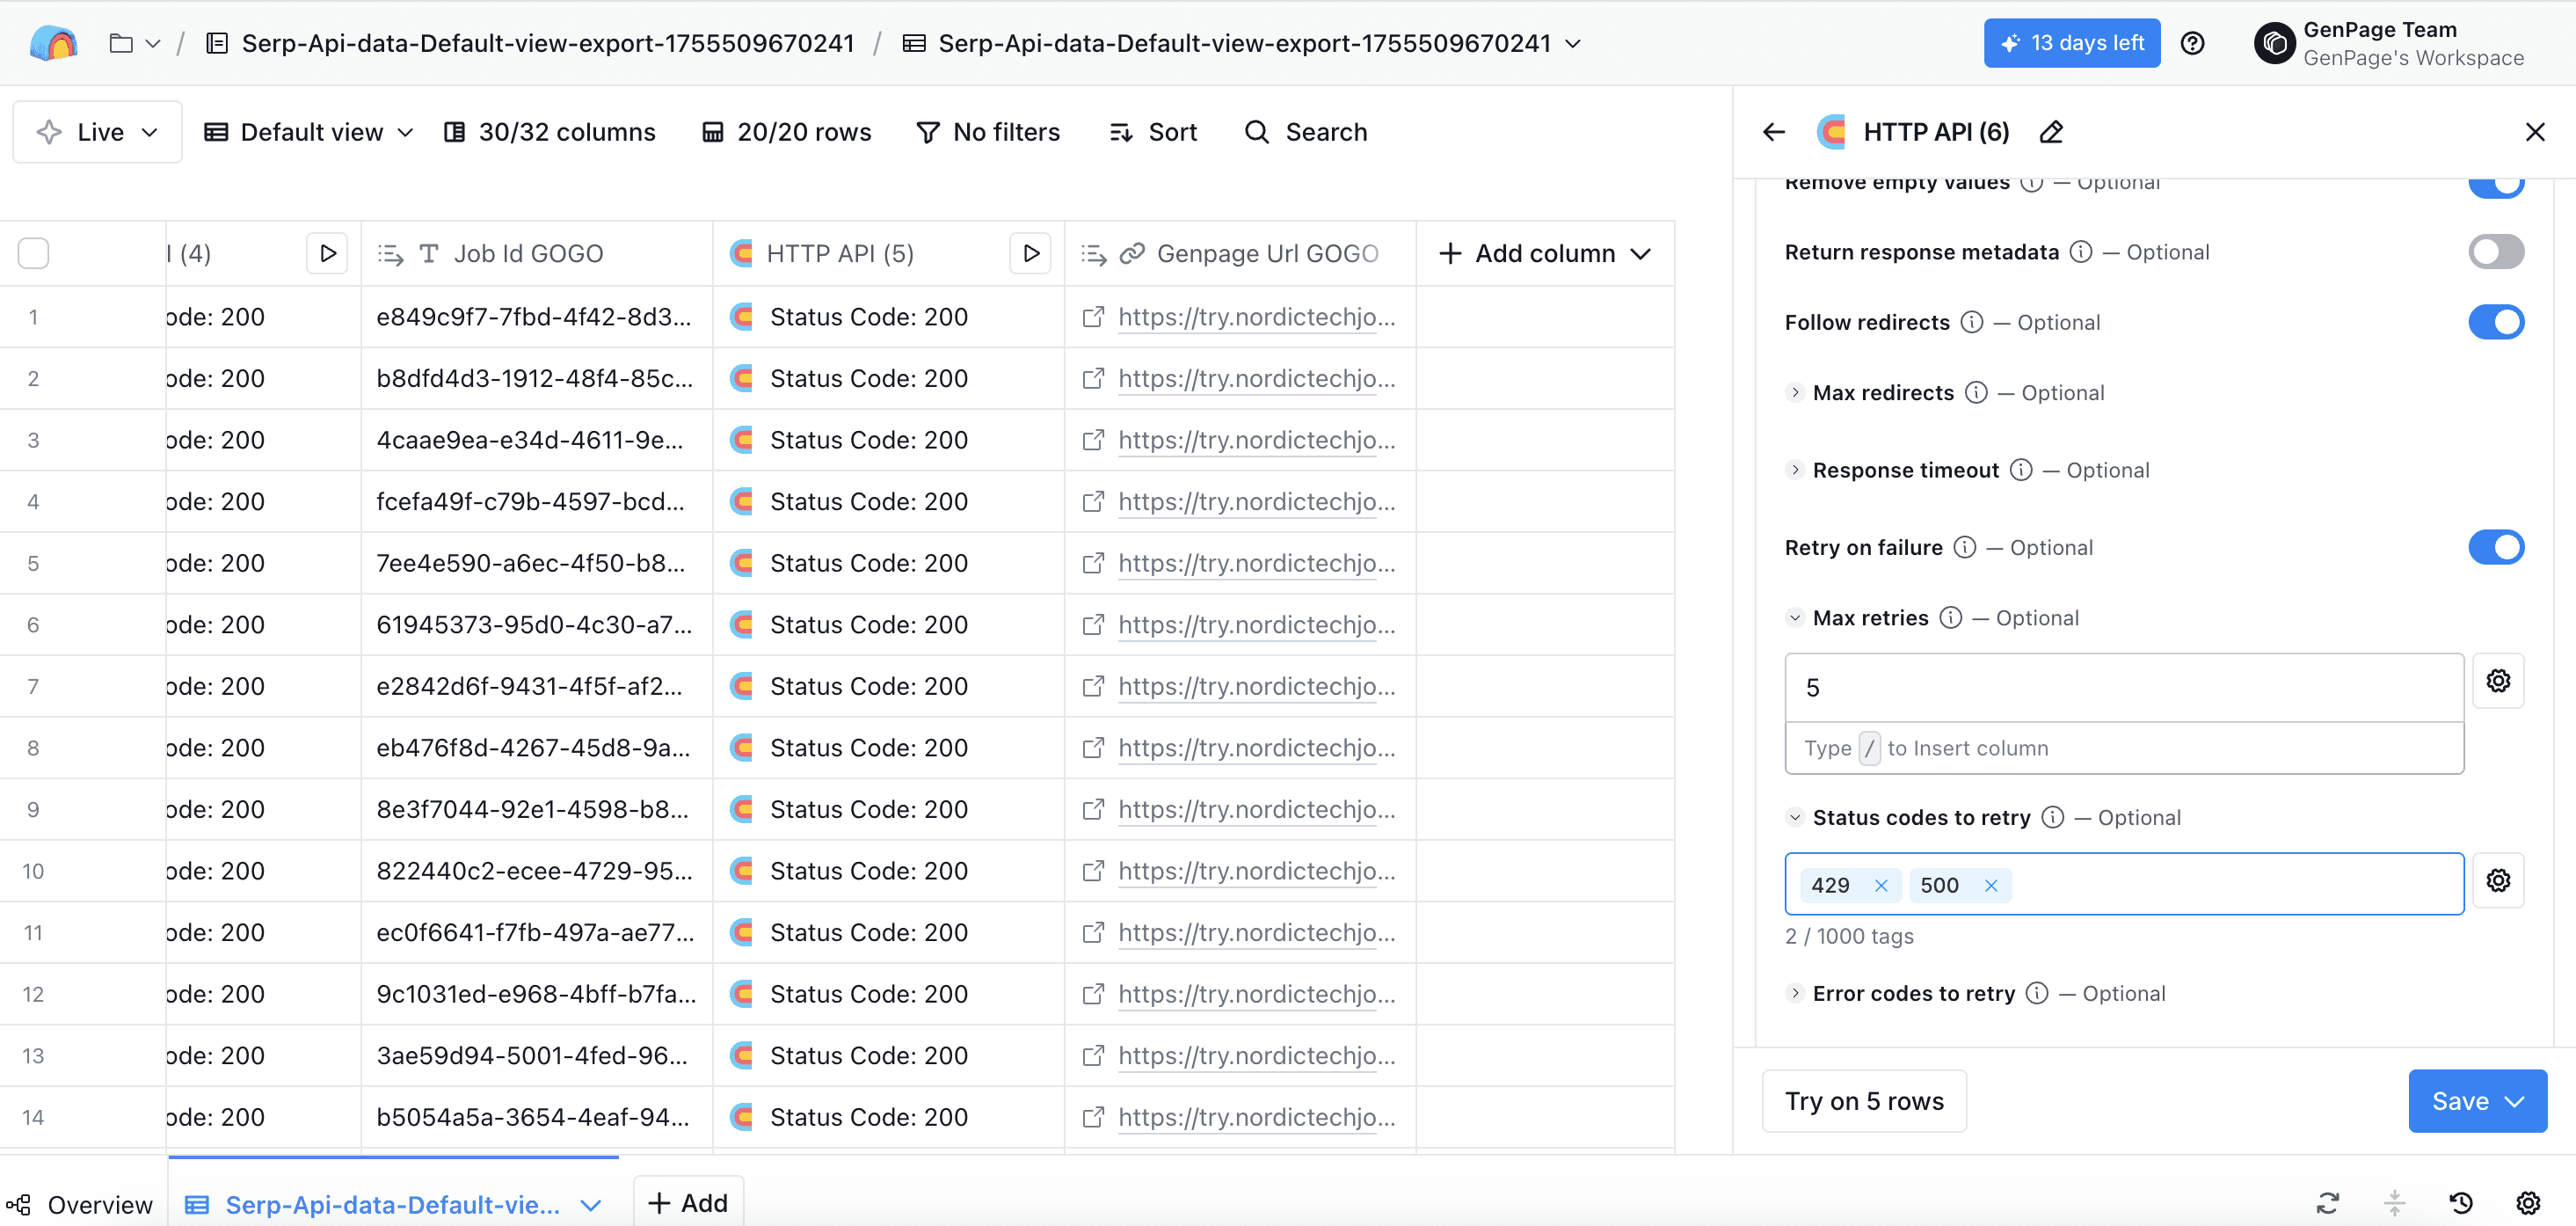
Adding status codes to retry in Clay
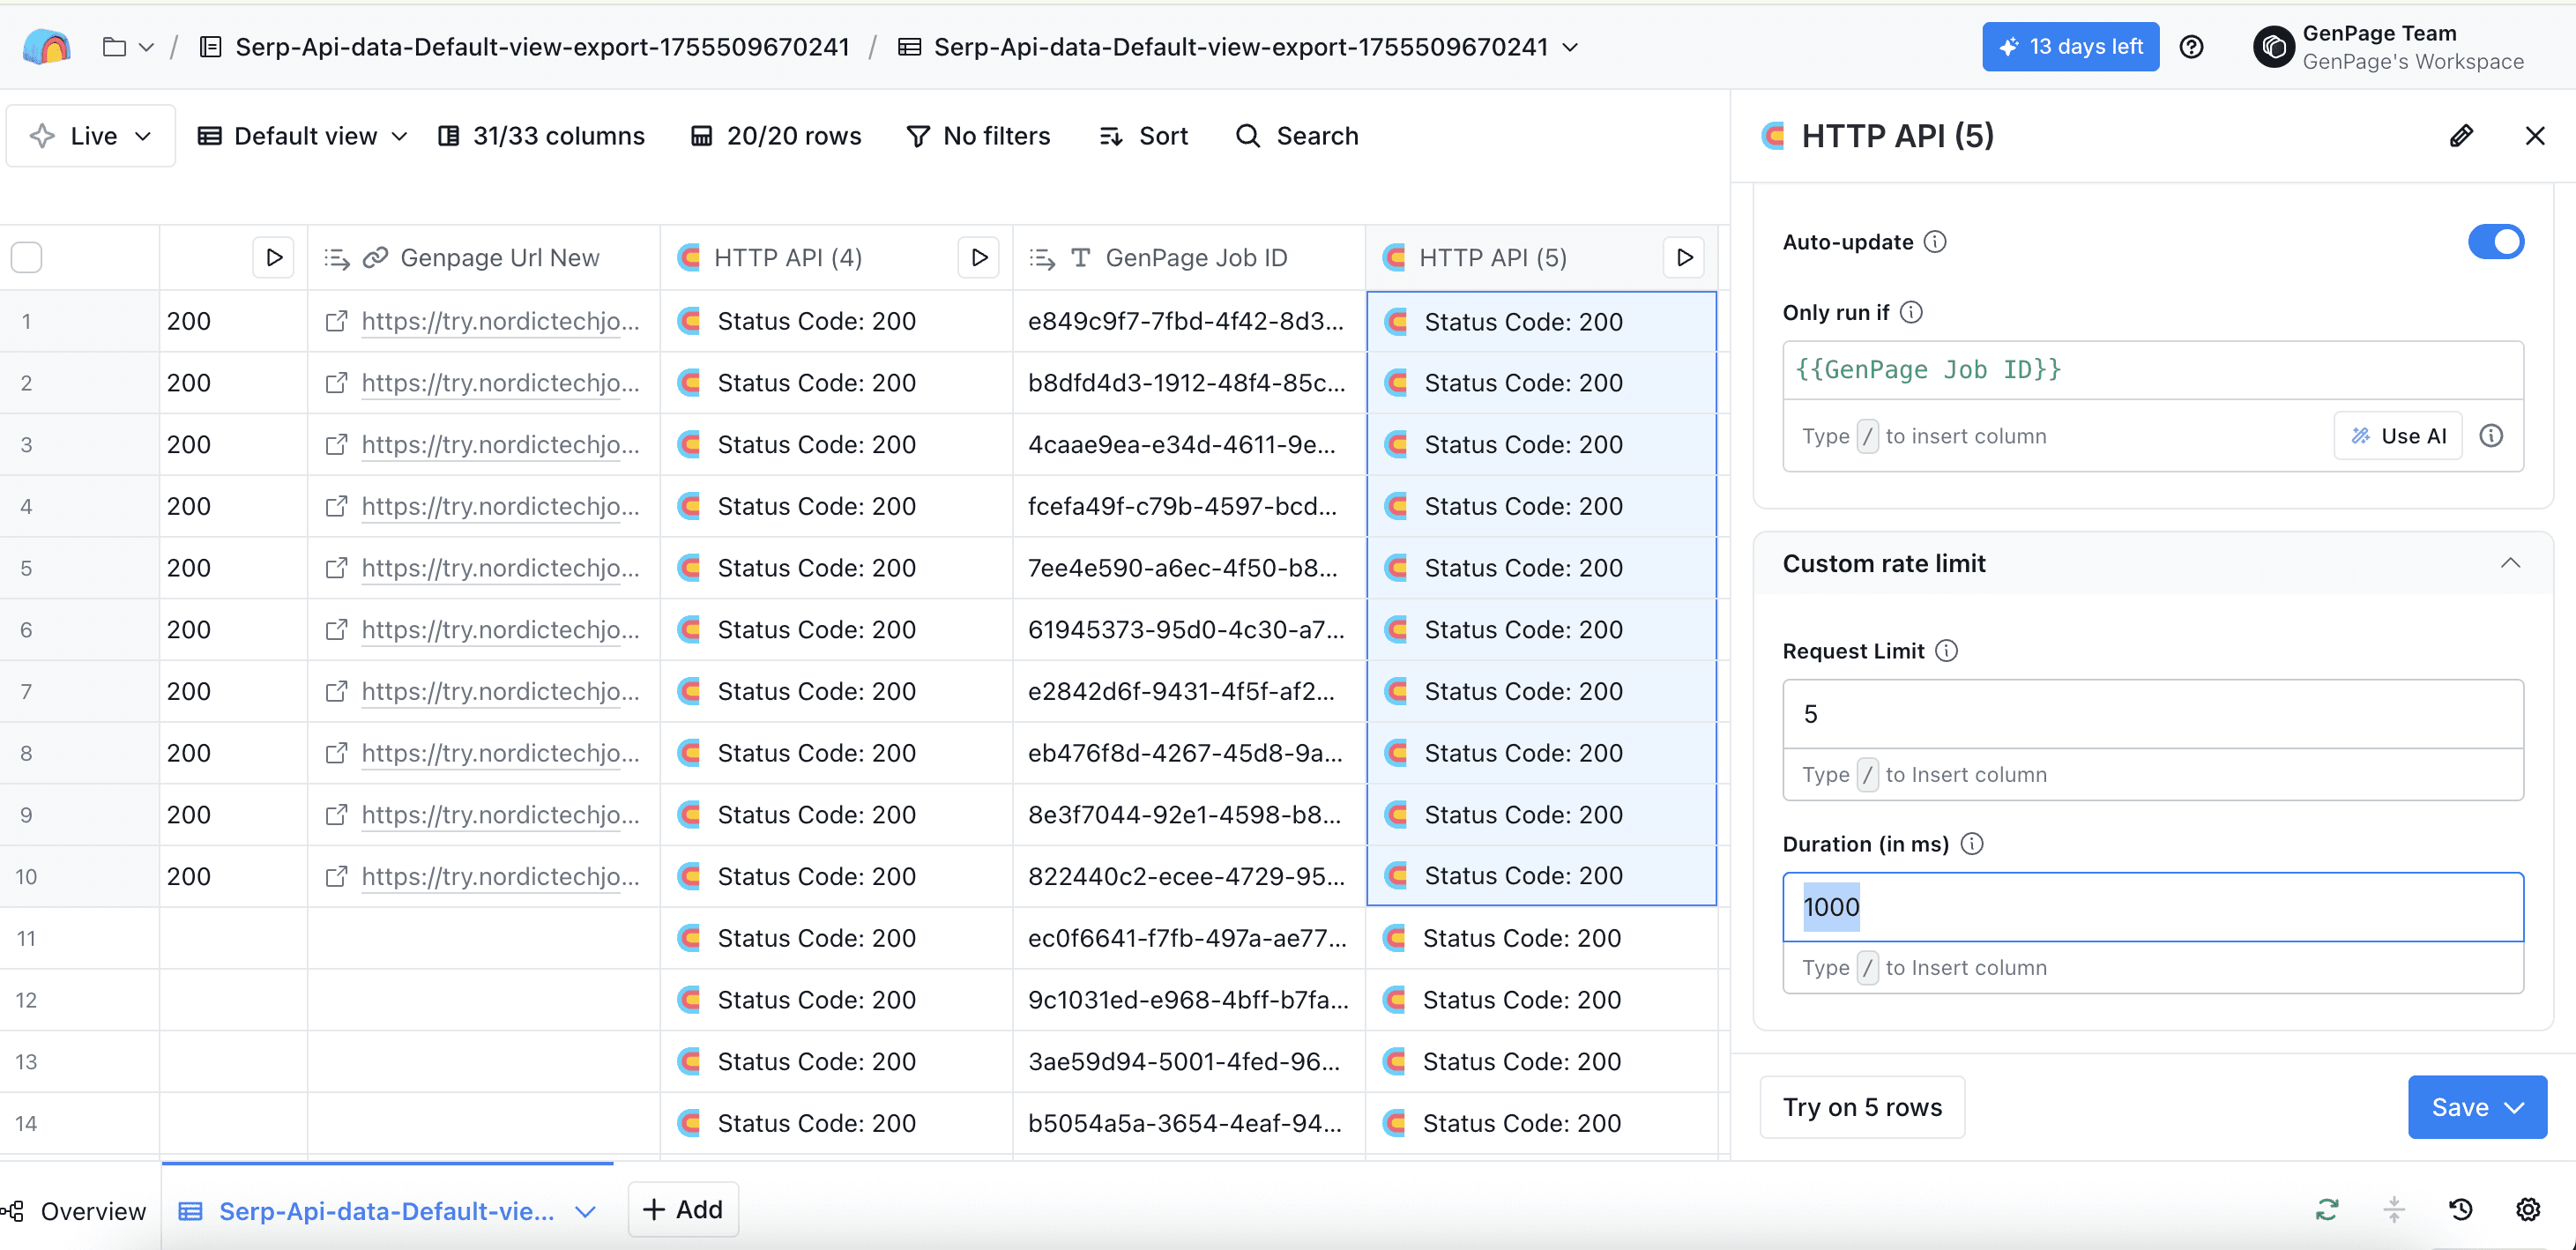
In the "custom rate limit" field, also add the following values:
- Request limit: 5
- Duration (in ms): 1000
Adding a custom rate limit in Clay
Hit "Save and don't run". You can then test your API call by running one cell first (click the play button within the cell and wait a couple of seconds):
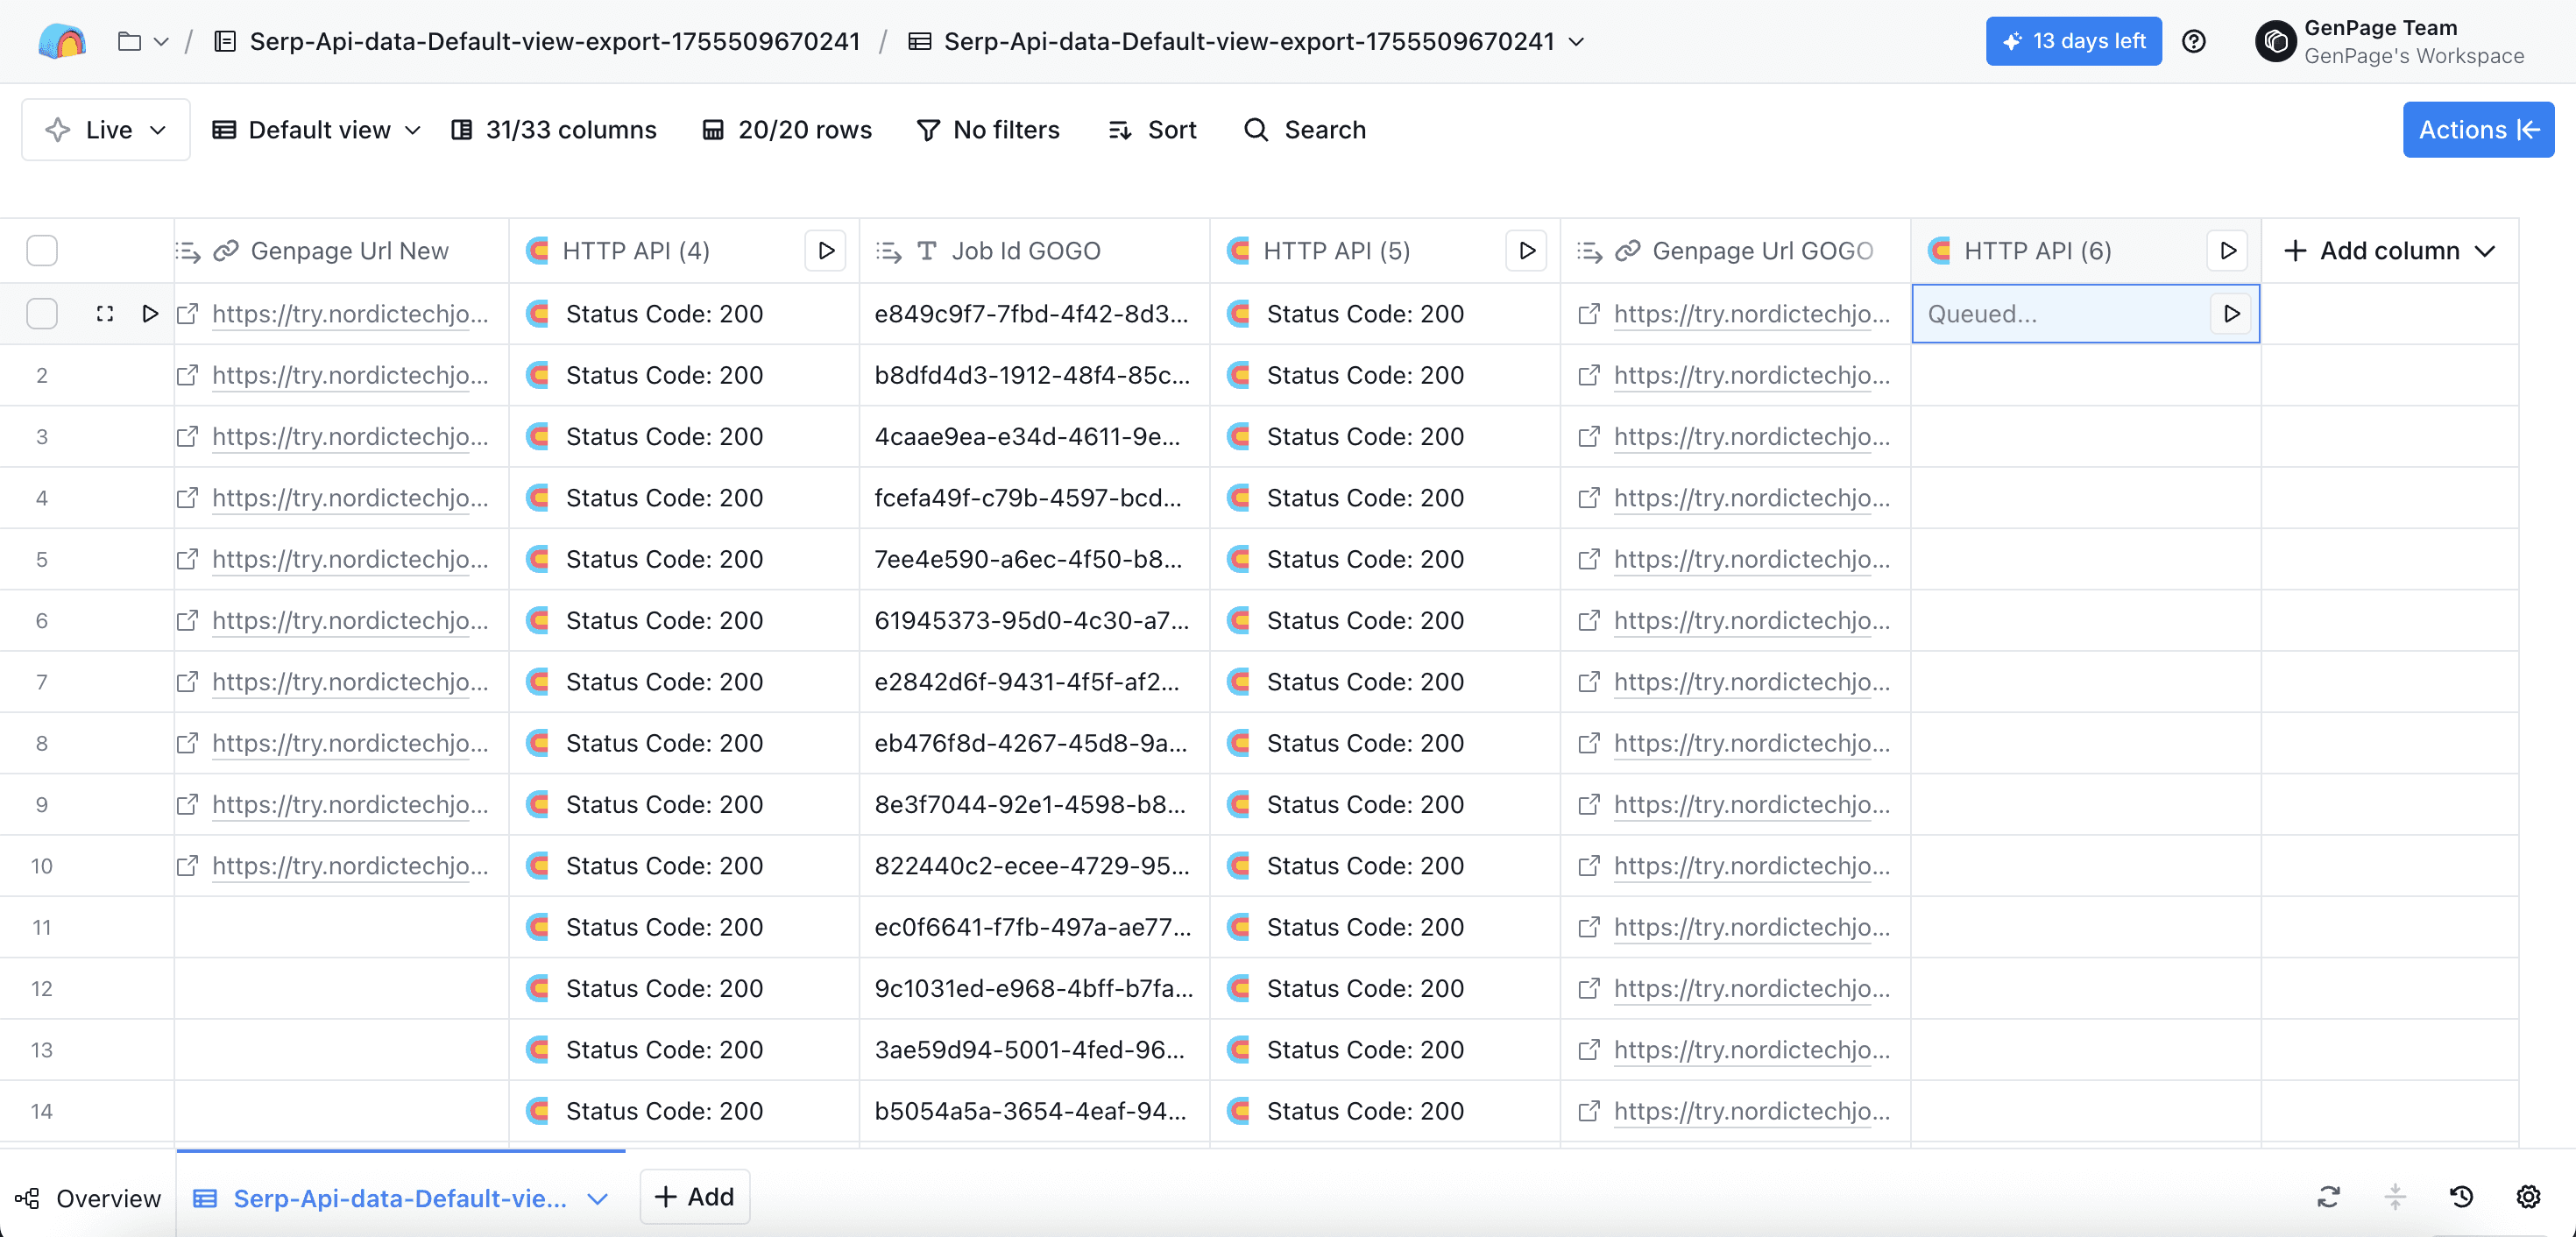
Queuing your HTTP API request
Step 5: Verify success and capture the Job ID
Once your API call has succesfully run, your row will show "Status code 200". If you click on it, the cell details in Clay will include a "Job ID":
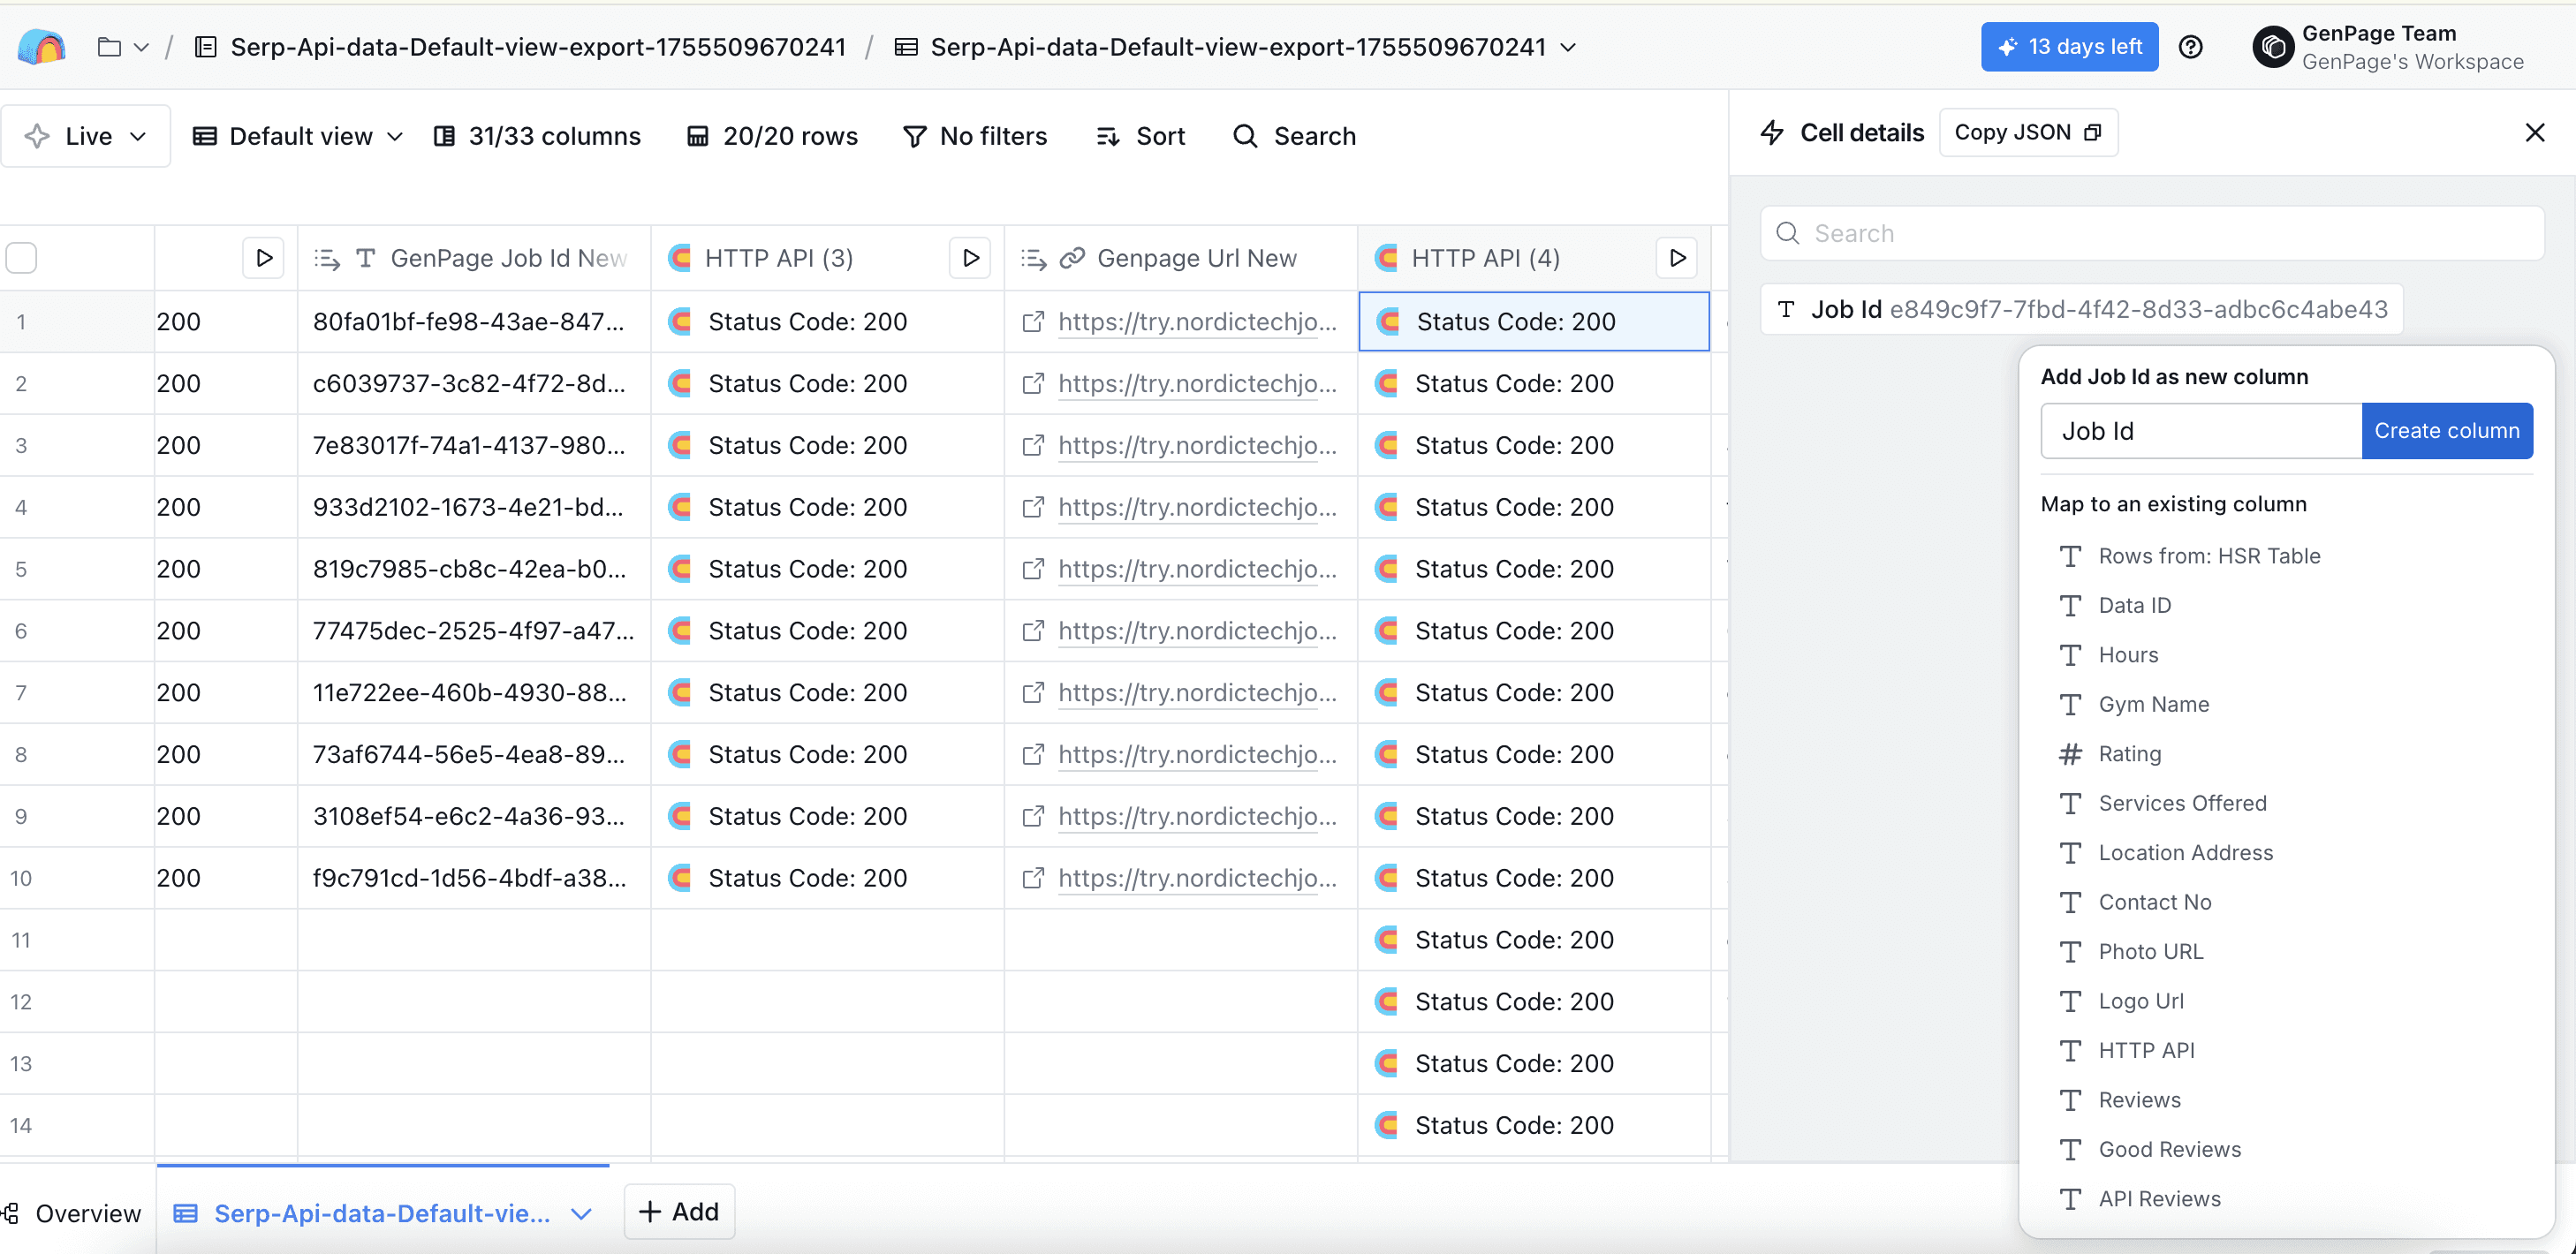
Finding your GenPage Job ID in Clay and creating a new column
Click on the job ID, select "Add as column", and save a name for the column suche as "GenPage Job ID":
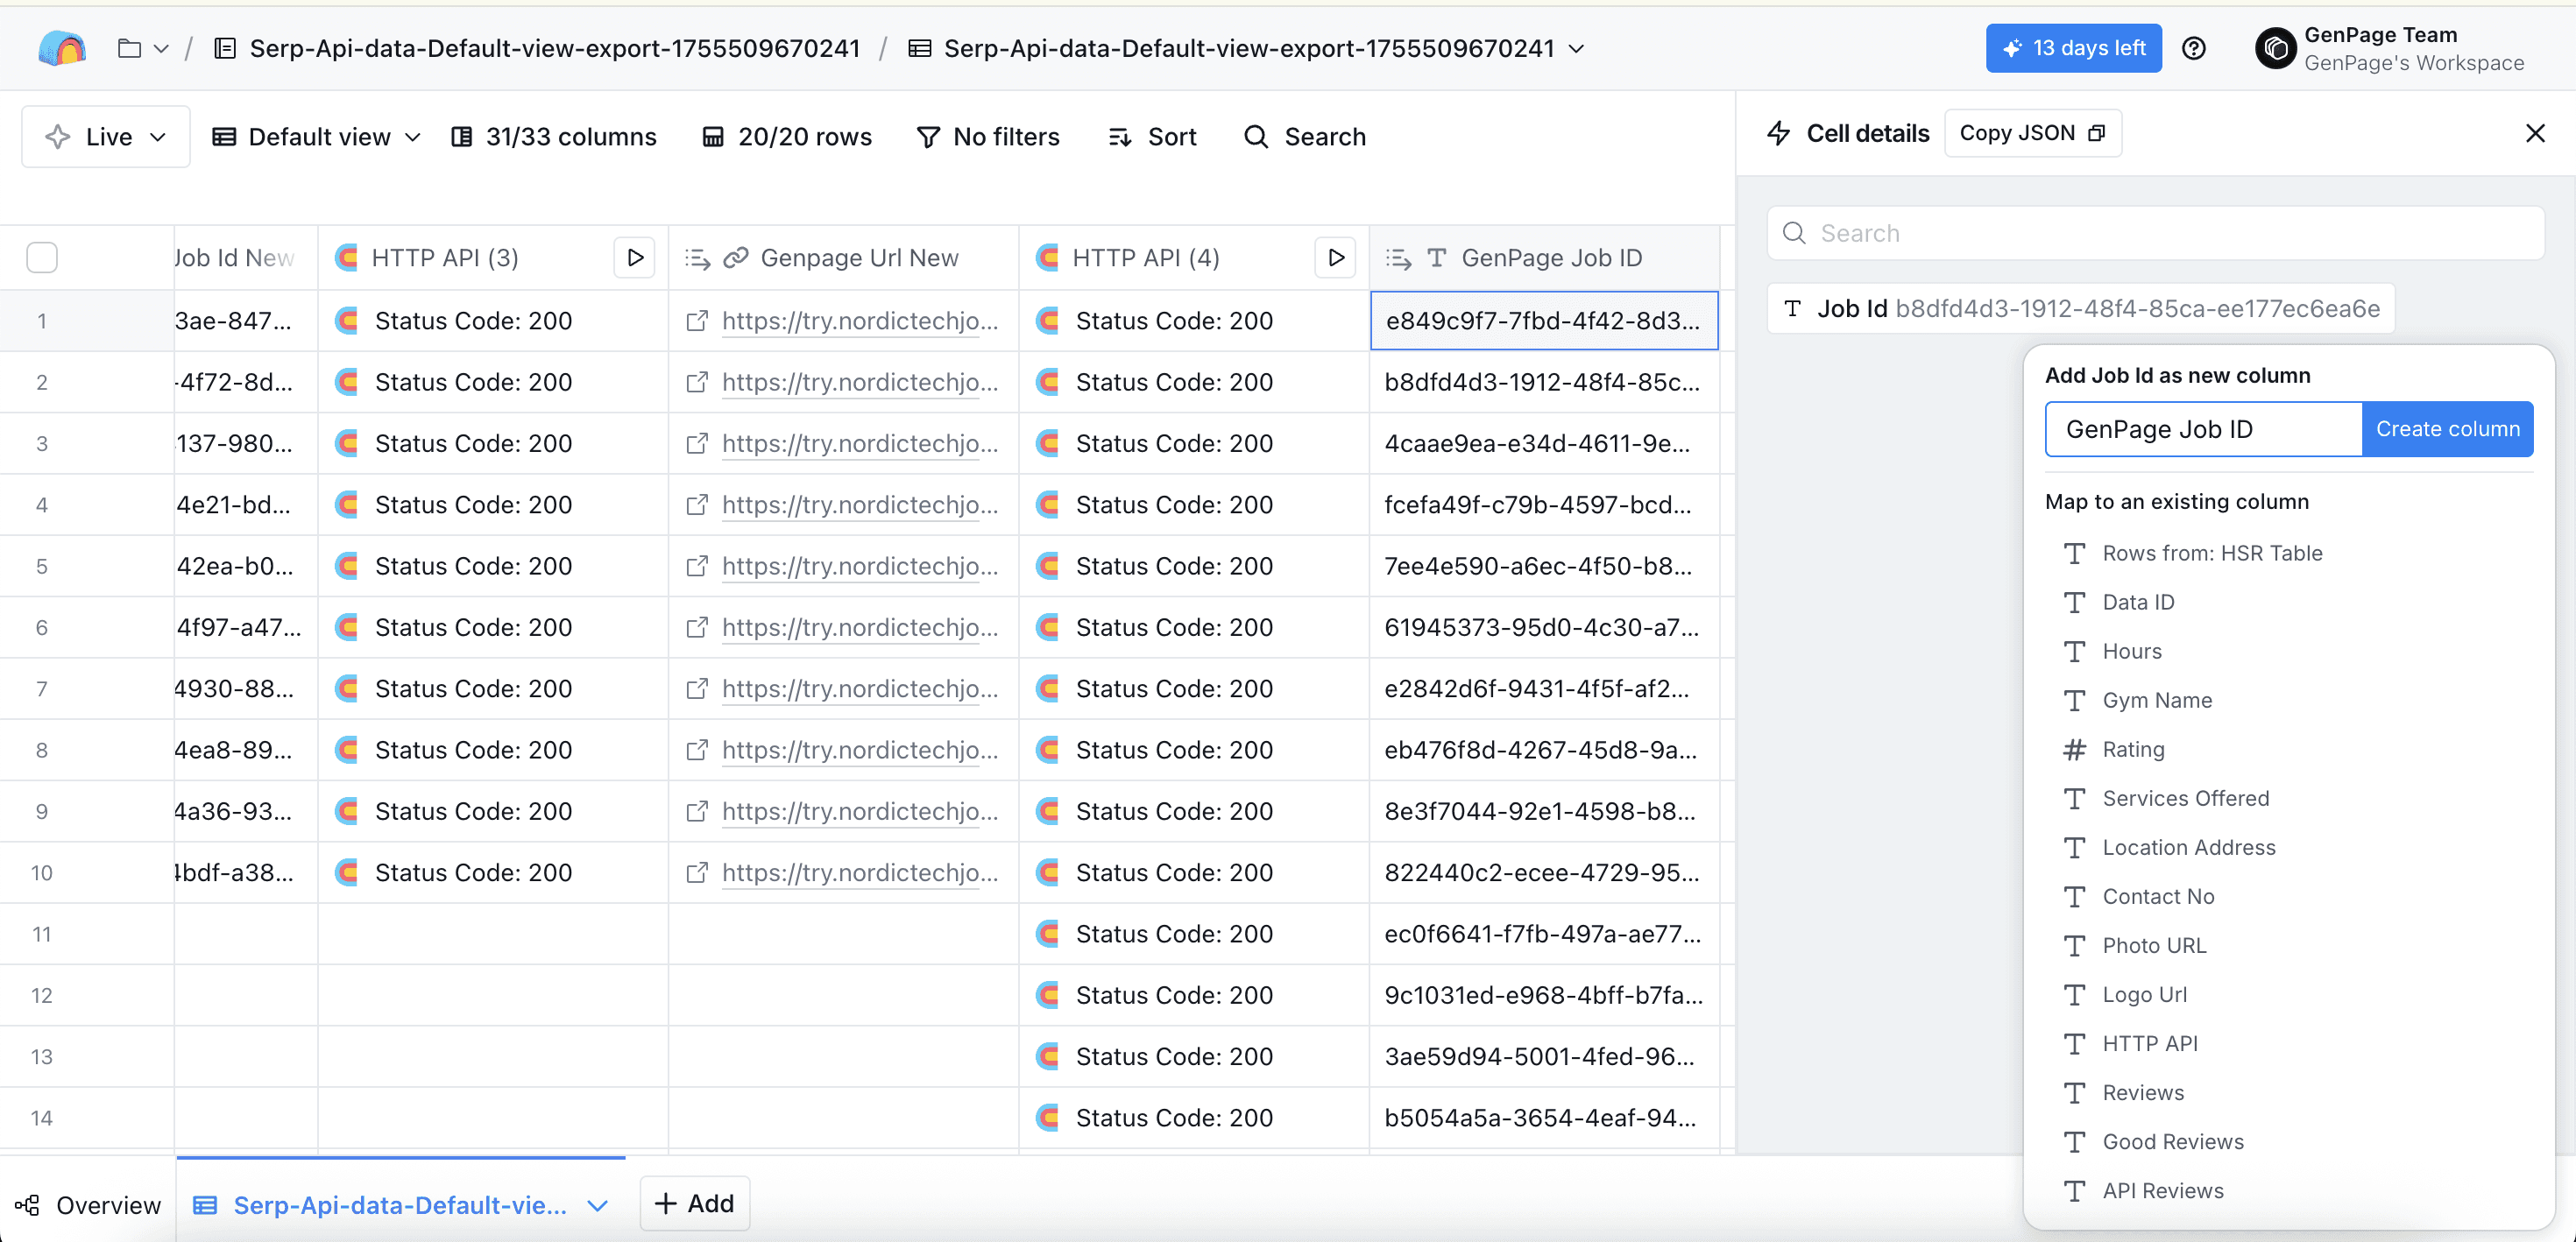
Adding the new "GenPage Job ID" column
Step 6: Add Clay Variables to your GenPage Template
Once you've created and completed the first HTTP API request, GenPage will start receiving your leads from Clay and their related variables. To ensure your variables show in the personalized landing page you've prepared for them, head to your GenPage campaign, and add the new variables throughout relevant content:
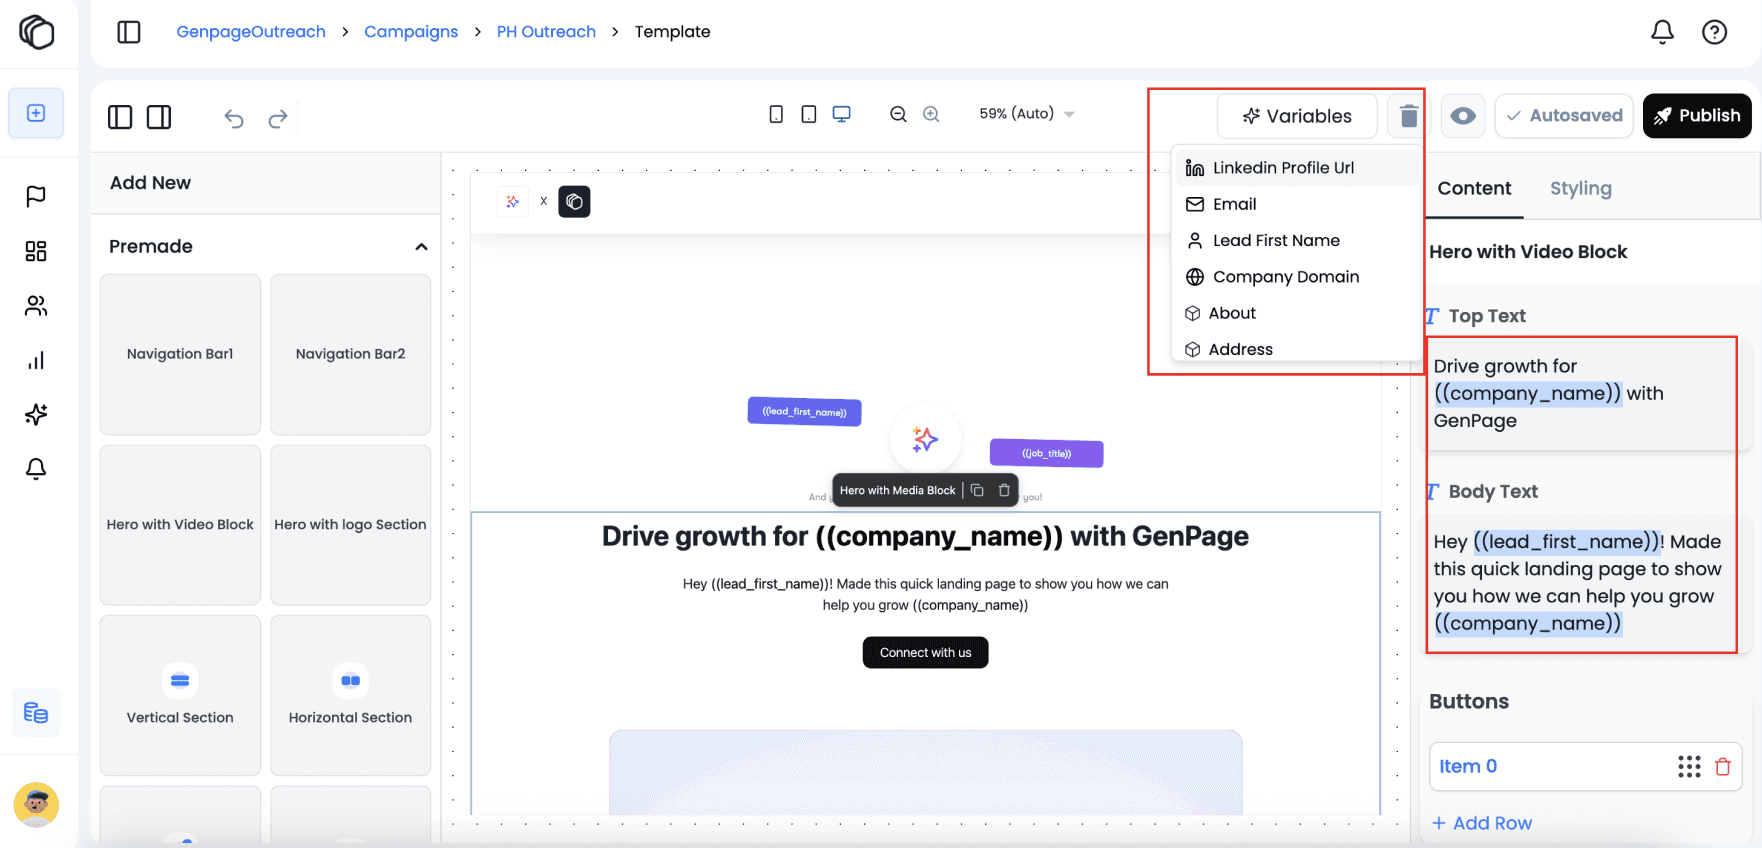
Linking Clay variables to GenPage variables in your landing page template
Step 7: Create a second HTTP API enrichment to fetch results
In a new column, add another HTTP API enrichment. This will use the "Job ID" to get the final GenPage URL in Clay.
Use the same API key you've saved in the "HTTP API (headers) account in the enrichment settings.
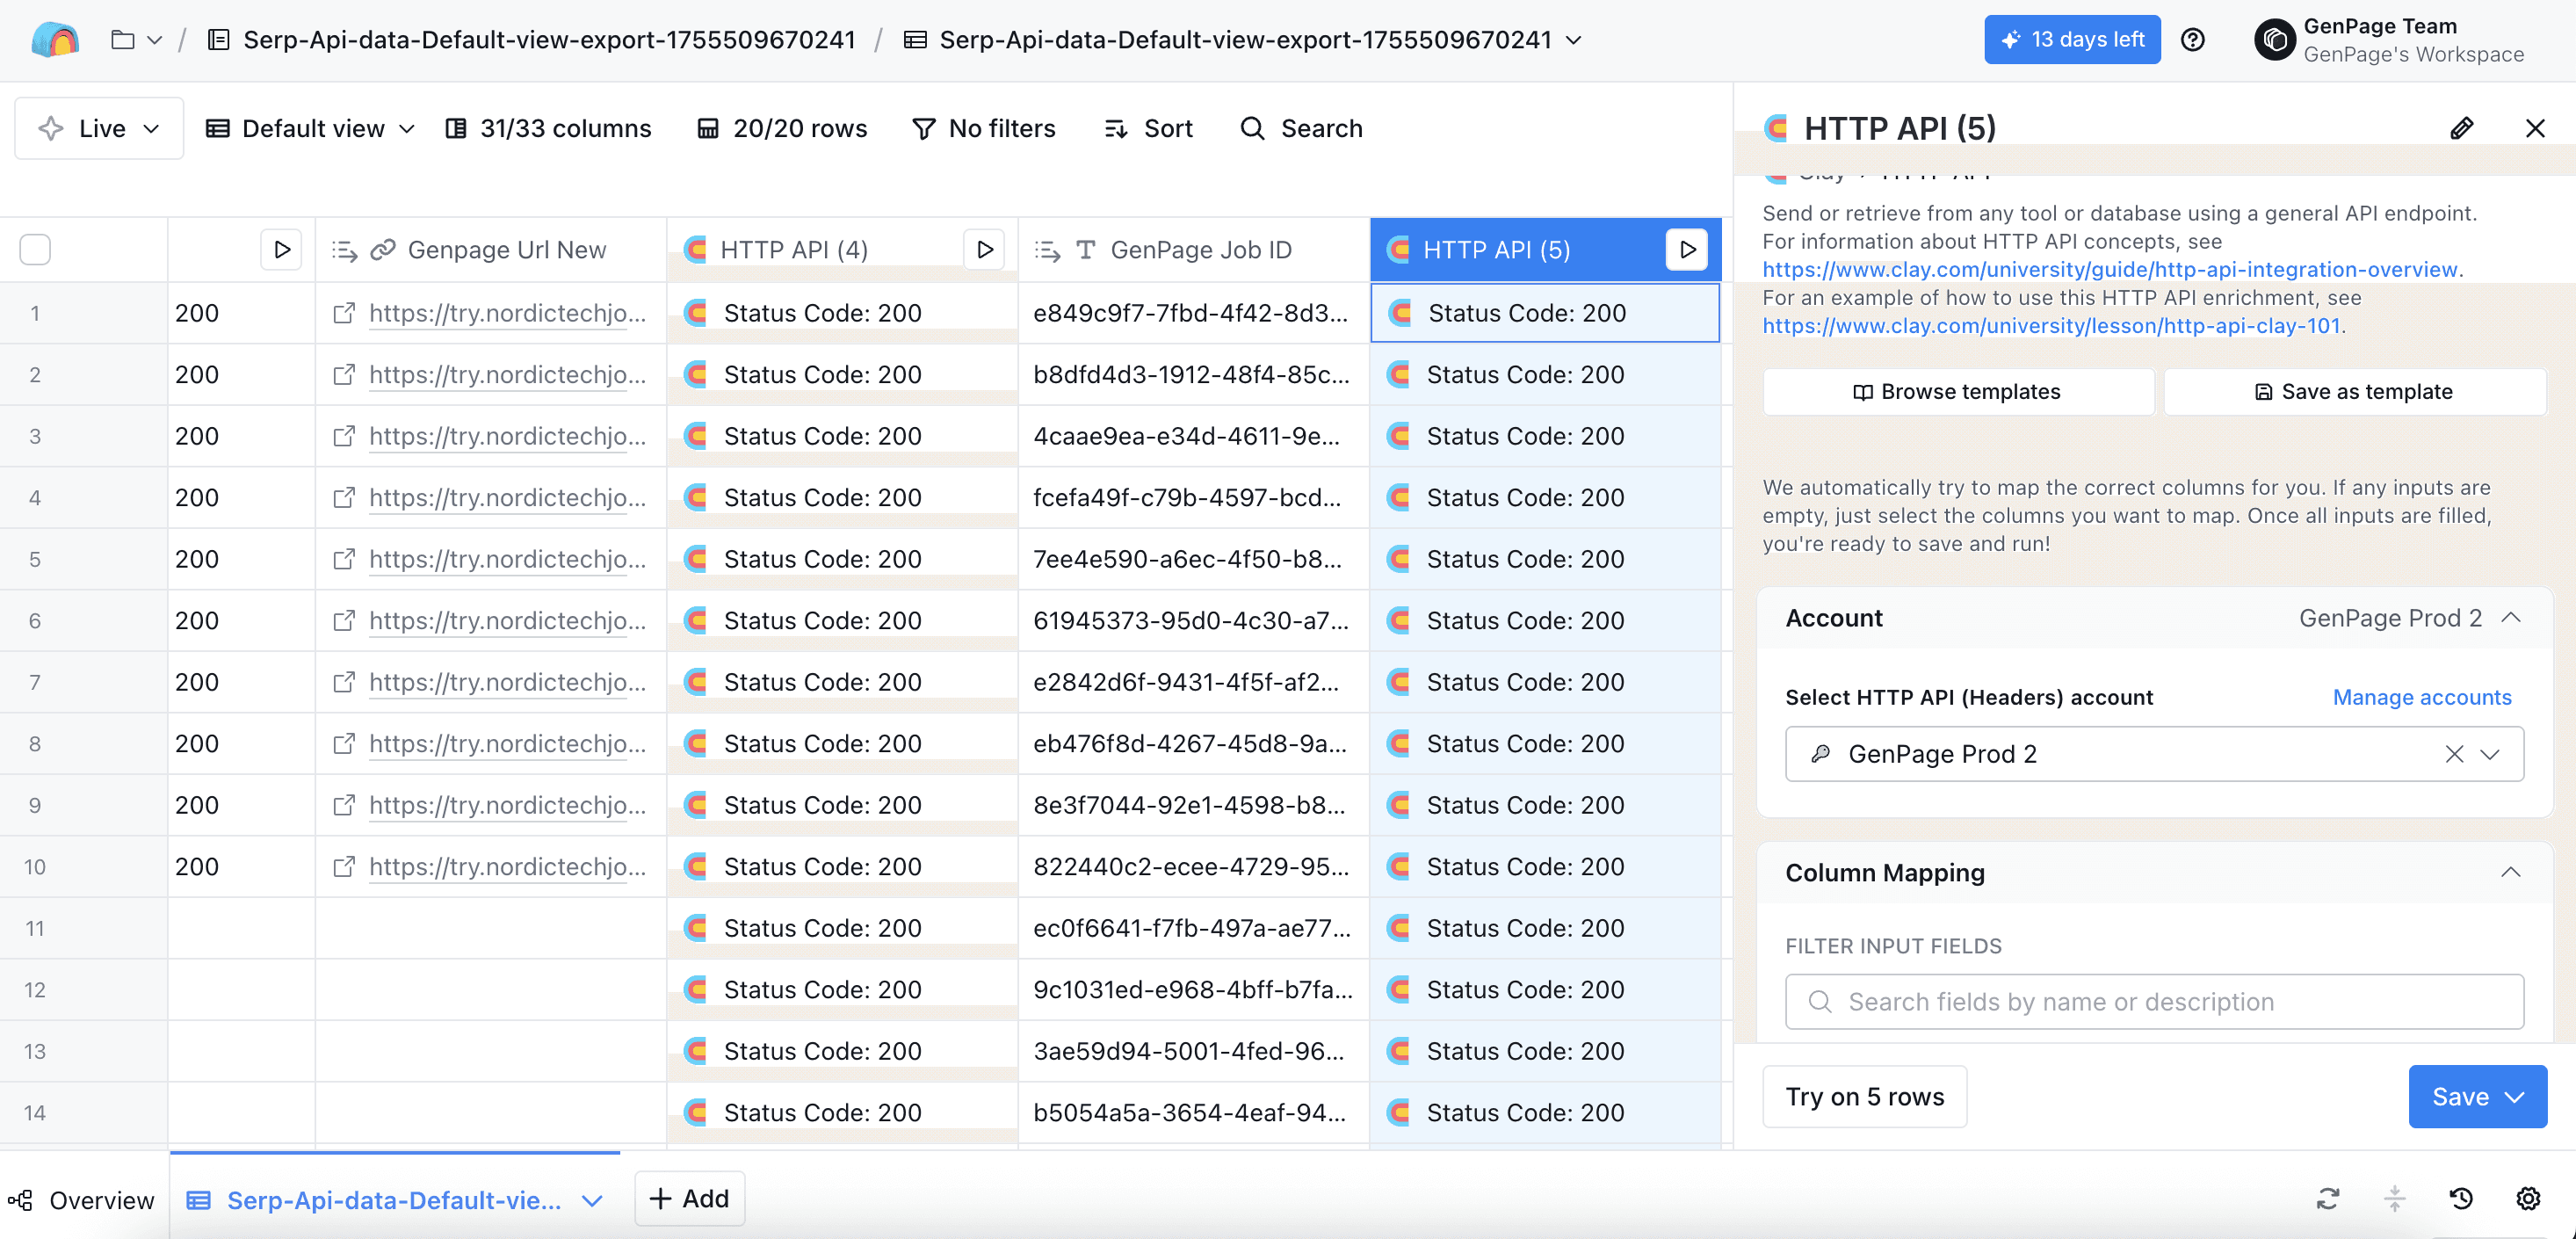
Adding a new HTTP API request to fetch results
Under the "Method" field, choose
GET:
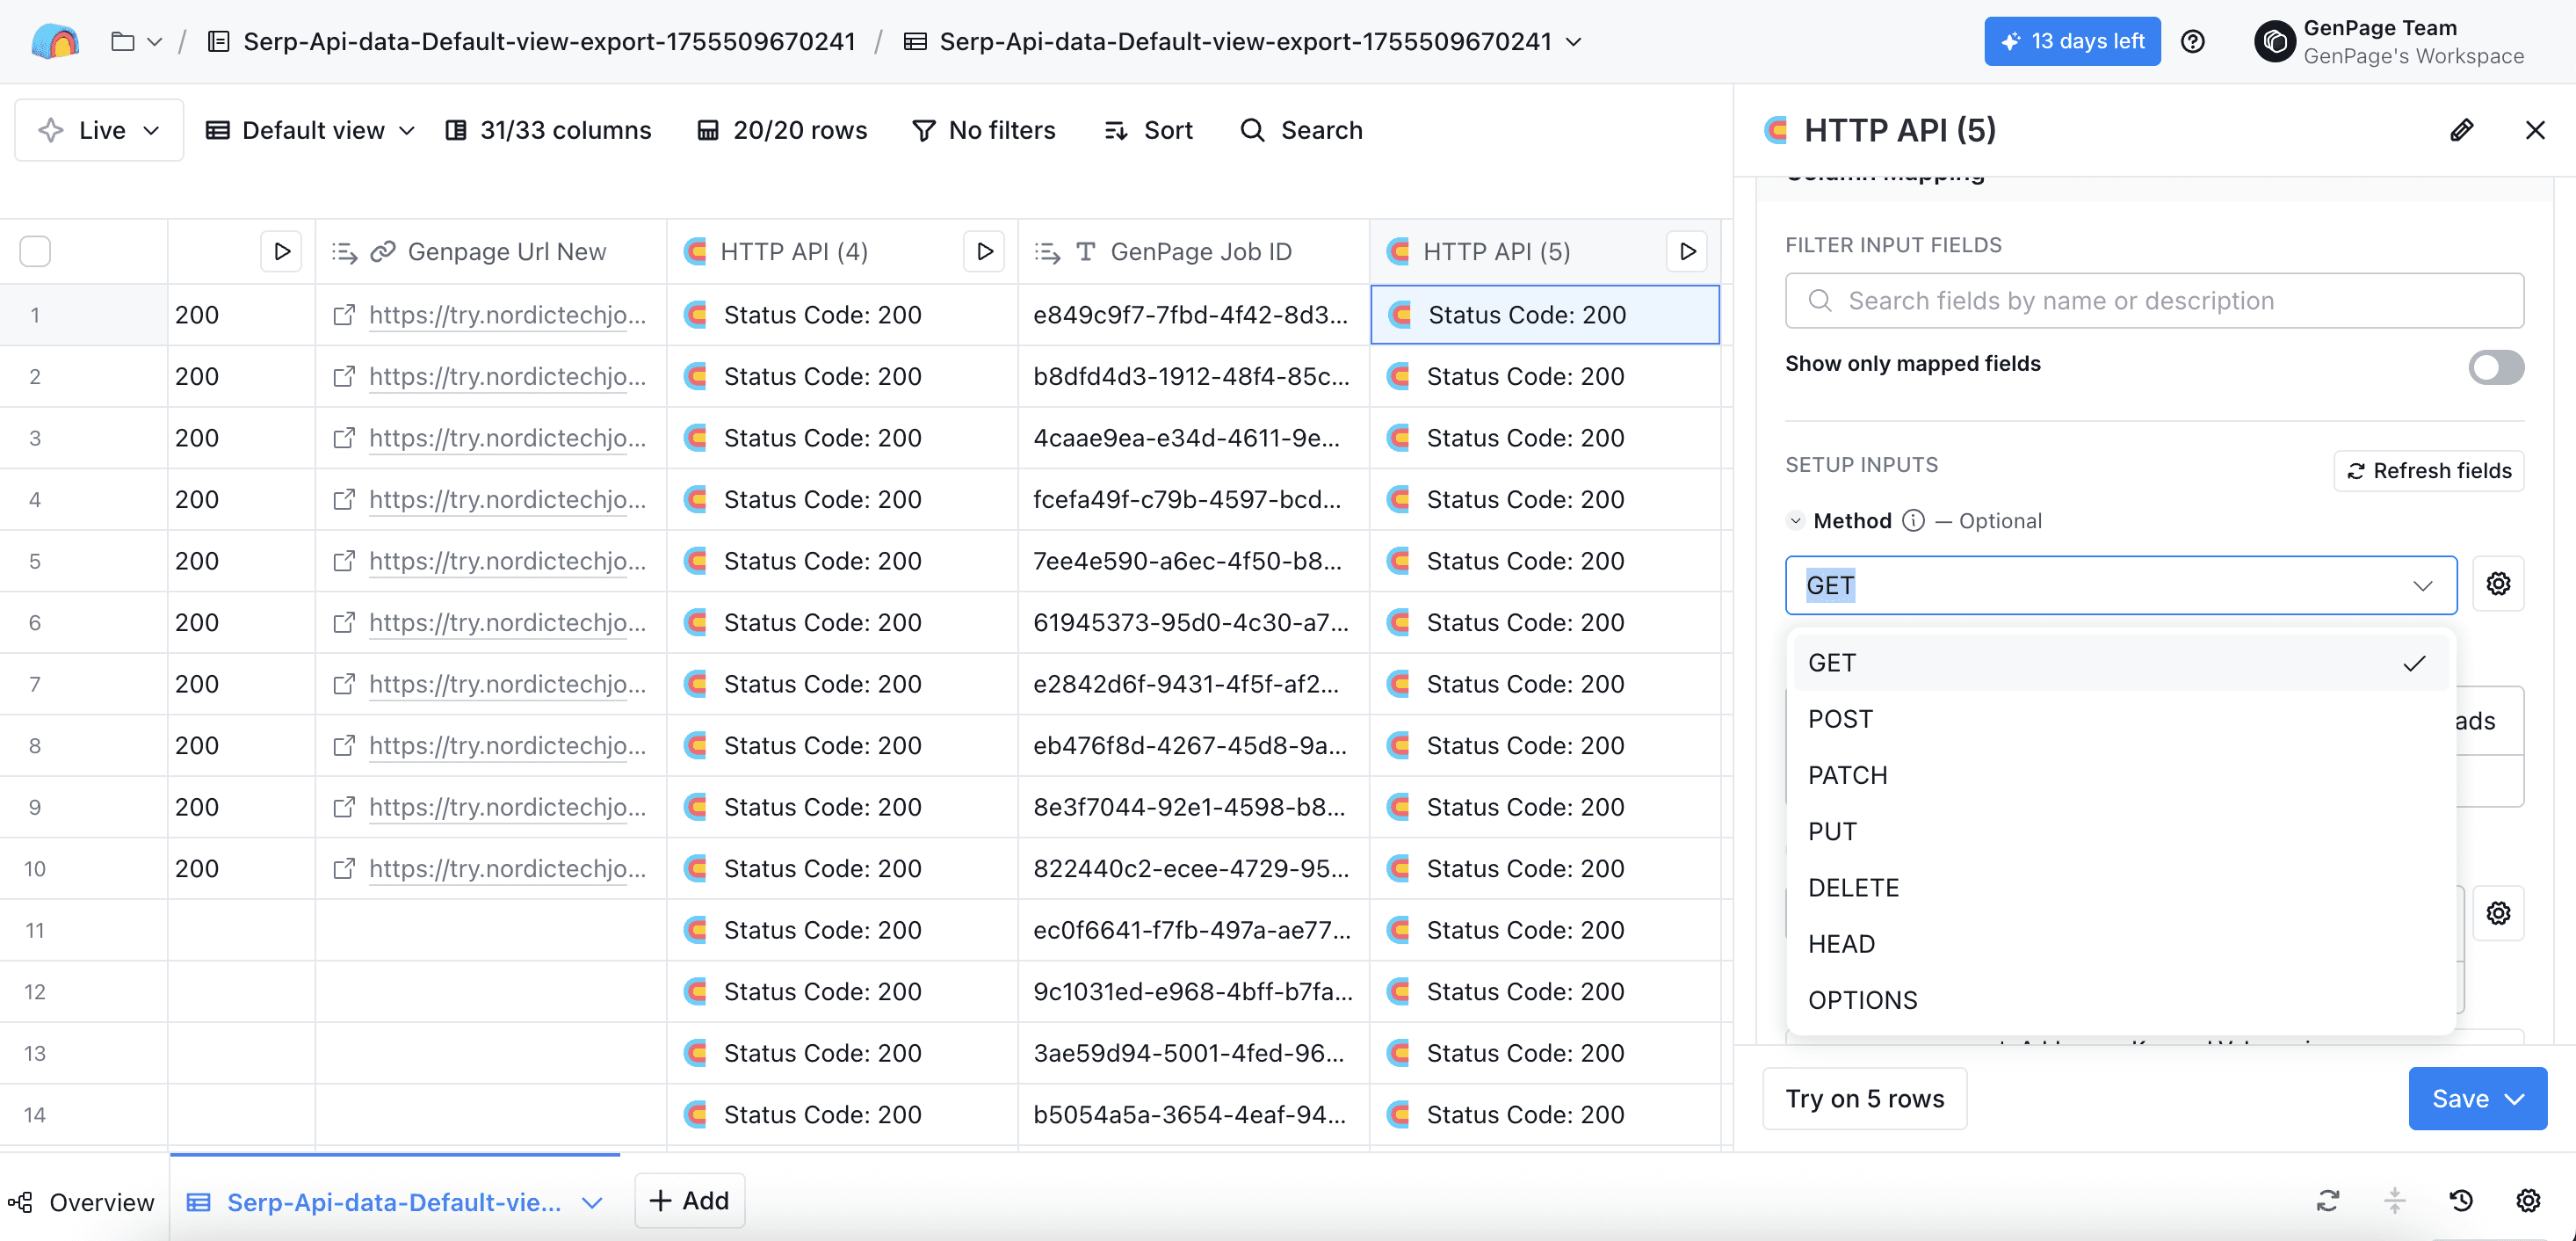
Choosing the GET method for your new HTTP API request
Under the "Endpoint" field, add the "Get Leads" endpoint for GenPage, with the following URL:
https://backend.genpage.ai/api/external/v1/leads/get-leads
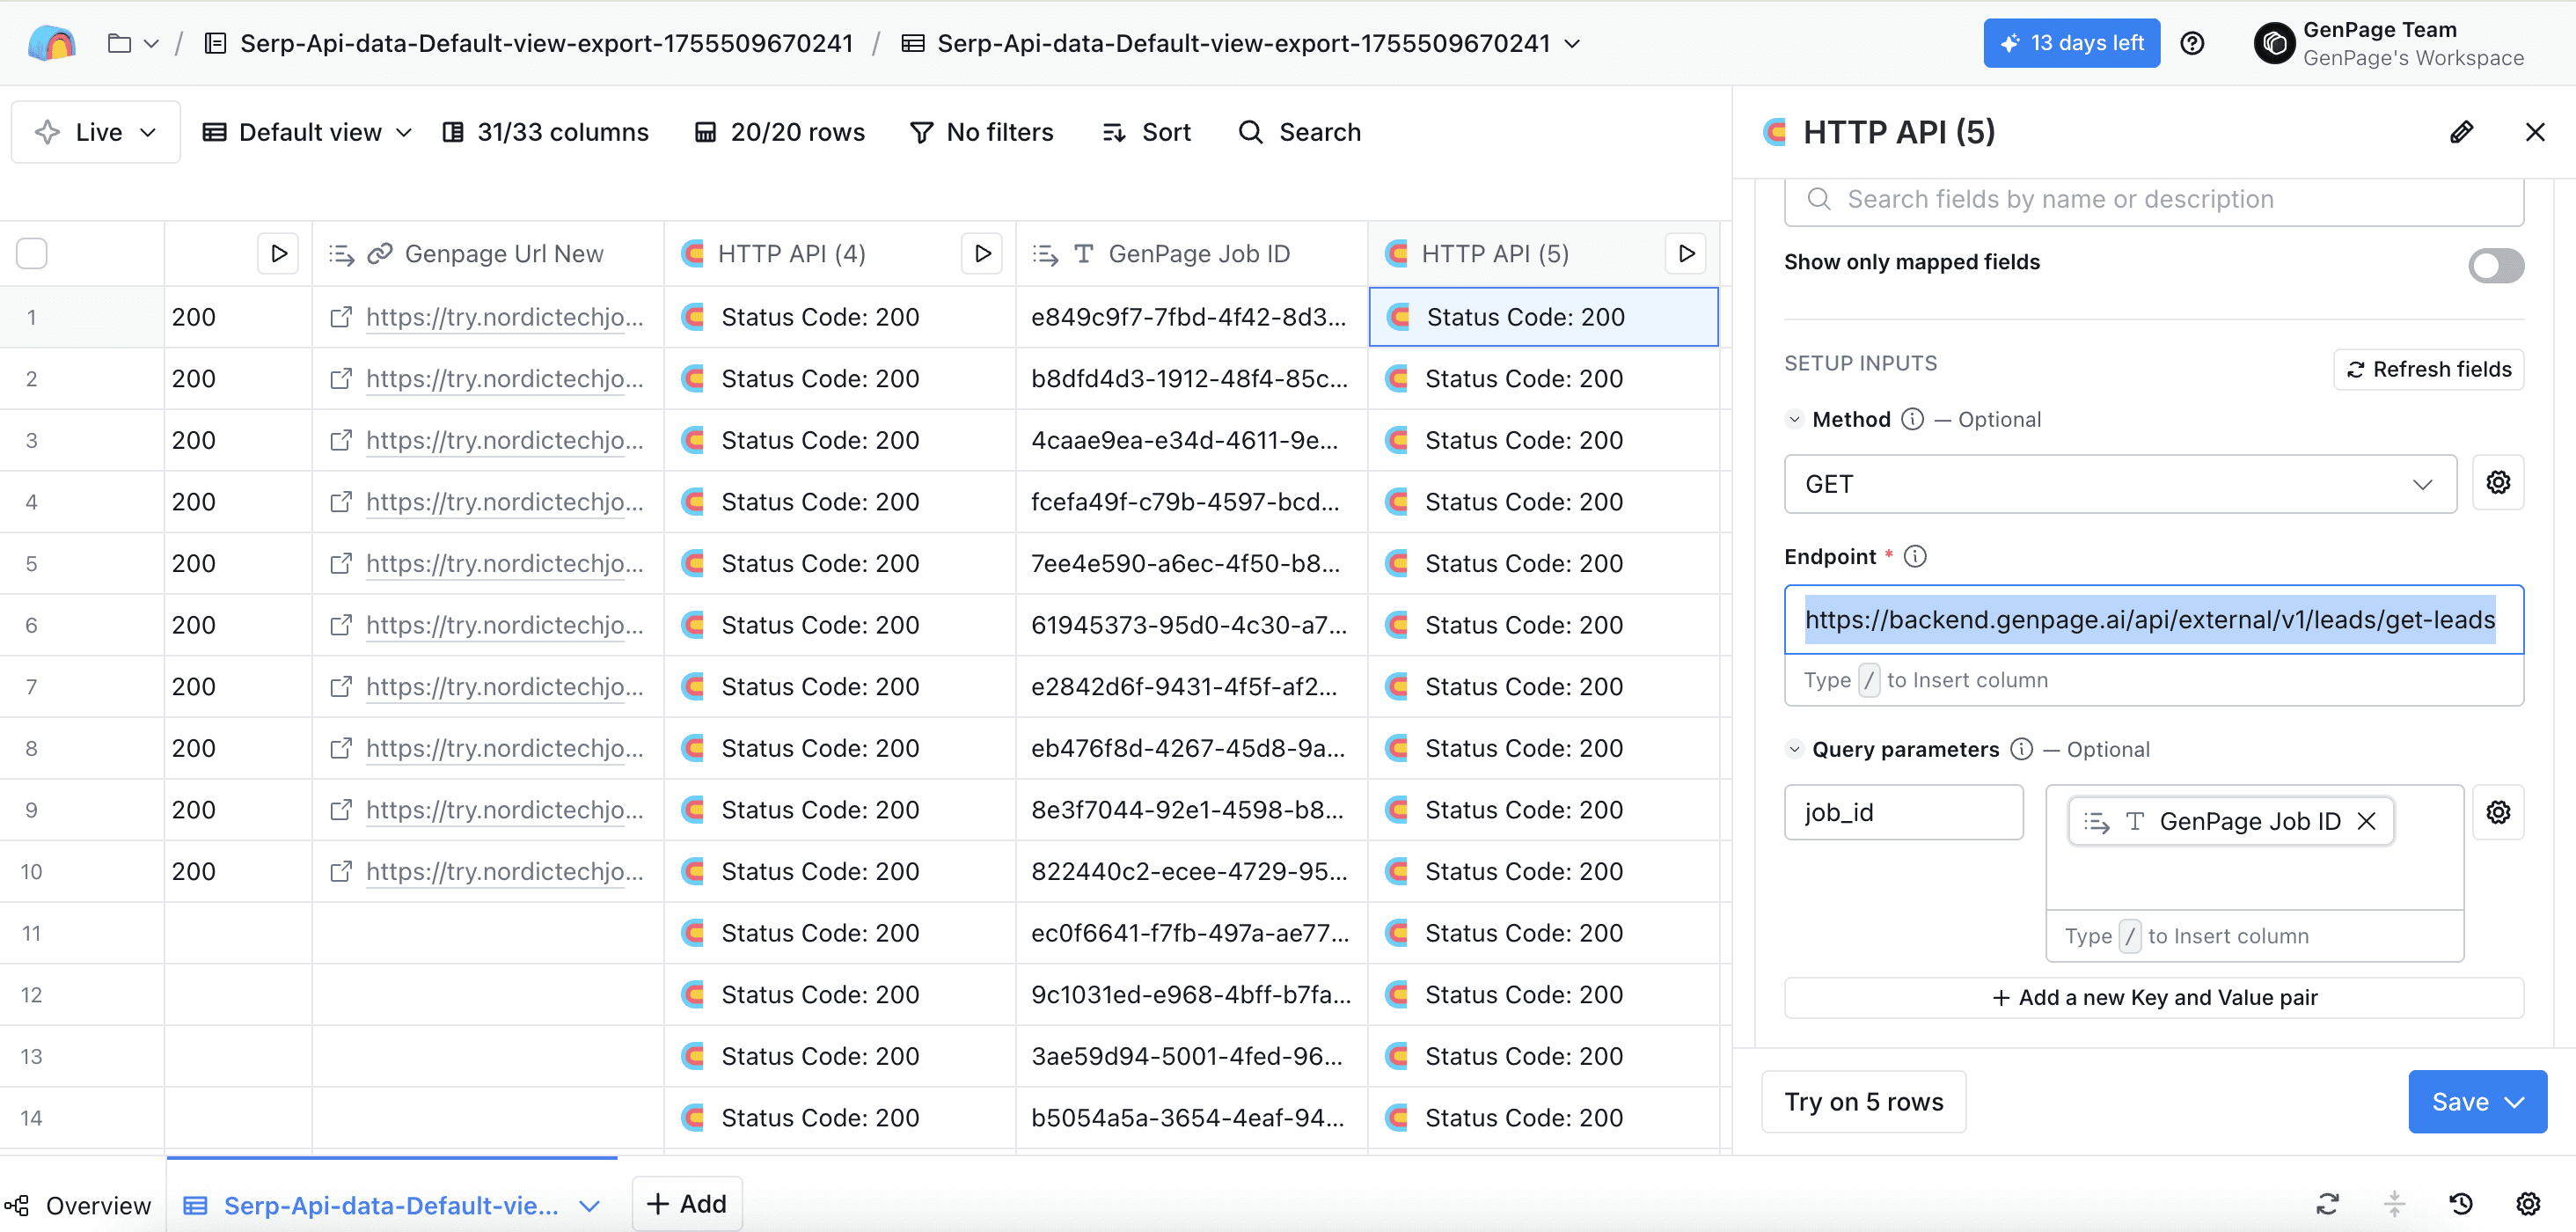
Adding the "Get Leads" endpoint in Clay
Under "Query parameters", click "Add a new Key and Value pair":
- Under your query parameters, in the "key" field input:job_id
- In the "value" field, choose the column you just created for the"GenPage Job ID". You can simply type "/" and select the appropriate column in the dropdown.
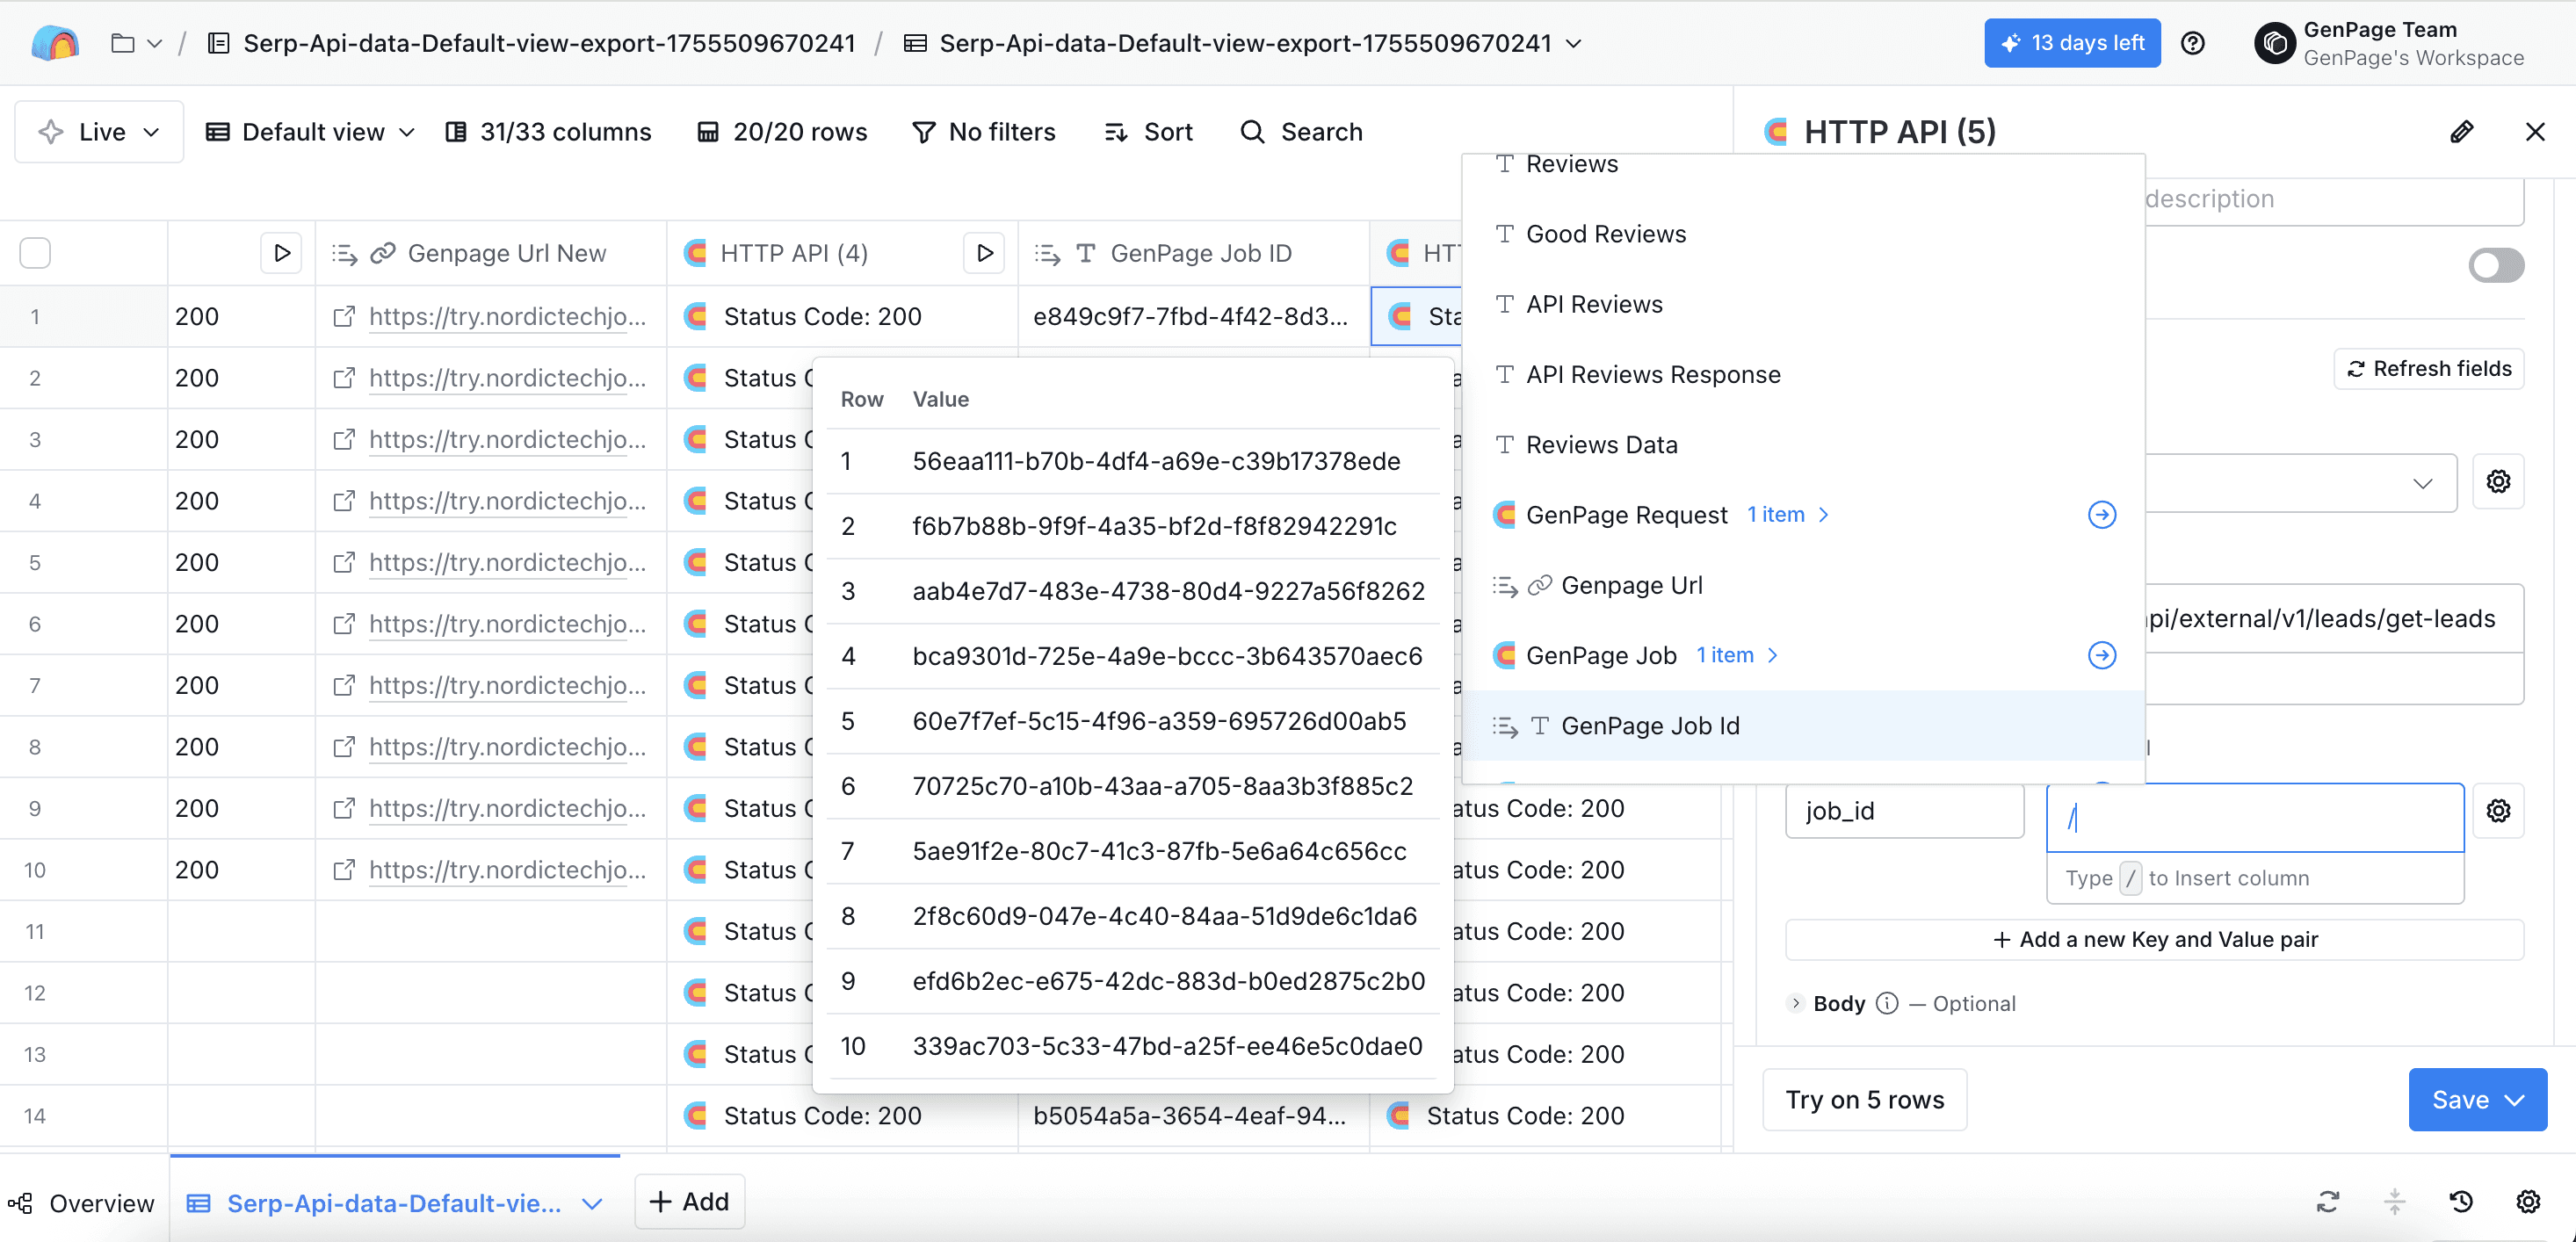
Selecting the "GenPage Job ID" as your value field query parameter.
Under "max retries", input:
100Under "status codes to retry", input:
503, 429, 400, 500
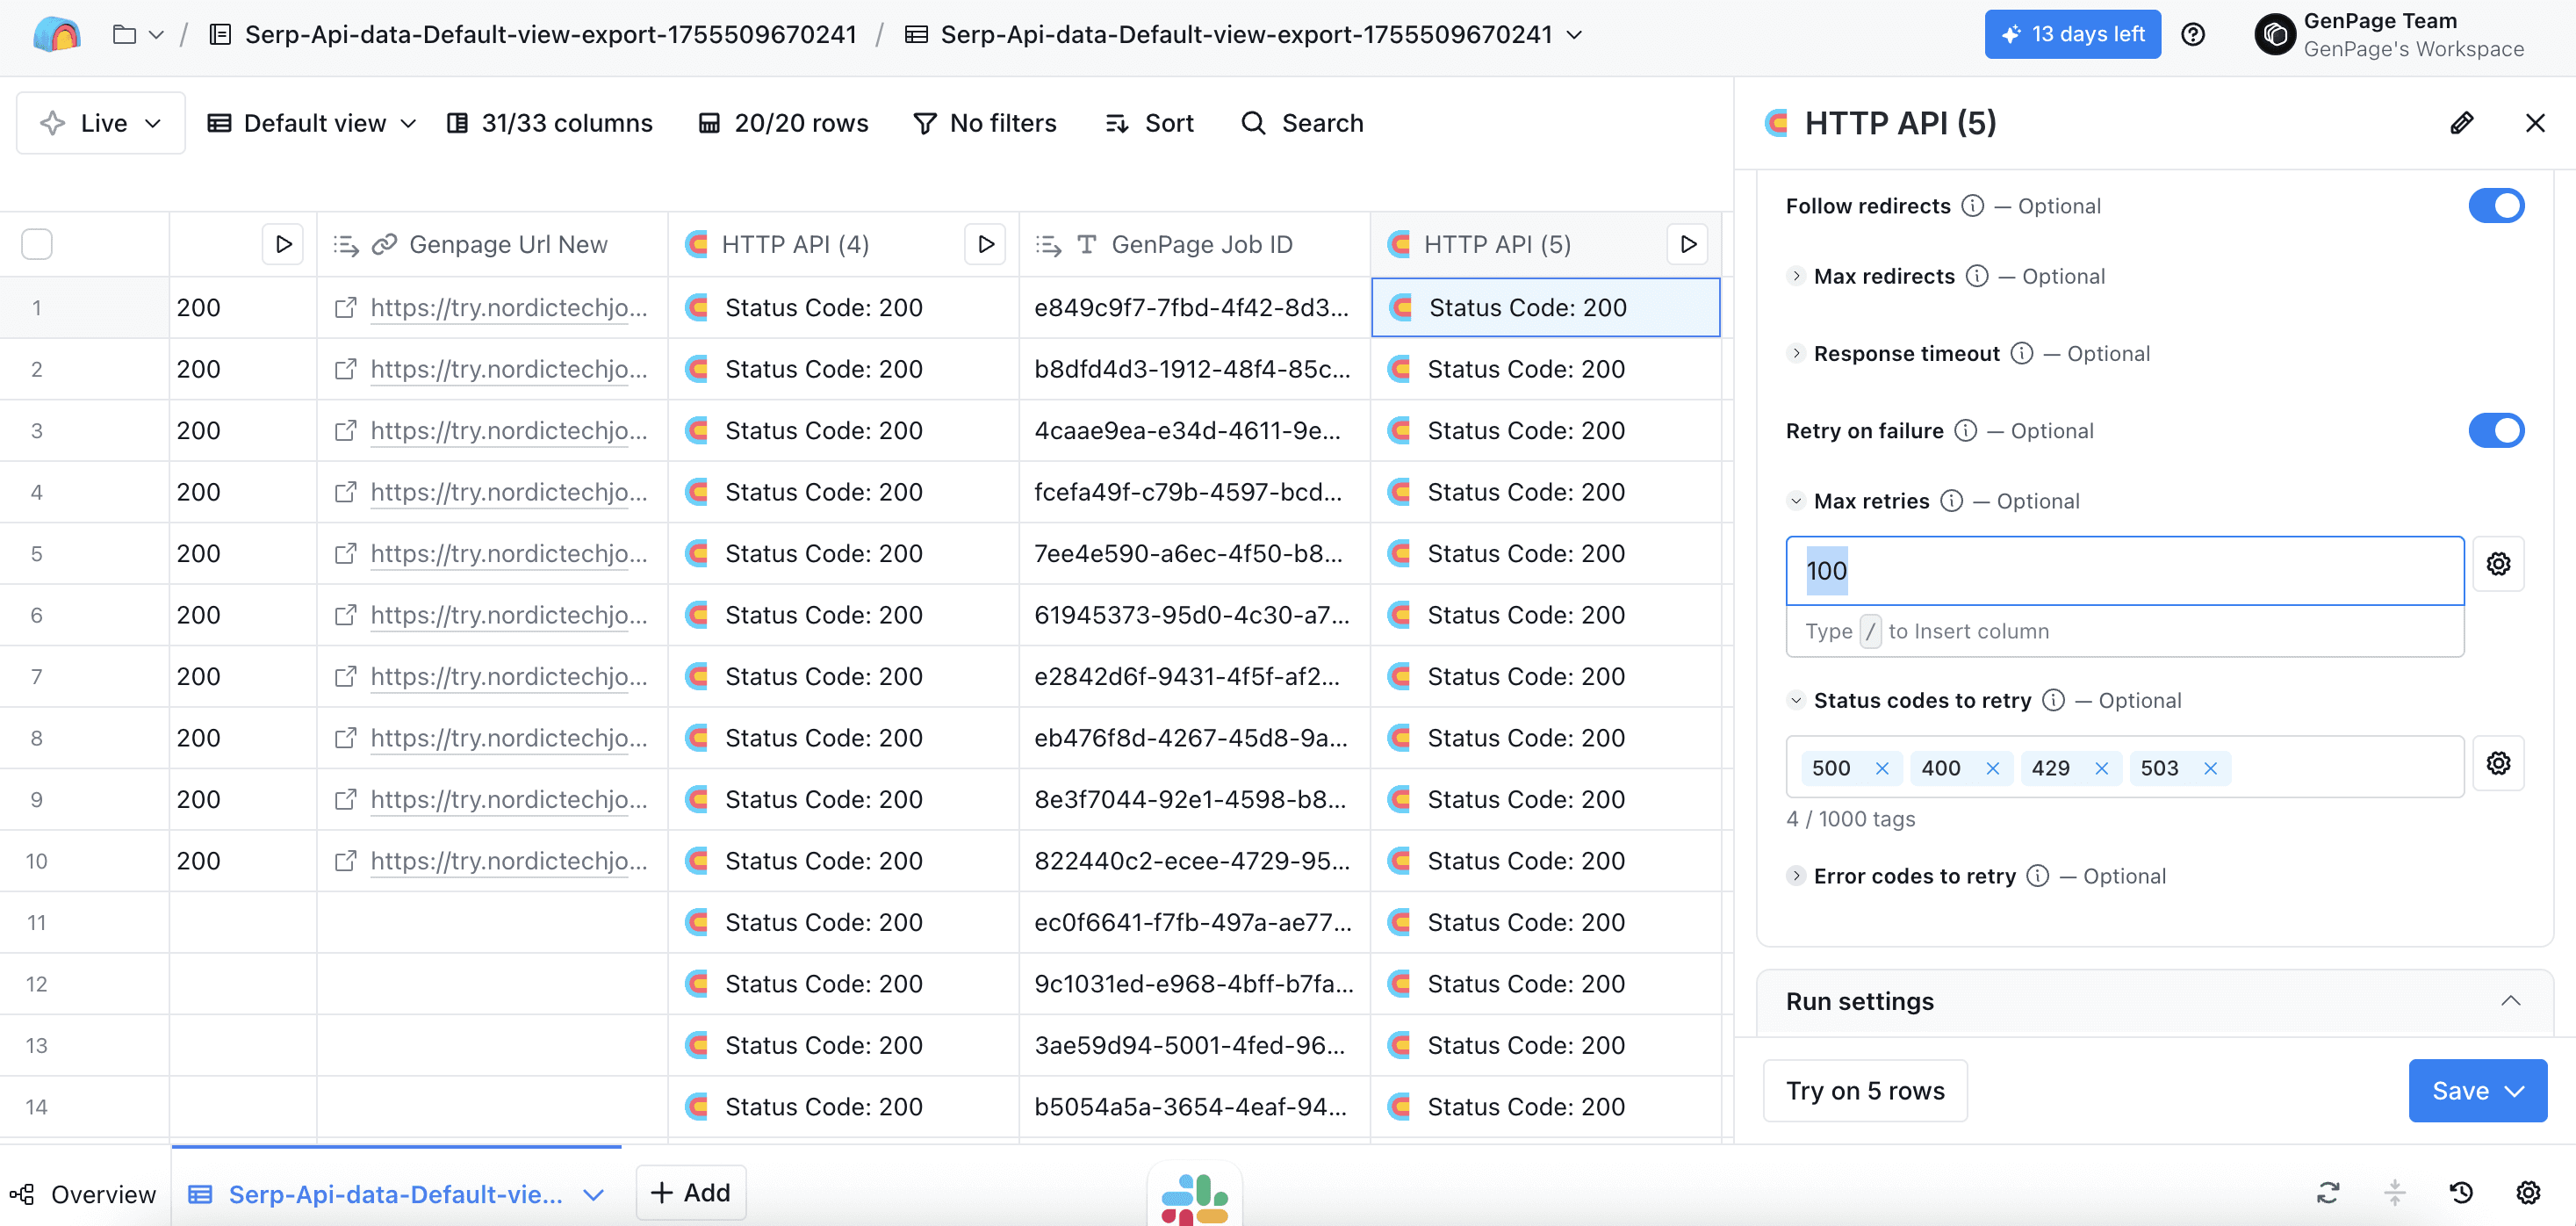
Adding a number of max retries and status codes to retry in Clay
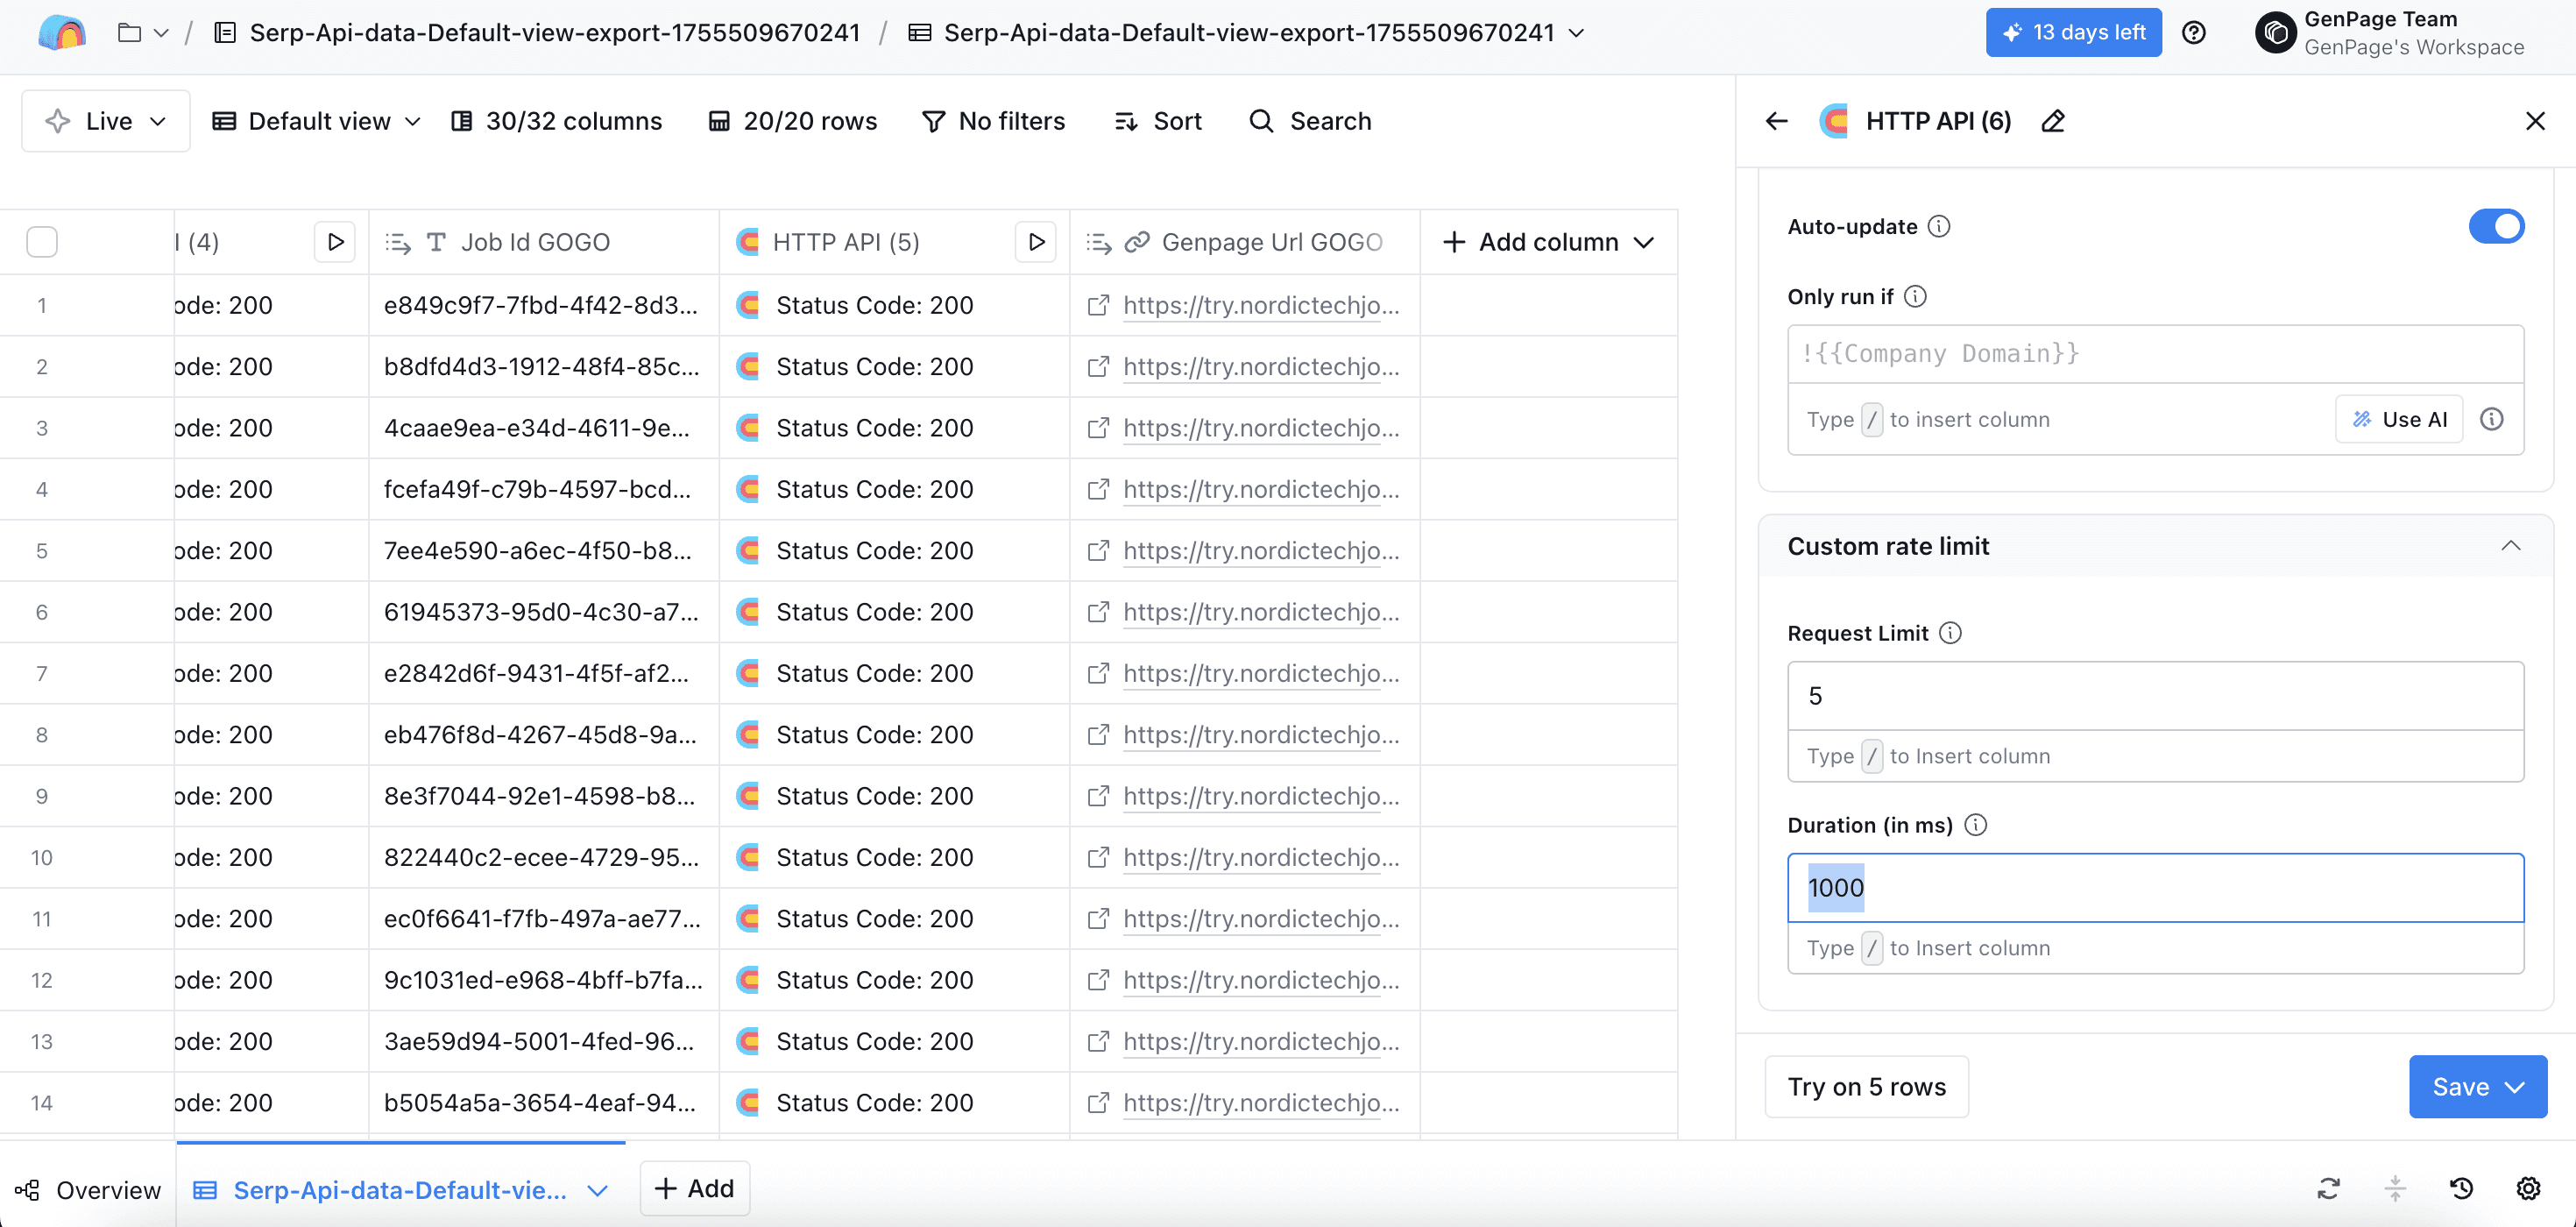
Make sure "auto update" is toggled on, and under "only run if" field, type "/" and search in the dropdown to add the "GenPage Job ID" column:
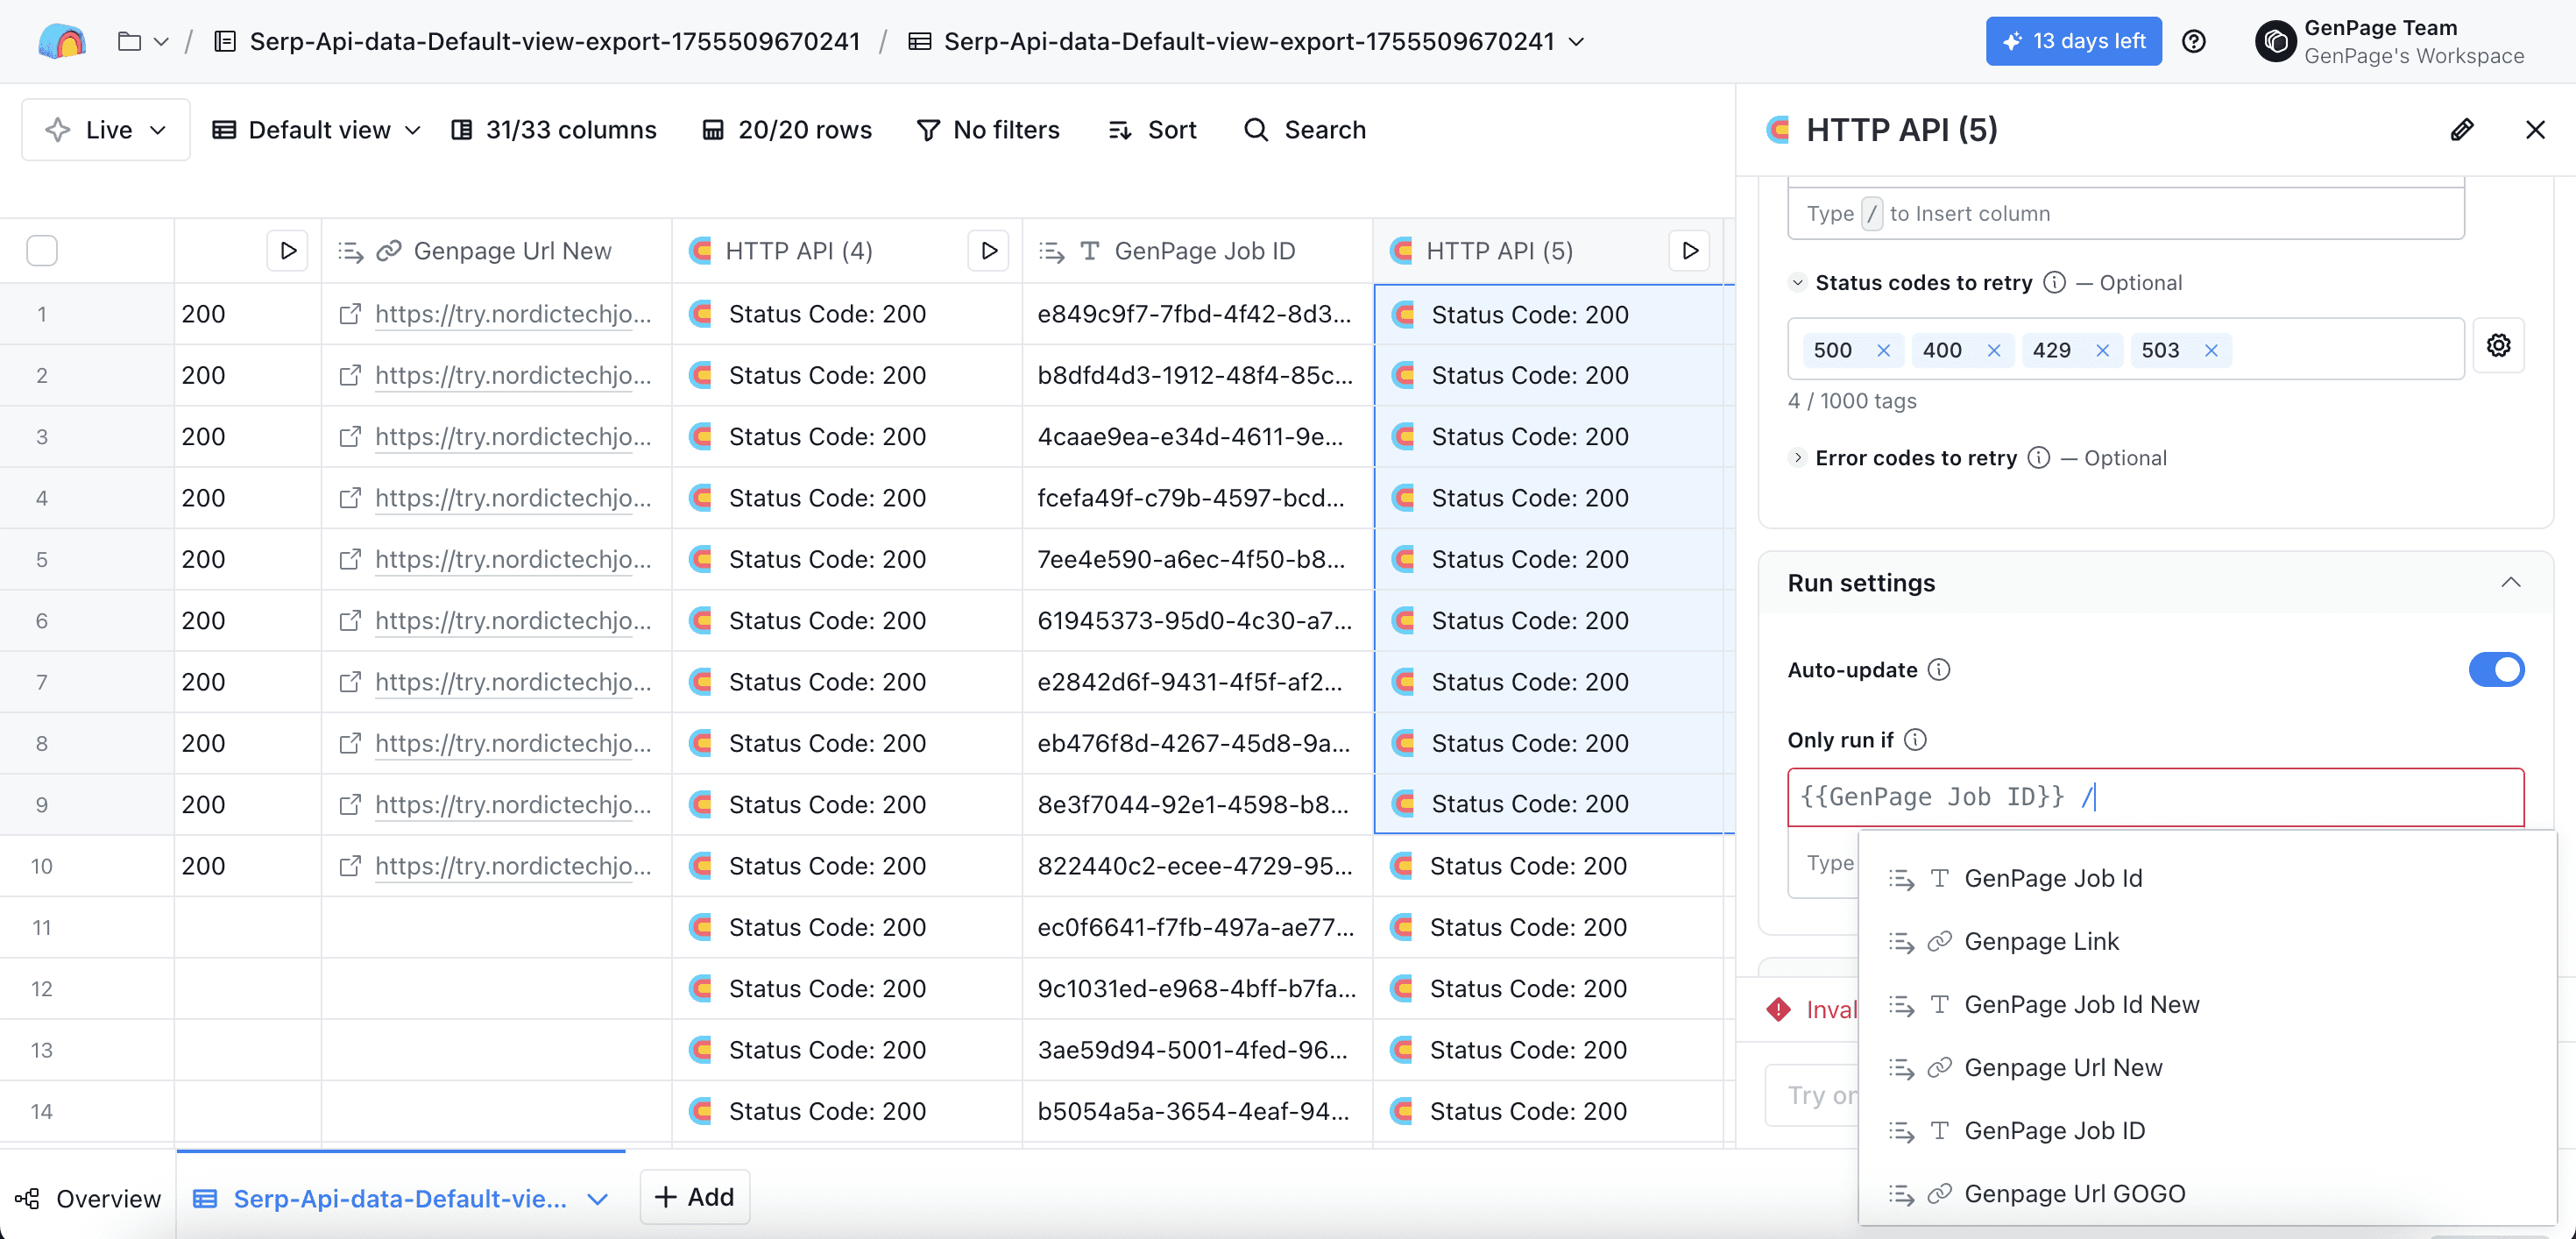
Adding the GenPage Job ID column to your run settings
Go to the "custom rate limit" section, and:
- Under "request limit", input5
- Under "duration (in ms)", input1000
Adding a custom rate limit in Clay
Hit save and don't run the enrichment just yet!
Step 8: Get GenPage page URLs in Clay
Try running the request in your first row by clicking the play button in the first cell.
Once your API call has succesfully run, your row will show "Status code 200". If you click on it, the cell details in Clay will include a a few parameters, including "GenPage URL". This is what we're after:
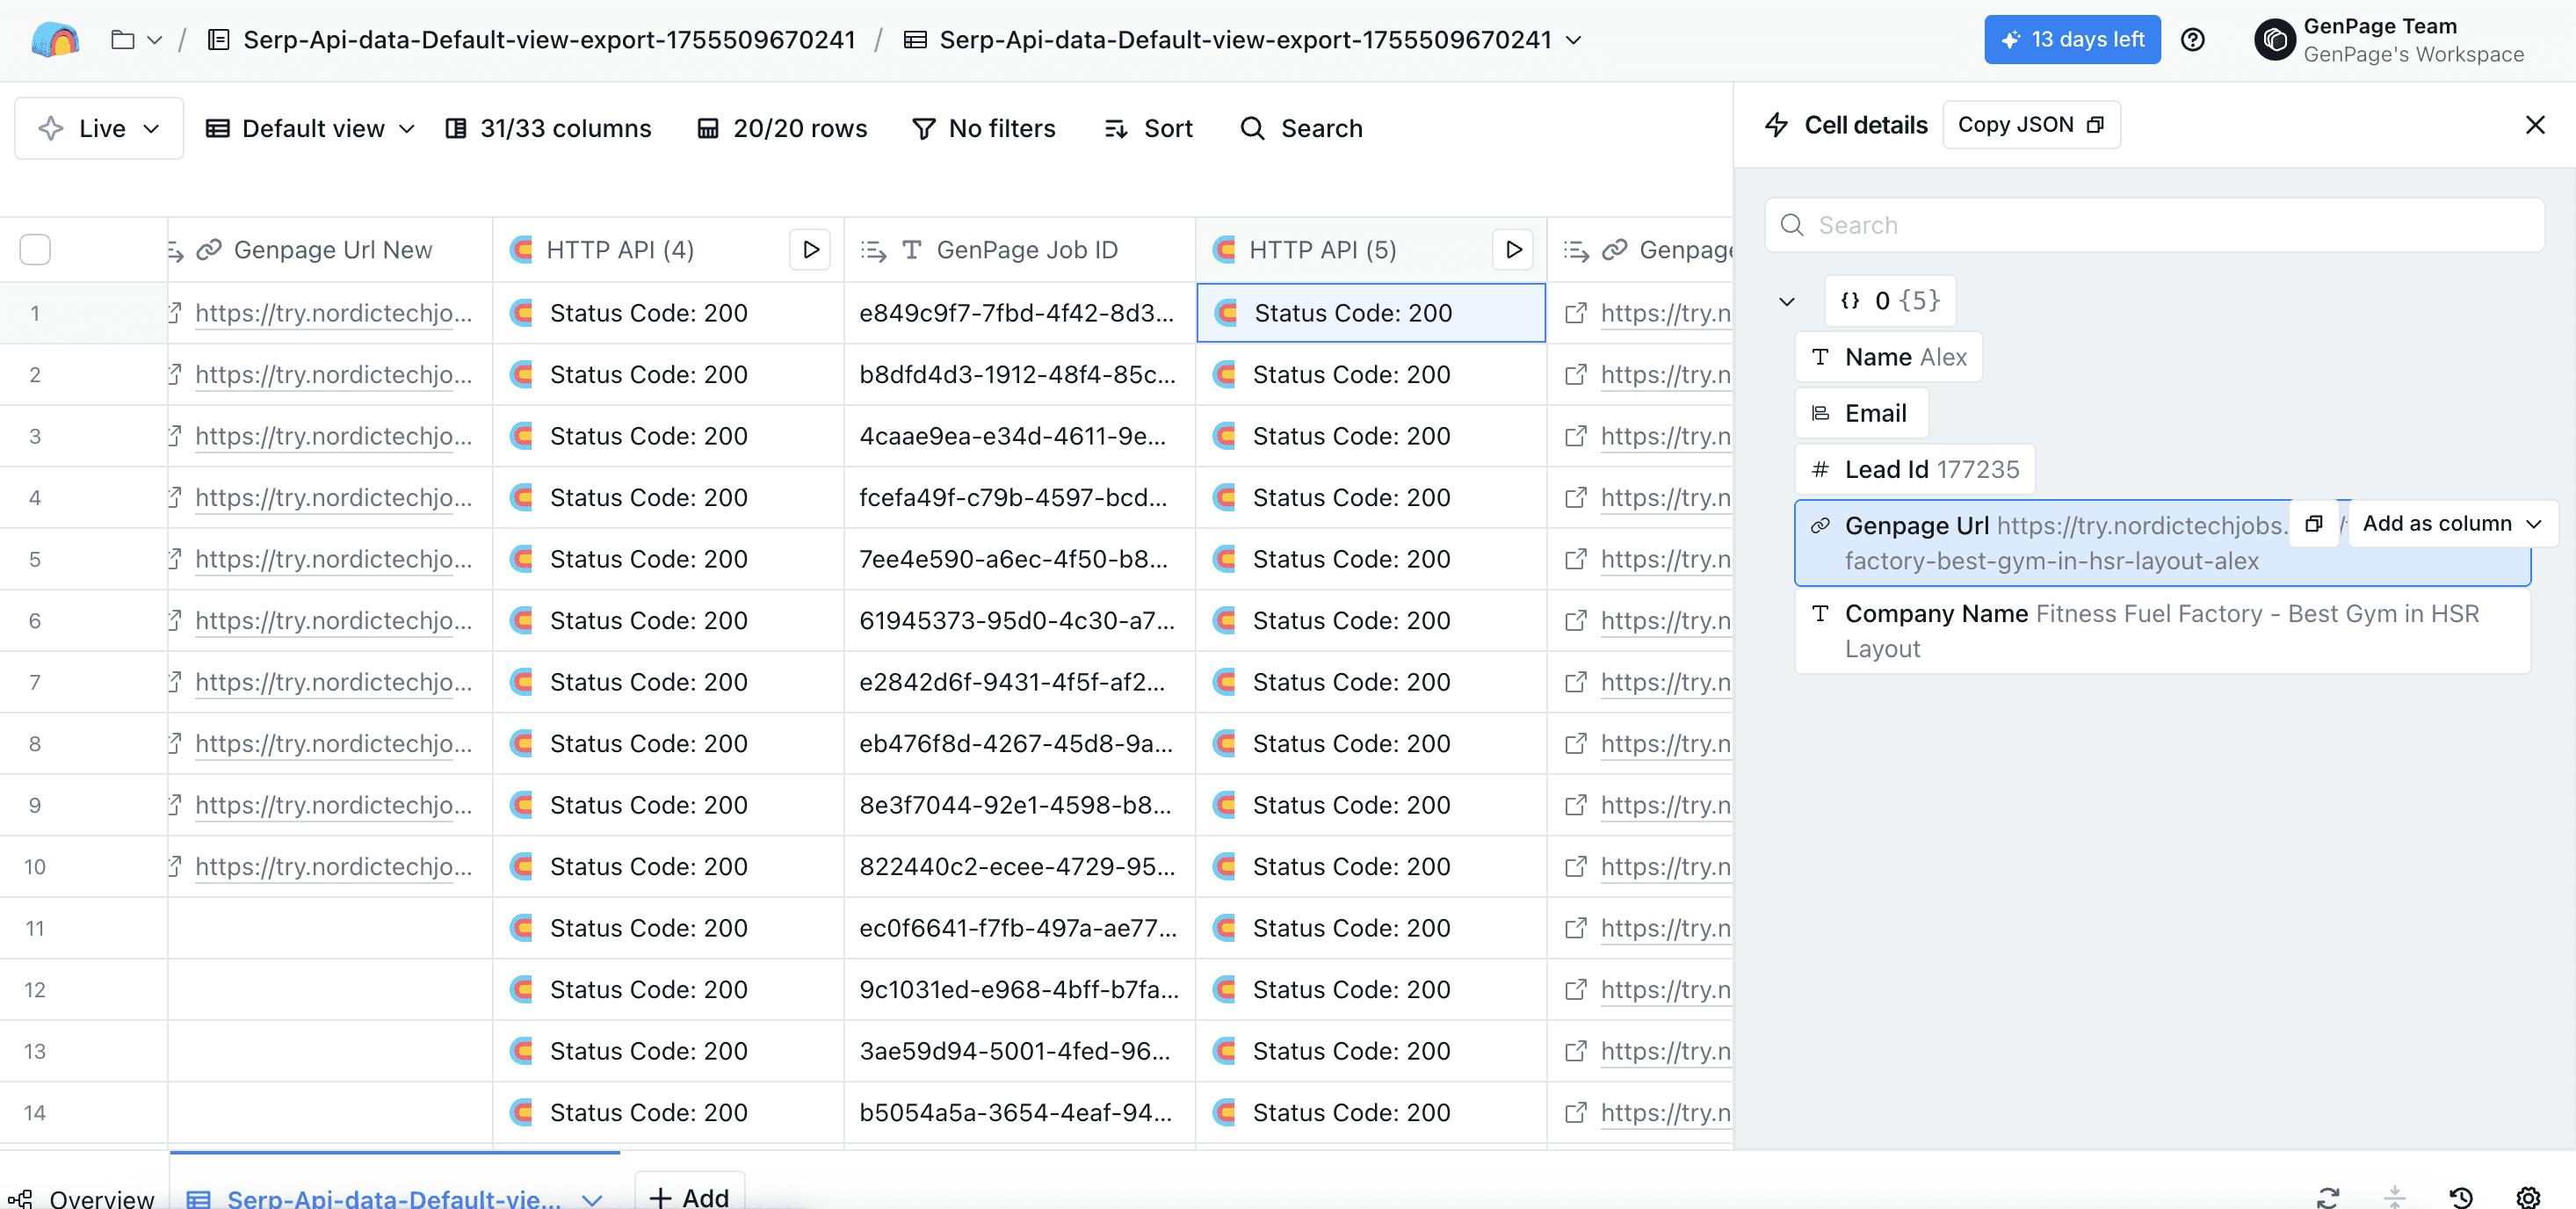
Getting your GenPage URL response in Clay
Click on the "GenPage URL" field, and hit "Add as column". Add a name such as "GenPage URL" - your link will now show as a new column in Clay.
Head back to the very first HTTP API column you created, and click run all rows. All other columns will populate automatically, including your new column with your GenPage URL:

After all rows are run, your GenPage URLs appear directly in Clay.
You’re All Set!
You’ve now fully integrated Clay with GenPage and can start creating personalized landing pages at scale.
Questions or feedback? Reach out to our support team anytime, or book a demo with us. We’re always happy to help.